Install the nt6d11ab, nt6d11ae, nt6d11af dchi, Procedures, Procedure 1 – Nortel Networks NN43001-301 User Manual
Page 85: Install the nt6d11ab, nt6d11ae, nt6d11af dch
Install the NT6D11AB, NT6D11AE, NT6D11AF DCHI
85
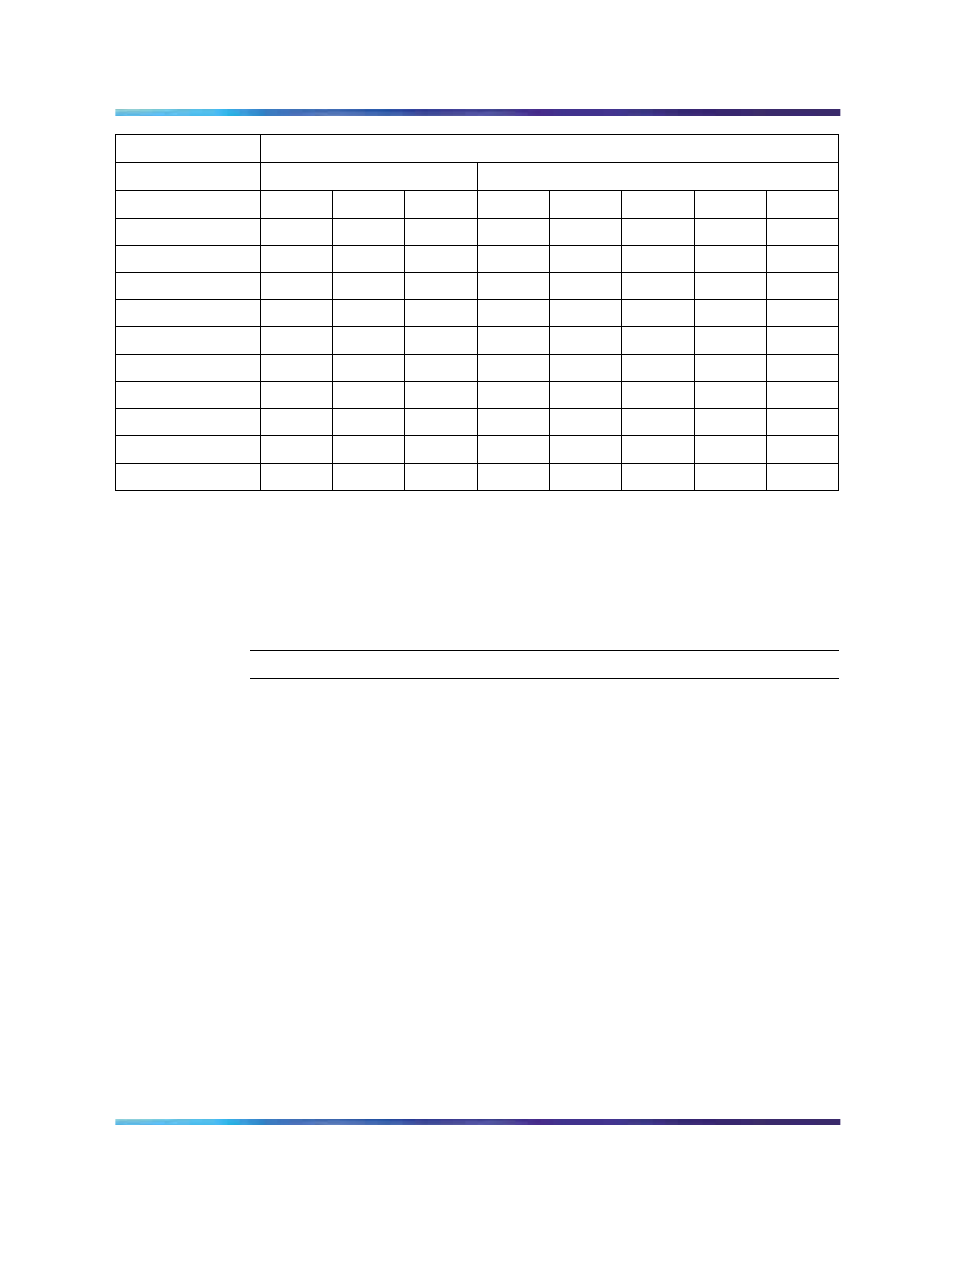
Port Address
Switch Setting
Half Group No.
Device No.
S3
S4
S5
S6
S7
S8
S9
S10
14
0
0
0
1
1
1
0
x
15
0
0
1
16-31
0
0
1
32-47
0
1
0
48-63
0
1
1
64-79
1
0
0
80-95
1
0
1
96-111
1
1
0
112-127
1
1
1
Install the NT6D11AB, NT6D11AE, NT6D11AF DCHI
Follow
Procedure 1 "Install the NT6D11AB, NT6D11AE, NT6D11AF DCH"
to install the NT6D11 DCH on the Large System.
Procedure 1
Install the NT6D11AB, NT6D11AE, NT6D11AF DCH
Step
Action
1
Determine the cabinet and shelf location for the circuit pack being
installed.
The NT6D11AB, NT6D11AE, or NT6D11AF DCHI card can be
installed in any slot appropriate for an I/O port card on a Network
shelf. (The NT6D11 DCHI card can be located on the Common
Equipment shelf only on single-CPU switches.)
2
Unpack and inspect the card.
3
Set the option switches on the DCHI card. For PRA capability, set
port J2 to odd. For ISL capability, set port J2 for high speed or low
speed operation (See
Figure 36 "NT6D11 DCH with ISL high-speed
programming jumper settings" (page 82)
,
with ISL low-speed programming jumper settings" (page 83)
, and
Table 26 "Port address switch settings for ISDN" (page 84)
starting
on
Figure 36 "NT6D11 DCH with ISL high-speed programming
4
Set faceplate toggle switch to DISABLE.
Nortel Communication Server 1000
ISDN Primary Rate Interface Installation and Commissioning
NN43001-301
02.03
Standard
Release 5.5
7 December 2007
Copyright © 2003-2007, Nortel Networks
.