Table 104 ntak02 switch settings, Table 105 ntak02 jumper settings, Procedure 43 setting up the d-channel – Nortel Networks NN43001-301 User Manual
Page 287: Procedure 43, Setting up the d-channel, Table, Table 105 "ntak02
ISL hardware installation
287
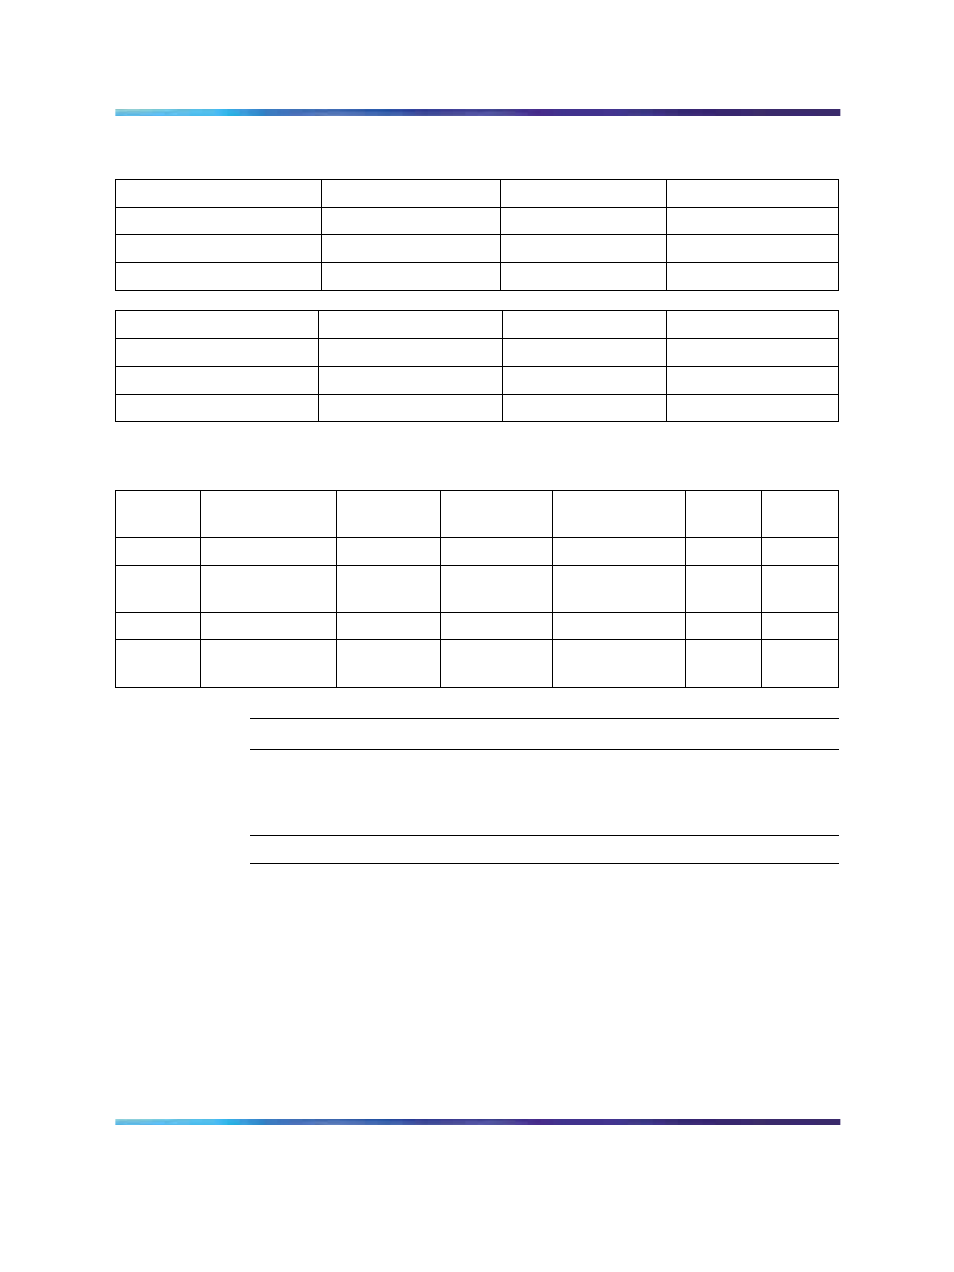
Table 104
NTAK02 switch settings
Port 0
Port 1
SW1-1
SW1-2
SDI
DCH
OFF
OFF
SDI
DPNSS1
OFF
ON
—
ESDI
ON
ON
Port 2
Port 3
SW1-3
SW1-4
SDI
DCH
OFF
OFF
SDI
DPNSS1
OFF
ON
—
ESDI
ON
ON
Table 105
NTAK02 jumper settings
Unit
Jumper
location
Strap for
DTE
Strap for
DCE
Jumper
location
RS422
RS232
Unit 0
J10
C - B
B - A
Unit 1
J7
J6
C - B
C - B
B - A
B - A
J9
J8
C - B
C - B
B - A
B - A
Unit 2
J5
C - B
B - A
Unit 3
J4
J3
C - B
C - B
B - A
B - A
J2
J1
C - B
C - B
B - A
B - A
—End—
Procedure 43
Setting up the D-channel
Step
Action
1
If this is a dedicated mode installation using leased line modems,
the D-channel connects the DCHI with the far-end modem over a
dedicated leased line. Synchronous modems with a minimum 2400
baud data rate must be configured. Modems must support leased
line capability and synchronous mode. The Hayes Smartmodem
2400 cannot be used on leased lines.
Nortel Communication Server 1000
ISDN Primary Rate Interface Installation and Commissioning
NN43001-301
02.03
Standard
Release 5.5
7 December 2007
Copyright © 2003-2007, Nortel Networks
.