Mounting the system on a rack – ATL Telecom R1-SW Ethernet Switch User Manual
Page 56
R1-SW24L2B User’s Manual
4-4
Mounting the System on a Rack
To mount the Corecess R1-SW24L2B on a 19-inch rack, you need the following tools and
equipment:
y
A Philips screwdriver
y
Electrostatic discharge (ESD) grounding strap
y
Rack Brackets and Screws (provided along with the product)
¾
Two (2) rack brackets
¾
Four (4) binder-head screws (M5, 8mm)
¾
Eight (8) pan-head screws (M3, 6mm)
Note
: For more information about ESD, refer to the
Chapter 3 Before Installation
.
Once all the tools and equipment are prepared, mount the Corecess R1-SW24L2B on a 19-inch
rack according to the following procedure:
1. Place the Corecess R1-SW24L2B on a spacious floor or a sturdy table near the rack. And
check the tools and equipment.
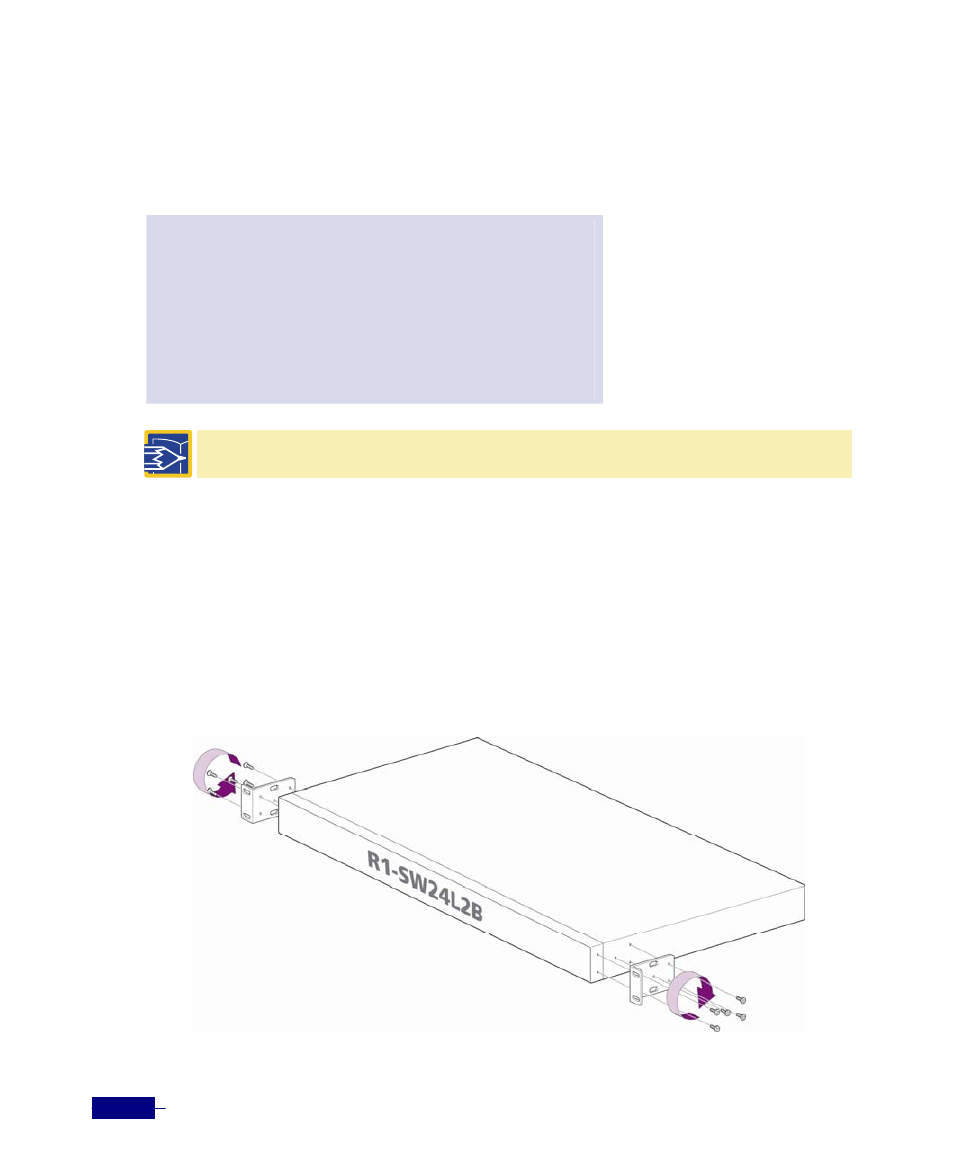
2. There are four screw holes on each side of the Corecess R1-SW24L2B. As shown in the figure,
place the rack brackets to the screw holes and fix them using pan-head screws.