Creating vlans – ATL Telecom R1-SW Ethernet Switch User Manual
Page 127
Configuring VLAN
7-3
Creating VLANs
In the factory default configuration, VLAN support is enabled and all the ports are only in the
Corecess R1-SW24L2B physical broadcast domain, which is given the name DEFAULT. You can
partition the Corecess R1-SW24L2B into multiple virtual broadcast domains by adding one or
more additional VLANs and moving ports from the default VLAN to the new VLANs. Because
the default VLAN permanently exists in the Corecess R1-SW24L2B, adding new VLANs results
in multiple VLANs existing in the Corecess R1-SW24L2B.
User-configured VLANs have unique IDs from 2 to 4094. Enter a vlan command with an unused
ID to create a VLAN. Enter a vlan command for an existing VLAN to modify the VLAN.
To create a VLAN, perform this task in the Privileged mode:
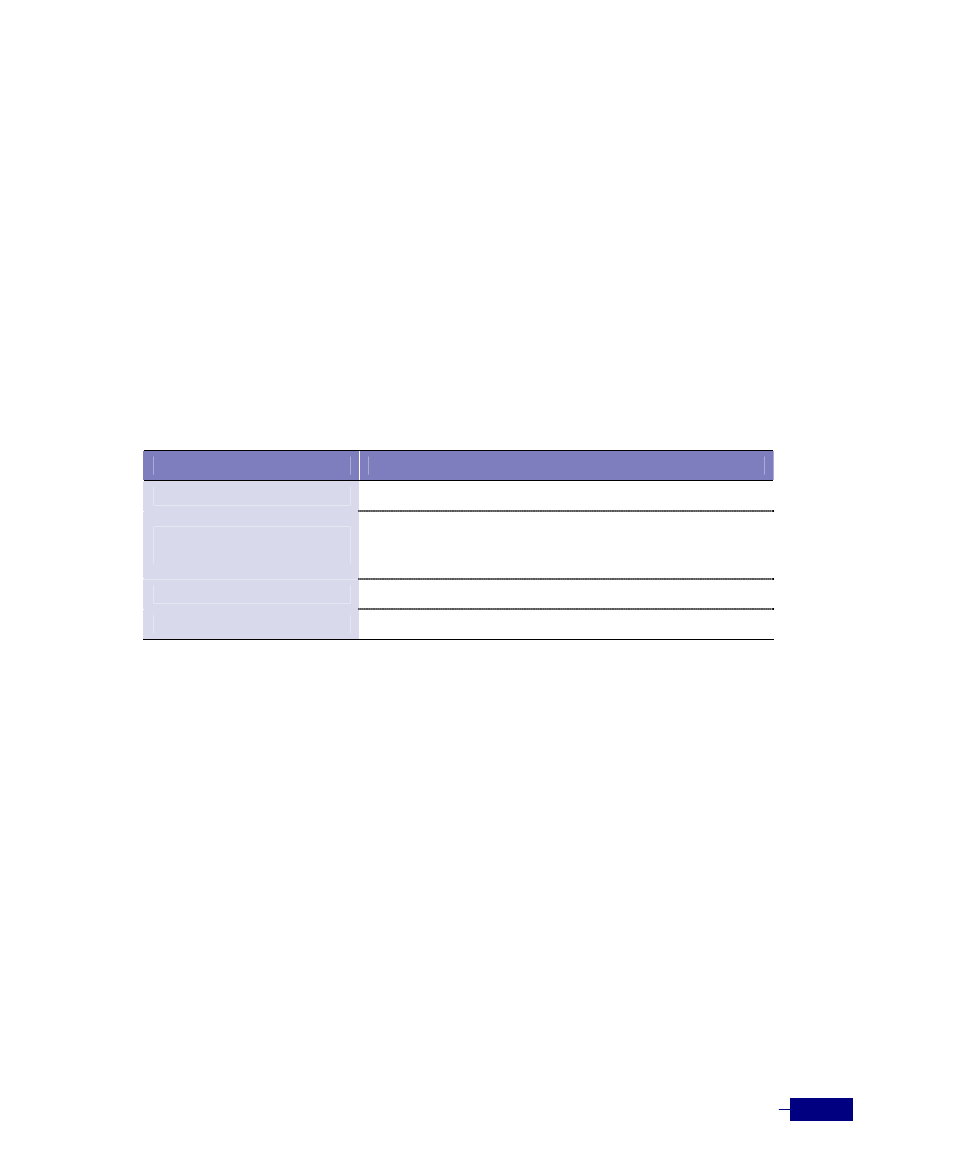
Table 7-2 Creating a VLAN
Commands
Task
configure terminal
1. Enter Global configuration mode.
vlan id
name
2. Add a VLAN.
y
y
end
3. Return to Privileged mode.
show vlan
4. Verify that a new VLAN is created.
The following example creates a VLAN whose id is
2
and name is ‘
test
’.
# configure terminal
(config)# vlan id 2 name test
(config)# end
# show vlan
VLAN Name Status Slot/Port(s)
---- ----------------- -------- ------------------------------------
1 DEFAULT active 1/1-2
2/1-24
2 test active
VLAN Interface IGMPs STP Private Promisc Port(s)
---- ---------- -------- -------- -------- ------------------------
1 disable disable enable Disable None
2 disable disable enable Disable None
#