About the real-time guidance process, Starting real-time guidance, About the real-time guidance process -39 – TeeJet Swath XL User Manual
Page 87: The real-time view page
Swath XL
Software Version 3.00
3-39
Chapter 3 - Real-Time Guidance
About the Real-Time Guidance Process
About the Real-Time Guidance Process
Once you have the Swath XL software correctly setup, the next step is to start up the real-time guidance process. The
real-time component of Swath XL is where you are actually out in the field running guidance with the Swath XL
Lightbar and Smartpad. At this stage you should have a DGPS receiver connected to the Smartpad and running prop-
erly. It is always a good idea to verify that your DGPS receiver is running properly and communicating with the
Smartpad prior to driving out to the field. To verify that your receiver is working properly, connect it to the GPS cable
on the Smartpad Interface and run the Swath XL Receiver Status Tool, see Chapter 2. Once you are sure your GPS
receiver is running properly, you are ready to begin guidance.
Starting Real-Time Guidance
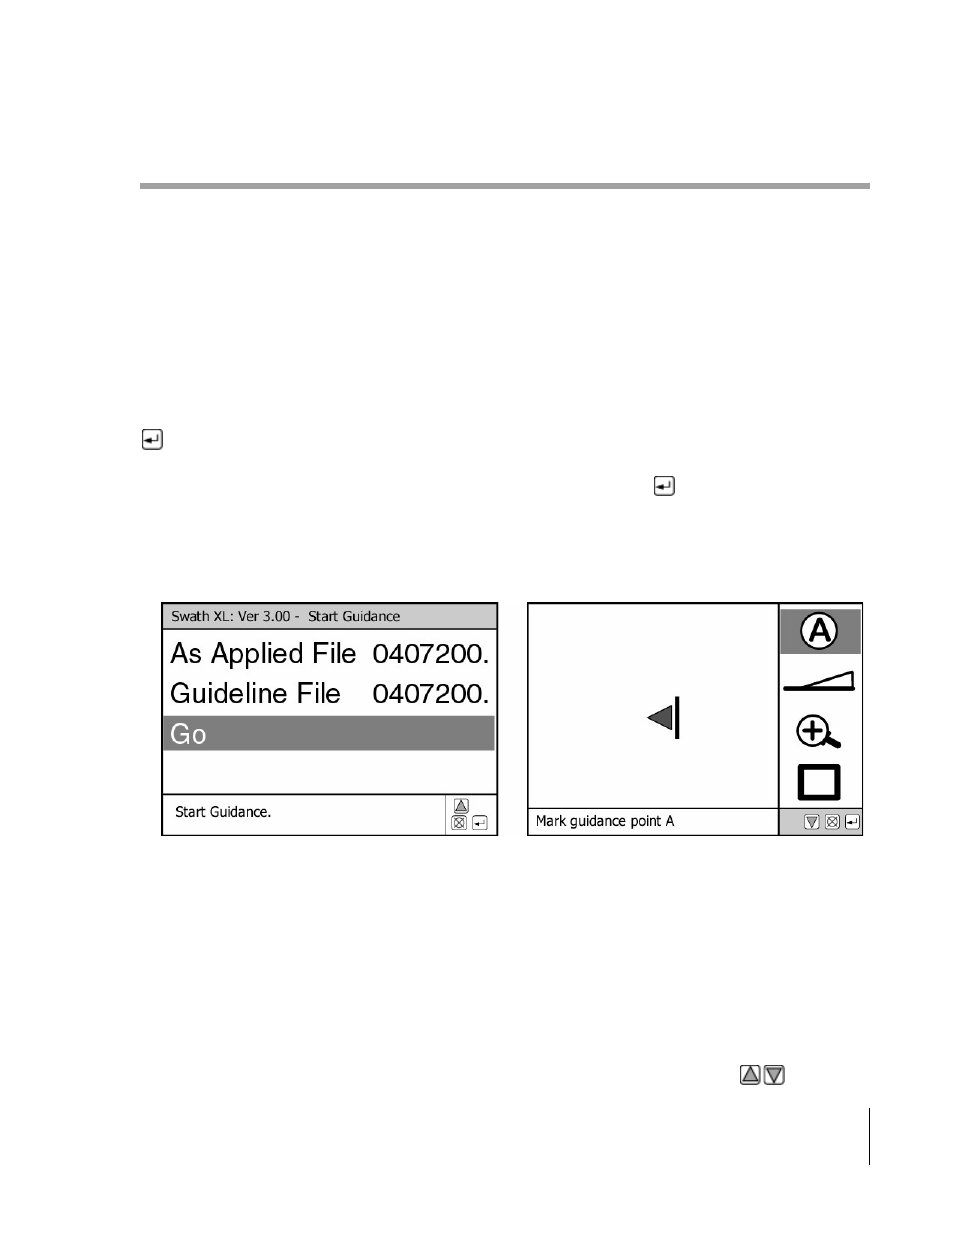
To start the real-time guidance process, highlight the Start Guidance menu item in the Main Menu page and press
, see Figure 3-49. In the example shown in Figure 3-49, the user setup the Swath XL software to not collect any
data or map any points, hazards or field boundary. Because the user does not want to collect, map or view any data,
the Swath XL software immediately moves to the Real-Time View page, once the
key is pressed. This start up
sequence varies depending on how you configure the Data Setup menu in the setup process. For more information
about the Data Setup menu see the Data Setup section in Chapter 2 of this User Guide.
The Real-Time View Page
There is only one view page associated with real-time guidance, see Figure 3-50. The left side of this view page con-
tains the map window. This is where the vehicle and its trajectory can be viewed while running guidance. Other fea-
tures such as the current guideline, hazards, points, and the vehicle’s swath are displayed in the map window as well.
The right side of the view page contains several buttons, located in the button bar, see Figure 3-50. A detailed descrip-
tion of each button is listed in Table 3-14. The number of buttons located in the button bar varies based on how you
setup the Swath XL software. For example, if you select to create the field boundary in the setup process, a Map Field
Boundary button is included in the button bar. To navigate up and down in the button bar use the
keys located
Figure 3-49: Starting The Real-Time Guidance Process