About nav 2 point real-time navigation, About nav 2 point real-time navigation -21 – TeeJet Swath XL User Manual
Page 141
Swath XL
Software Version 3.00
4-21
Chapter 4 - Waypoint Navigation
About Nav 2 Point Real-Time Navigation
About Nav 2 Point Real-Time Navigation
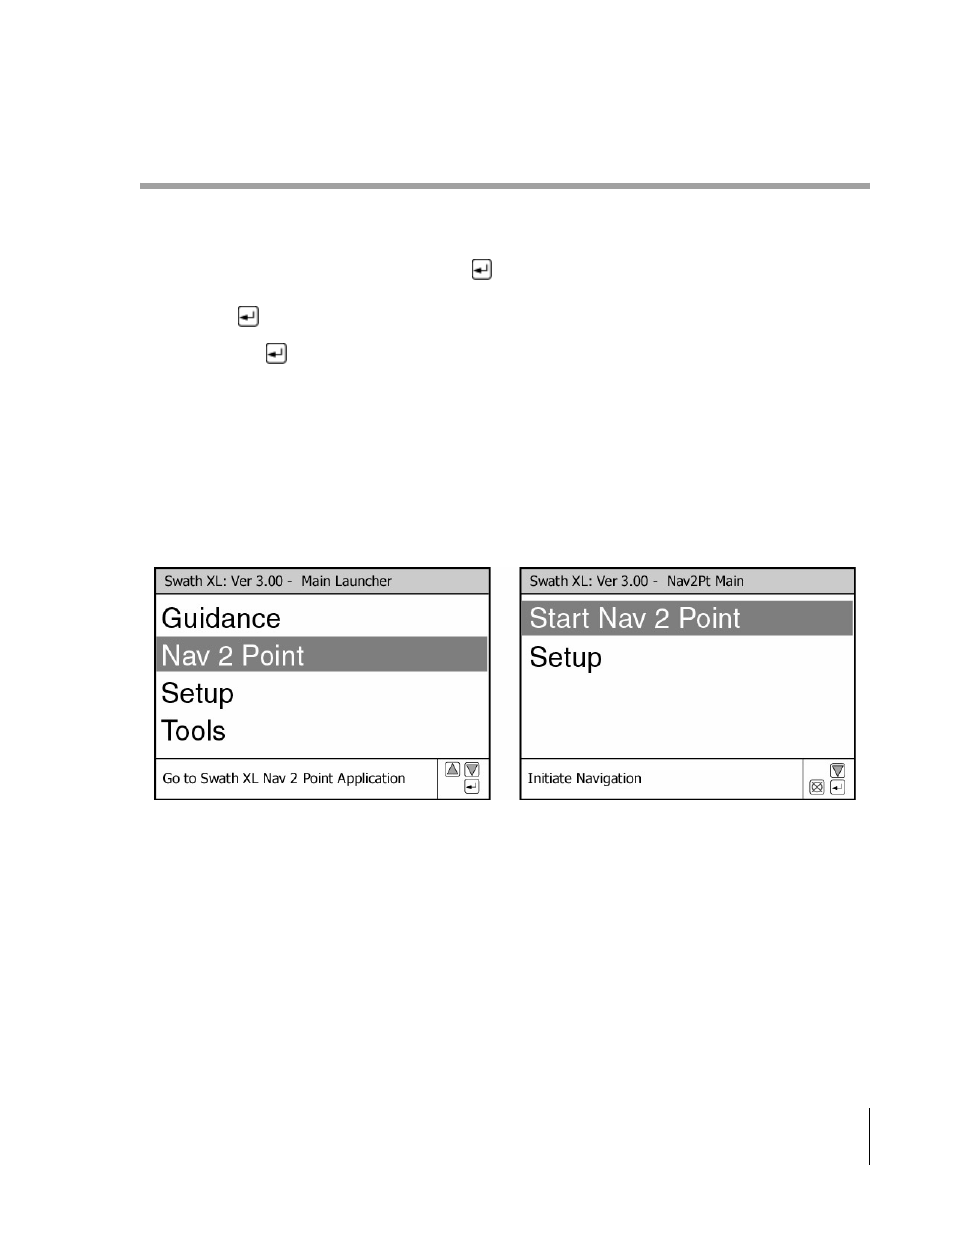
Once you have properly setup the Nav 2 Point application by running through the setup process, the next step is to
start the Nav 2 Point real-time process. Figure 4 -20 shows the Swath XL Launcher Main Menu on the left side. The
user highlights the Nav 2 Point menu item and press
. This brings up the Nav 2 Point Main Menu, right side of
Figure 4 -20. To start the real-time Nav 2 Point process, highlight the Start Nav 2 Point menu item in the Main Menu
page and press
What happens after
is pressed to the start the Nav 2 Point real-time process depends on how you have configured
Nav 2 Point via the Setup process. Using Figure 4 -21 as an example Nav2Pt is setup to have a new Point/Grid file
and create a field boundary. Therefore prior to pressing the Go menu item to start the real-time mapping, the user
needs to select or enter new Point/Grid and Boundary file names. Once the filenames have been properly selected, the
user highlights the Go menu item and presses the enter button to start real-time mapping. Because the user has elected
to create a new field boundary, the Map Boundary icon is displayed in the side button bar, Figure 4 -22.
For more information about the Data Setup menu see “Data Setup” on page 4-5. The section, “Nav 2 Point Real-Time
Scenarios” on page 4-26, covers the various real-time process scenarios.
Figure 4-20: Launching into the Nav 2 Point Application.