Figure 4 -32, Figure 4 -33 – TeeJet Swath XL User Manual
Page 150
Chapter 4 - Waypoint Navigation
4-30
Nav 2 Point Real-Time Scenarios
Swath XL
Software Version 3.00
presses
. This brings up the real-time view page.
Figure 4 -34 and Figure 4 -35 show a sequence of dropping a sample point. First the operator drives the desired sam-
ple point location and highlights the Add Sample icon in the button bar. Pressing
brings up the Sample Name dia-
log, Figure 4 -34. Once the Sample Name is entered the operator begins to drive away from the newly added sample
point, Figure 4 -35.
Detecting Nearness to a Sample Point
A feature in the Nav 2 Point application is detecting when you are close to an existing sample point. When you get
within a certain predetermined distance from a sample point, the Delete Sample Point and Edit Sample Point icons
appear in the button bar. Notice in Figure 4 -35 that once the operator moved a certain distance from the sample point,
the Delete and Edit icons are removed from the button bar. This distance is determined by the alarm range setting in
“Alarm Range” on page 4-19.
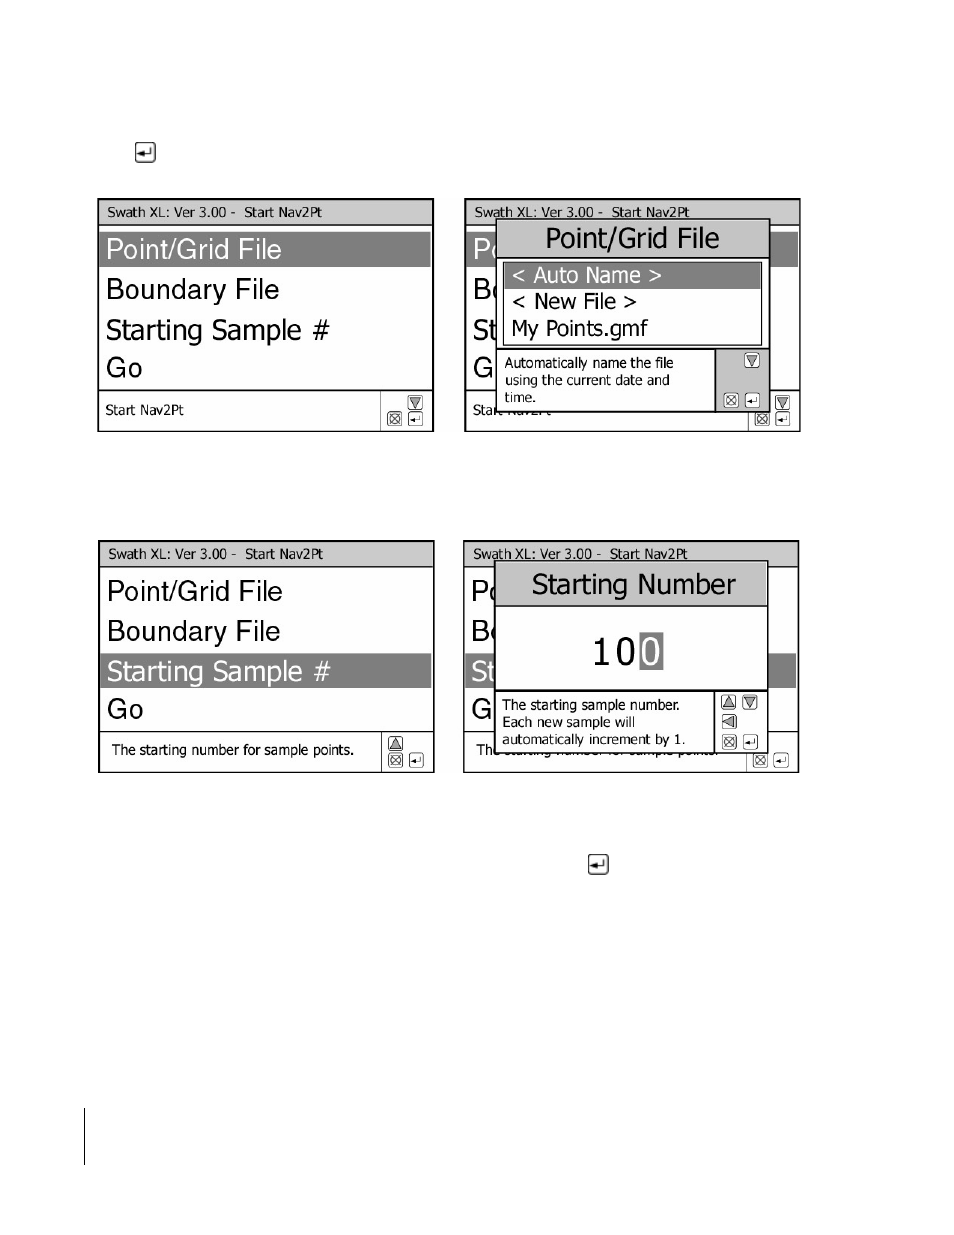
Figure 4-32: Entering/selecting the Point/Grid File.
Figure 4-33: Entering the Starting Sample Point Number.