7264 adjustments – Cub Cadet 7000 Series User Manual
Page 107
7264 Adjustments
2.14. Re-check the brake adjustment to insure that the
results were as intended.
2.15. Test run the tractor in a safe area before return-
ing it to service.
NOTE: If the brakes are correctly adjusted and
do not work as intended, mechanical inspection
of the entire system will be necessary.
• Check the linkage for loose bushings.
• Check the cross-bar that the brake arms are
mounted to for damage.
• Check the brake links for: binding; mis-align-
ment; loose or broken stops.
• Check the springs on the back of the brake
links for looseness or damage.
• Refer to the TRANSMISSION section of this
manual for service instructions covering the
internal brake mechanism.
3.
PTO CONTROL ADJUSTMENT
3.1.
Insure that no unsafe conditions will arise from
starting the engine or engaging the PTO.
3.2.
Start the engine.
3.3.
Set the PTO control lever to the 2000 RPM (front
only) position. Momentarily engage the PTO to
insure that only the 2000 RPM shaft rotates.
3.4.
Turn the engine off.
3.5.
The PTO control lever should rest near the for-
ward end of the opening in the fender. If it does
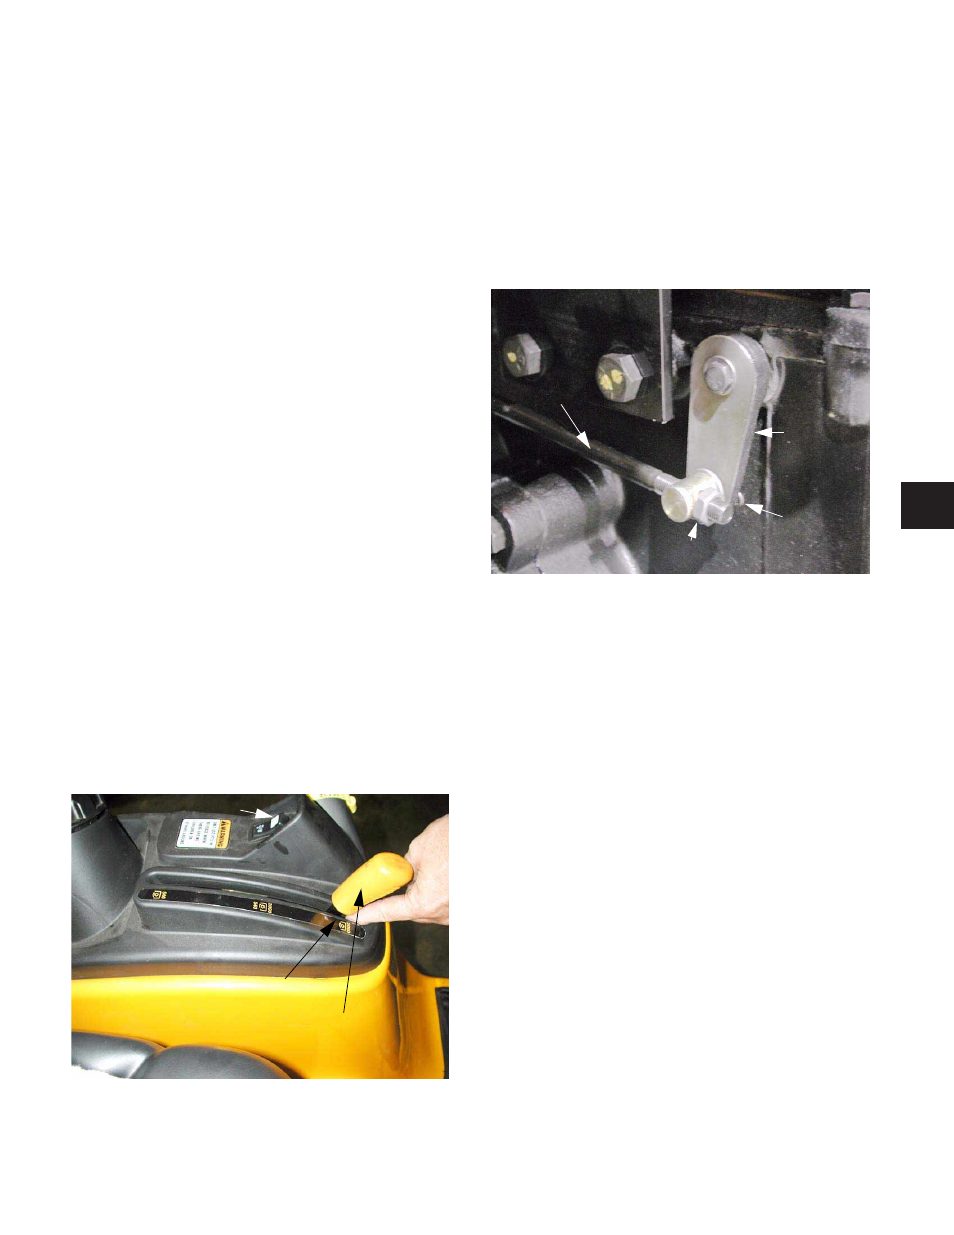
not, adjustment is necessary. See Figure 3.5.
NOTE: There should be roughly 3/4” between
the PTO control lever and the end of the slot.
This may be expediently measured by inserting
a finger into the gap.
3.6.
If adjustment is necessary, locate the end of the
PTO control link to the left of the transmission
housing. See Figure 3.6.
3.7.
Loosen the jam nut using a 9/16” wrench.
3.8.
Remove the hairpin clip.
3.9.
Withdraw the ferrule from the hole in the PTO
control arm.
3.10. Thread the ferrule up or down the length of the
PTO control link as necessary to achieve the
correct gap between the PTO control lever and
the end of the slot that it travels in.
3.11. Insert the ferrule in the PTO control arm, and
secure it with a hairpin clip.
3.12. Tighten the jam nut.
3.13. Start the engine and confirm correct operation of
the PTO.
NOTE: If the PTO fails to function as intended,
complete mechanical inspection is necessary.
• Inspect the pivot point of the PTO control lever
for worn bushings or a loose shoulder bolt.
• Inspect the PTO control link.
• Inspect the PTO control arm and its connec-
tion to the shaft that enters the transmission.
• If the problem is not within the linkage, refer to
the Transmission section of this manual.
Figure 3.5
2000 RPM Only
PTO Control Lever
PTO / Reverse
Over-rideSwitch
Figure 3.6
PTO
Control Arm
PTO
Control Link
Jam Nut
Hairpin Clip
6
6 - 133