Incorrect – Cub Cadet SLTX1000 Series User Manual
Page 143
CVT DRIVE AND BRAKE SYSTEM
137
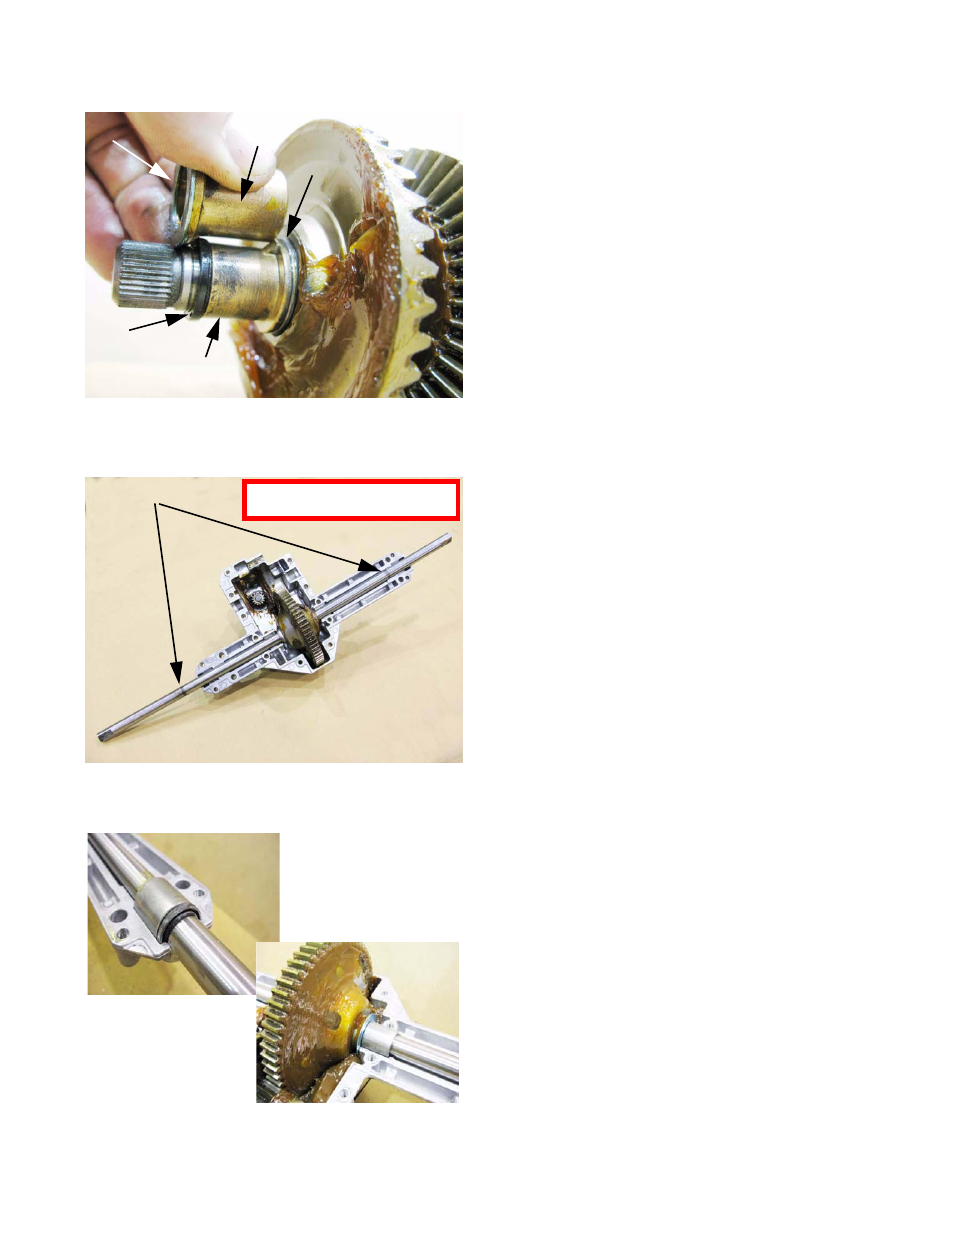
19c. Re-install the shims in their original locations on
the bevel gear shaft.
19d. Smear some Durina
TM
grease on the surfaces of
the shaft that will ride in the flange bearings.
19e. Install new bevel gear shaft bearings, with their
flanges facing the shims. See Figure 6.105.
NOTE: The bevel gear shaft bearings are of different
lengths.
The longer bearing goes on the reduction gear
end of the shaft. The shorter bearing goes on the
brake-spline end of the shaft.
19f. Install the brake shaft seal. The primary pur-
pose of this seal is to keep grease away from
the brakes. The seal should be installed with
the lip facing in.
19g. Install the bevel gear shaft into the transmission
housing for a dry fit check.
20.
Install the axle and differential assembly:
20a. Check notes, markings, or witness marks on
the axle shafts to confirm the correct orienta-
tion. See Figure 6.106.
20b. Reinstall the end-play shims in their original
positions.
20c. Apply a small amount of Durina
TM
grease to the
inboard bearing contact surfaces of the axle,
then slide new bearings into place.
20d. Apply a small amount of Durina
TM
grease to the
outer bearing contact surfaces of the axle, then
slide new bearings into place.
20e. Slip the seals onto the axle shaft. The seal lip
should face outward.
20f. Carefully place the assembly into the housing
for a dry fit. See Figure 6.107.
Figure 6.105
Seal
Brake-side bearing
(short)
Reduction-gear
side bearing (long)
Shims
Shims
Figure 6.106
Witness marks
This axle is in backwards!
INCORRECT
NOTE: Witness marks not aligned w/case
Figure 6.107