Fuel tank removal/replacement – Cub Cadet SLTX1000 Series User Manual
Page 14
LTX Tractors
8
Fuel tank removal/replacement
Remove/replace the fuel tank by following these steps:
•
Work in a well-ventilated area.
•
Allow the engine to cool fully before starting work on the tractor.
•
Eliminate any sources of possible ignition from the work area, including but not limited to: heat sources,
open flame, potential sparks.
•
Clean-up any spilled fuel quickly and properly, disposing of cleaning materials in a way that will not pro-
duce a further fire hazard.
•
Hold any drained fuel in an approved and safe
container.
1.
Open the hood.
2.
Drain the fuel in the fuel tank into an approved con-
tainer.
NOTE: The tank may be drained by mechanical
syphon or by disconnecting the fuel line from
the fuel filter.
3.
Disconnect the fuel tank vent hose from the roll over
valve (if equipped).
4.
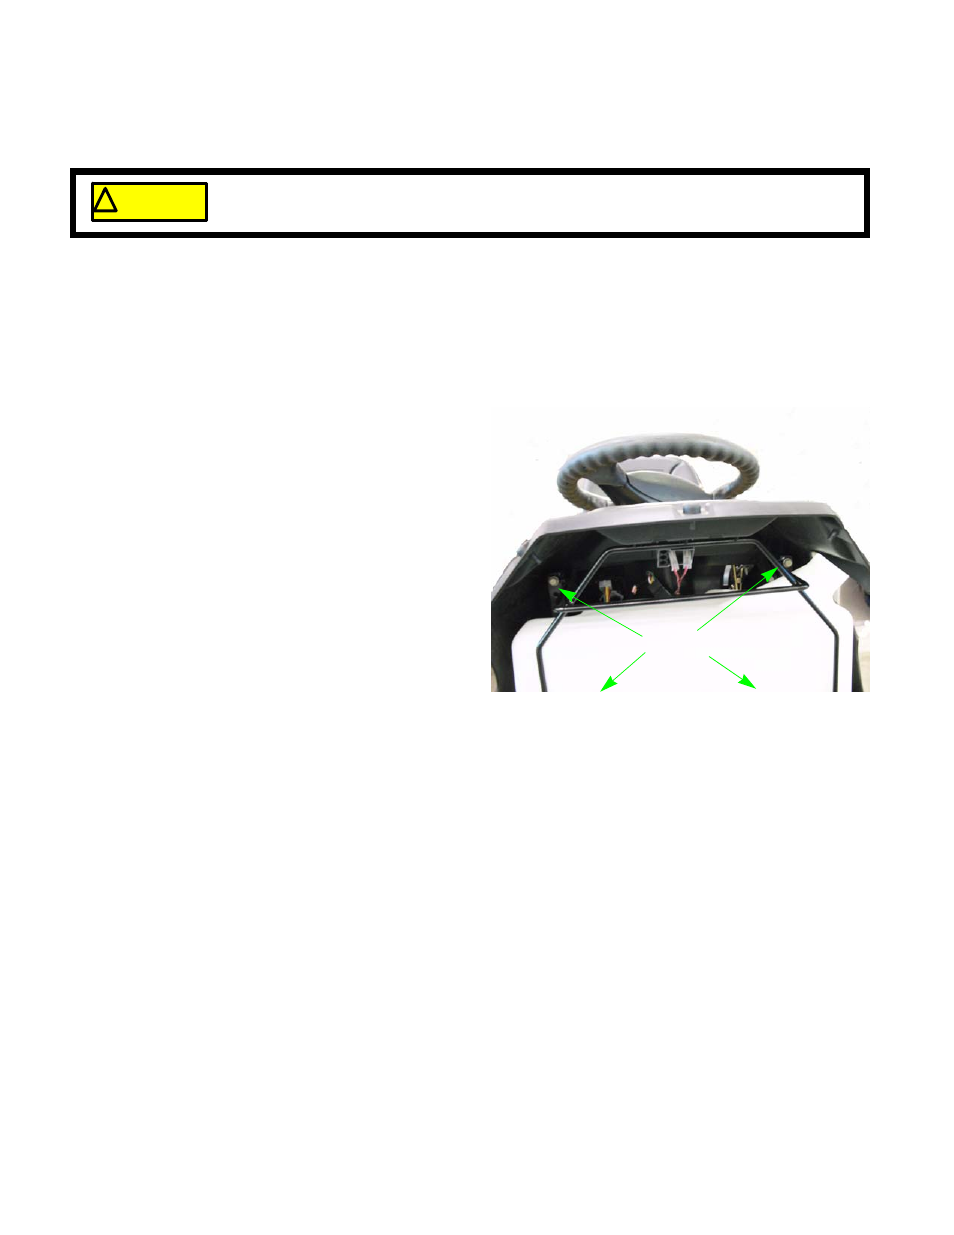
Remove the four screws that secure the fuel tank
support rod. See Figure 2.7.
5.
Work the fuel tank support bracket off of the tractor
6.
Slide the fuel tank out from between the dash and
the engine.
7.
Remove the fuel line clamp and slide the fuel line off of the fuel tank nipple.
NOTE: The fuel tank has a barbed fitting. Anytime a fuel line is removed from a barbed fitting it should be
replaced because of the damage caused to the fuel line liner.
8.
Install the fuel tank by following the above steps in reverse order.
9.
Test run the tractor and check for leaks before returning to service.
! CAUTION
! CAUTION
Gasoline and its vapors are extremely flammable. Use common sense when working around
the fuel system.
Figure 2.7
Screws