Command types, Fader starts, Smart keys – DiGiCo SD Series User Manual
Page 87: Chapter 2 - the master screen
Chapter 2 - The Master Screen
2-53
2. Touch the row in the list in which you want the command to appear, then touch one of the command types in the scrollable
command types list to the left of the display. This brings up a list of the commands within that command type in the scrollable
commands list in the lower half of the display. Touch the desired command to bring it into the included commands list.
For commands associated with worksurface controls (all command types above System in the command types list), the
included commands list displays the command type (in the channel type column), the scope of channels included in the command
where appropriate (in the from and to columns), the command’s name (controller) and any value associated with the command.
For command types associated with the master panel (from System down), the included commands list displays the command,
along with any filename or value associated with it. The list can be scrolled if necessary using the scroll bar to its right.
The values in the from, to and value columns can be adjusted by using the Touch-Turn encoder and value + and value -
buttons to the right of the included commands list. Touch the box to be adjusted to assign it to the encoder and value buttons. The
present value is shown in the display in between the value buttons. If the value column displays something other than numeric
values, the options are cycled using the Touch-Turn encoder and value + and value - buttons (cycling for example, between on,
off and toggle). Values can also be typed in by touching the value box, typing the new value using the external or on-screen
keyboard, and touching OK.
To remove a command from the list, touch the command to be removed and touch the remove button to the right of the included
commands list.
The bottom-right of the Macro Editor is used to define what triggers the macro. The action buttons below the smart keys /
macro buttons are used to define whether pressing the button triggers a macro on or off command. Selecting a new trigger for
a macro automatically deselects any old trigger than might have been assigned.
On SD7, SD5 and SD10, Smart keys are selected by touching one of the eight bank buttons below the assigned to legend
(causing the button’s ring to light green, indicating that it is selected) followed by one of its five smart keys. The smart key will
then display the first command from the included commands list. The colour of the smart key can be chosen using the arrow
buttons in the colour area below the smart keys. The selected colour is displayed between the arrow keys.
On SD8, SD9 and SD11 Macros are assigned in a similar way but directly to one of the 8 Macro buttons.
GPIs are selected by touching the GPI number box and using the Touch-Turn encoder, or by using the arrow buttons to the right
of the GPI number.
OSC assignments are selected by Touching the OSC button, then the number box and using the Touch-Turn encoder or by using
the arrow buttons to the right of the OSC/GPI area. (Note: OSC triggering only functions if External Control is enabled)
Function keys on the external keyboard are assigned by touching the F1 to F8 buttons at the bottom of the display.
The previous and next snapshot buttons on the control surface can also have macros associated with them, using the buttons
to the right of the GPI area.
It is also possible to fire a Macro in response to the Audio Master being changed. Different Macros can be assigned depending on
whether Audio Master is being switched to A or B. These are assigned using the A audio master and B audio master buttons
to the right of the GPI area.
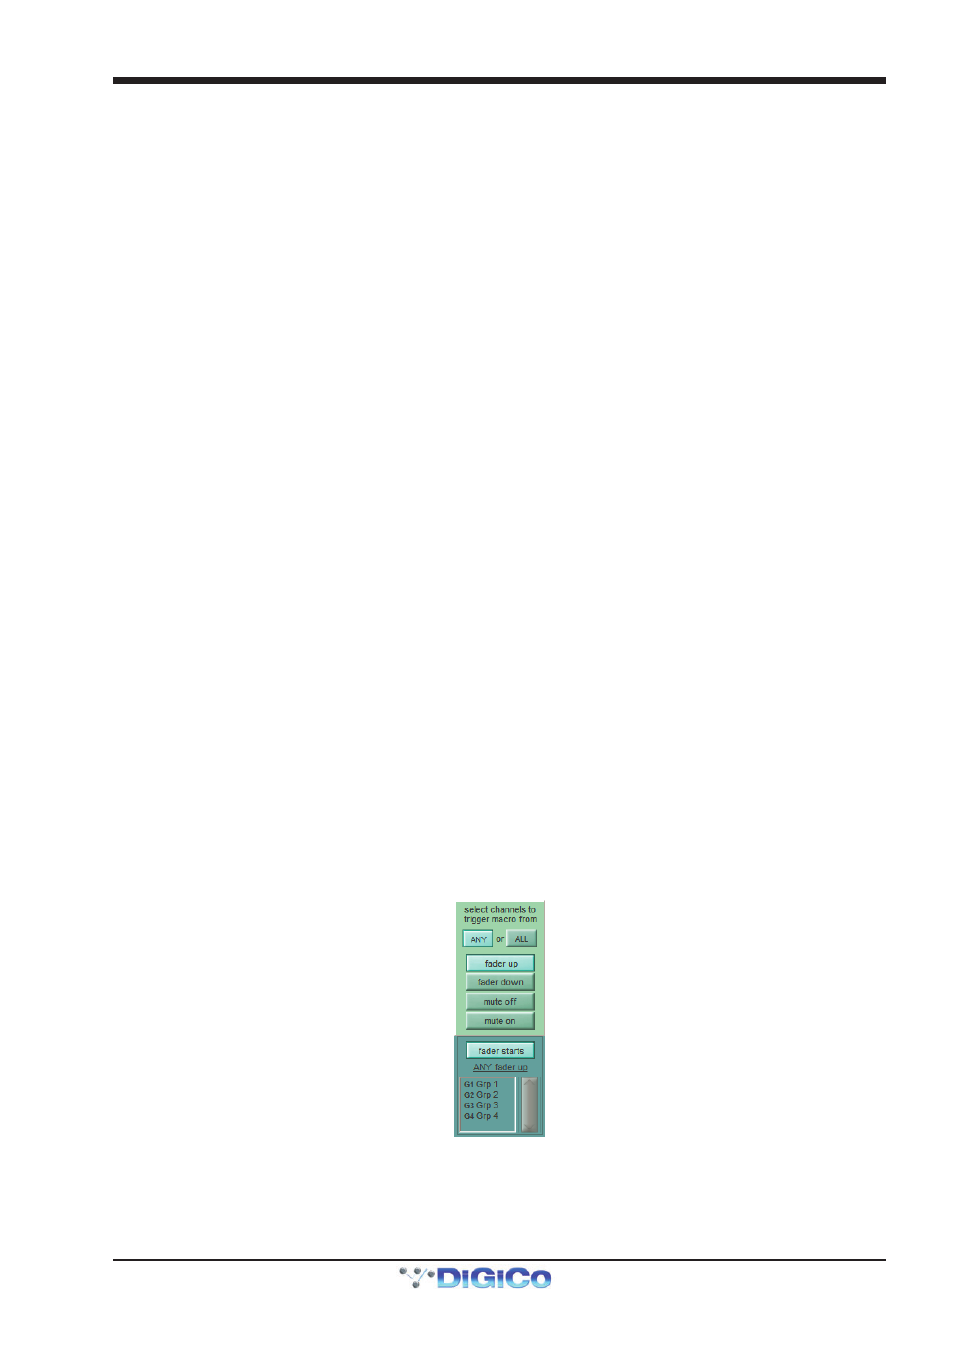
Fader starts are configured in the bottom right-hand corner of the panel. Pressing the fader starts button opens a small configu-
ration pop-up (shown below) as well as a Channel List display.
The four buttons above the fader starts button define what fader action fires the macro – fader up, fader down, mute off or
mute on. Once this has been defined, touching any channel row in the Channel List will add that channel fader to the fader
start, as listed below the fader starts button. If the ANY button is active, the Macro will fire when any of the associated faders
are moved to the specified state; if ALL is active, the Macro won't fire until all associated faders are in the specified state.
Note that fader starts are associated with the channel, not the fader – if a channel is moved, any fader start
functionality will move with it.