7 group and socket names, 8 socket options, Auto-conform all – DiGiCo SD Series User Manual
Page 82: Auto-name, Card/slot type, Conform all ports, Group and socket names, Group name, Socket conforming, Socket name
Chapter 2 - The Master Screen
2-48
indicating the card type matches the card installed in the rack. If there is a mismatch, the card type name will be red, and the error
should be corrected by selecting the correct card type.
Automatic Conforming
The audio I/O can be automatically conformed for the whole console (using the Conform All Ports button in the bottom left of the
panel) or the currently selected rack (using the conform rack button below the socket display). Pressing these buttons will
correctly select the correct card for each slot. Once complete, all of the card labels beneath each slot should turn green.
It is also possible to auto-conform on a card-by-card basis: With a single card selected (by touching any of the sockets on that
card), press the Cards & Sockets button towards the base of the screen, followed by the conform card button which
appears in the area to its right.
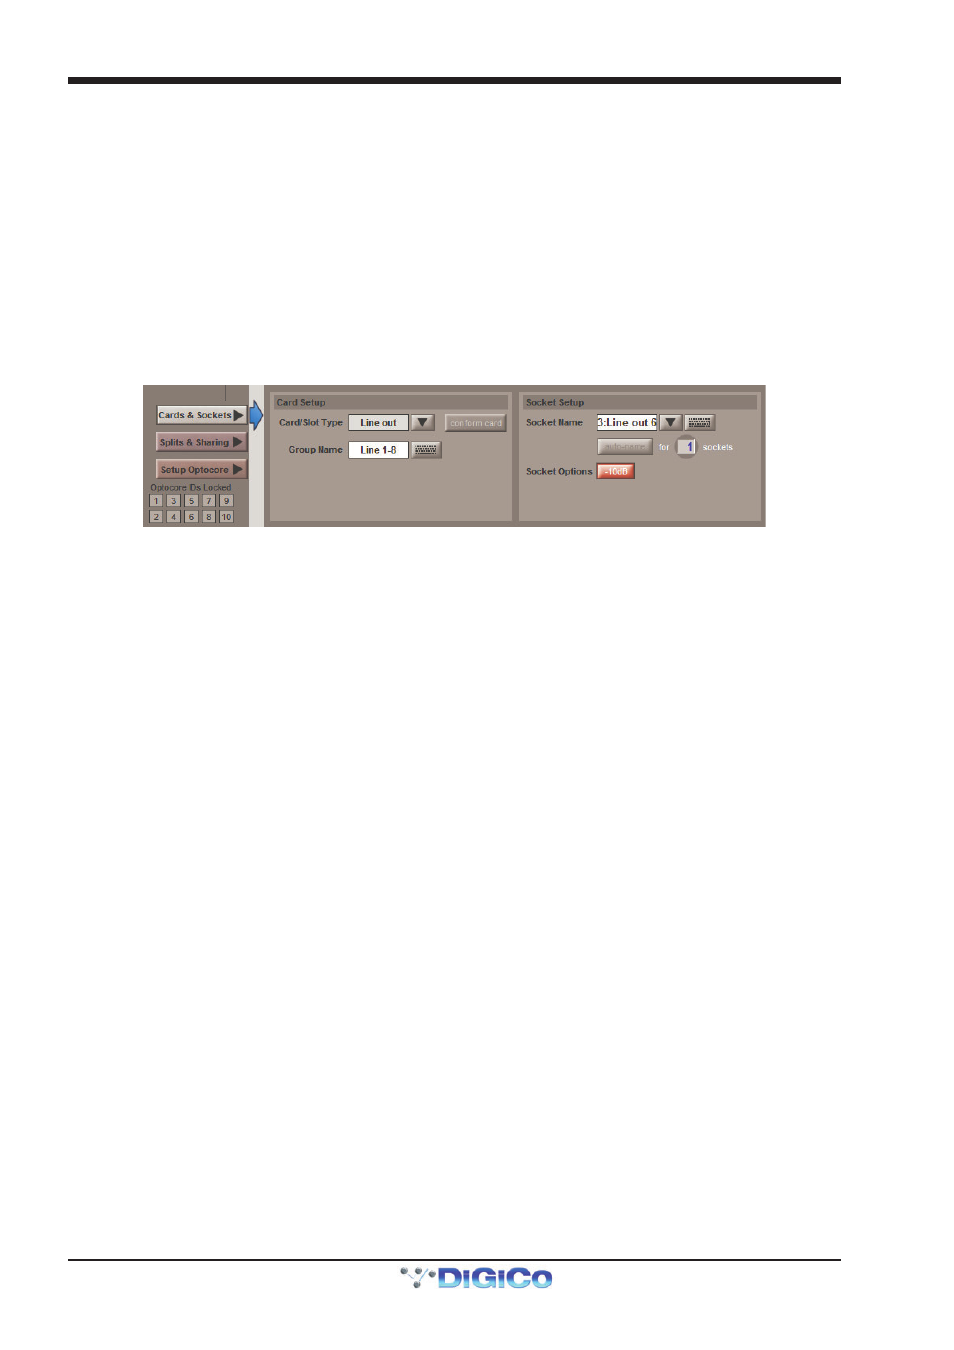
2.13.7 Group and Socket Names ..................................................
Cards and sockets are named automatically, according to the Device Type, Card/Slot Type and their position within the port. To
edit these names, press the Cards & Sockets button towards the base of the Audio I/O panel to bring up the Card Setup and
Socket Setup displays to its right:
Touch either the Group Name or the Socket Name box (or the keyboard symbols to their right), type the new name into the
QWERTY keyboard which appears and press OK. Touching the down arrow in between the Socket Name box and keyboard
symbol opens up the Channel Name display which enables commonly used words to be inserted quickly without the use of the
keyboard.
A range of sockets can be named with the same label and an incrementing number by using the auto-name function below the
Socket Name box: To define how many sockets will be auto-named, touch the numeric display, turn the Touch-Turn encoder to
the right of the screen until the numeric display below the keyboard symbol displays the correct number. Alternatively, touch the
numeric display, type in the number of sockets to auto-name into the keypad that appears, and press OK. Once the number of
sockets has been defined, the auto-name button becomes active. Pressing it will cause the name of the assigned socket to be
replicated for all the sockets selected for auto-naming. If the assigned socket’s name does not end in a number, a ‘1’ will be added
to it and incremented for the remaining sockets. If the assigned socket’s name already ends in a number, that number will be
incremented for the remaining sockets.
2.13.8 Socket Options ....................................................................
Depending on the socket type, further Socket Options are displayed below the Socket Name area.