6 brightness, 7 meters, Attack rate – DiGiCo SD Series User Manual
Page 65: Brightness, Dim lcd buttons, Meters, Overs hold, Peak hold, Post fader, Post-trim
Chapter 2 - The Master Screen
2-31
2.5.6 Brightness ..............................................................................
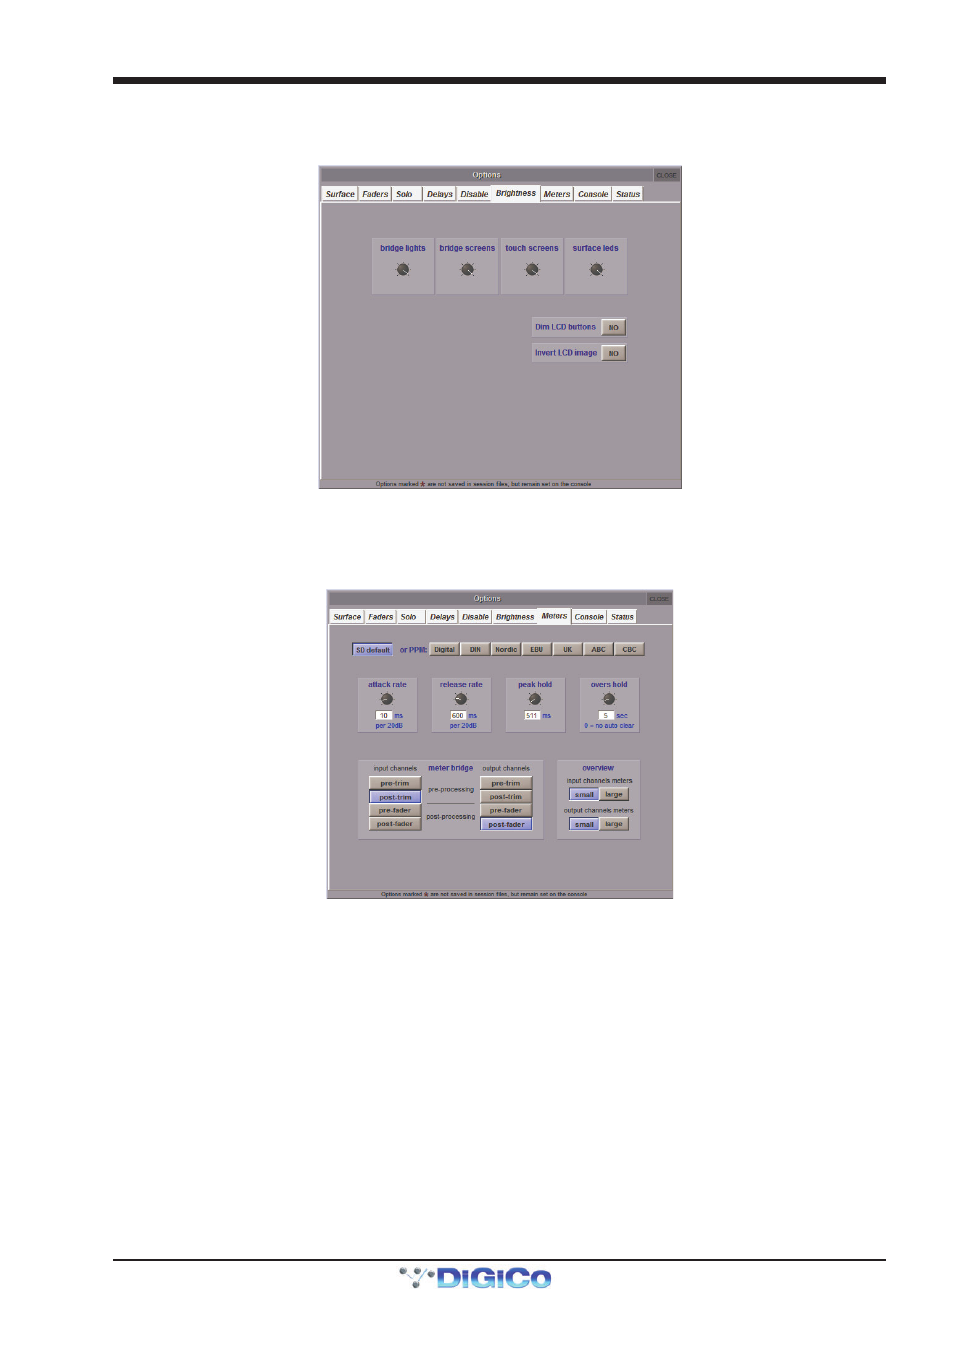
The Brightness tab is used for adjusting the brightness of the console’s bridge/Lil lights, screens and surface leds.
Touching each pot assigns it to the Touch-Turn encoder.
The SD5 and SD7 console’s LCD buttons are not controlled by the surface leds pot but by the Dim LCD buttons and Invert
LCD Image options towards the bottom of the screen. Note that the dimming option only dims the brighter LCD colours.
2.5.7 Meters ....................................................................................
The Meters tab includes settings related to the console meters:
The four pots across the middle of the panel affect the attack and release reaction time (attack rate and release rate), the
peak hold time and the overs hold time. The current setting for each is displayed in either milliseconds or seconds, below each
pot. Touching each pot assigns it to the Touch-Turn encoder. The row of buttons above the pots provide access to a number of
preset meter configurations, including the SD default and a number of PPM formats.
Note that when the overs hold time is set to 0, the hold time is set to infinite, not 0. The overs lights will
therefore remain lit until they are manually cleared.
Note also that if you activate a metering preset and then edit it, the button for the preset on which the setting
are based will still appear selected.
The point being metered within the channel is set using the eight buttons in bottom left of the display. The input channel meters are
adjusted using the buttons on the left, and the output channels are adjusted on the right. The options for each are pre-trim,
post-trim (pre-processing), pre-fader (post-processing) and post fader. The default setting is post-trim for input
channels, and post-fader for output channels. The currently selected button is displayed in purple.
The Overview area in the bottom right of the display allows the size of Input and Output Meters to be set: small or large.
Note that the settings in the bottom half of the display affect the meters on the worksurface, not the on-
screen meters.