12 macros, Pin eavesdrop, Assign – DiGiCo SD Series User Manual
Page 85: Floating labels, Frame rate, Machine control, Macros, Midi (mtc), Midi machine control, Off-line
Chapter 2 - The Master Screen
2-51
Frame Rate
This must be set up for the frame rate used by your other equipment. You can select from four different basic frame rates, with a
drop-frame option available for 29.97 and 30fps.
Timecode Source
You can choose the Console option to make the console generate the master timecode for the setup, or you can choose to make
the console "chase" timecode which arrives at one of the external sockets - SMPTE (LTC) (SD7 Only), MIDI (MTC), or 9-pin.
These external sockets are located on the console rear panel.
The 9-pin Eavesdrop option requires a special 9-pin cable . The option is provided for installations where the 9-pin connection
runs between two other pieces of equipment (for example, a video machine and DAW), but the console is required to chase this
timecode. 9-pin does not normally allow more than a single direct connection between two machines, but using the Eavesdrop
cable, you can make the console "listen" to the timecode passing between two other machines, and to sync to and display this
timecode on the worksurface.
Note - if you are using 9-Pin Eavesdrop mode, you cannot use any of the options for direct 9-pin connection.
Timecode Output Enable
Whether the console is operating as timecode master or deriving its timecode from another device, you can choose to route a
timecode signal out from the MIDI (MTC) and/or SMPTE (LTC) sockets. If timecode is being received from another device it is
regenerated before being routed to the output.
Machine Control Enable
The console can only send Control signals if you have enabled a Machine Control output. This can be MIDI Machine Control (MMC)
and/or 9-pin Disk or Tape. Note that you cannot output 9-pin control if you are using the Eavesdrop option to read timecode.
MIDI Machine Control has limited transport features, supporting only the Play, Record, FF, Rewind, Stop and Locate functions.
9-pin control supports Shuttle and Jog functions.
Off-line Buttons
The configuration panel allows you to temporarily disable all timecode and transport control to any combination of outputs. The
ALL button disables all timecode and machine control output - this is especially useful to prevent external machines trying to
chase the console timecode.
2.13.12 Macros ...............................................................................
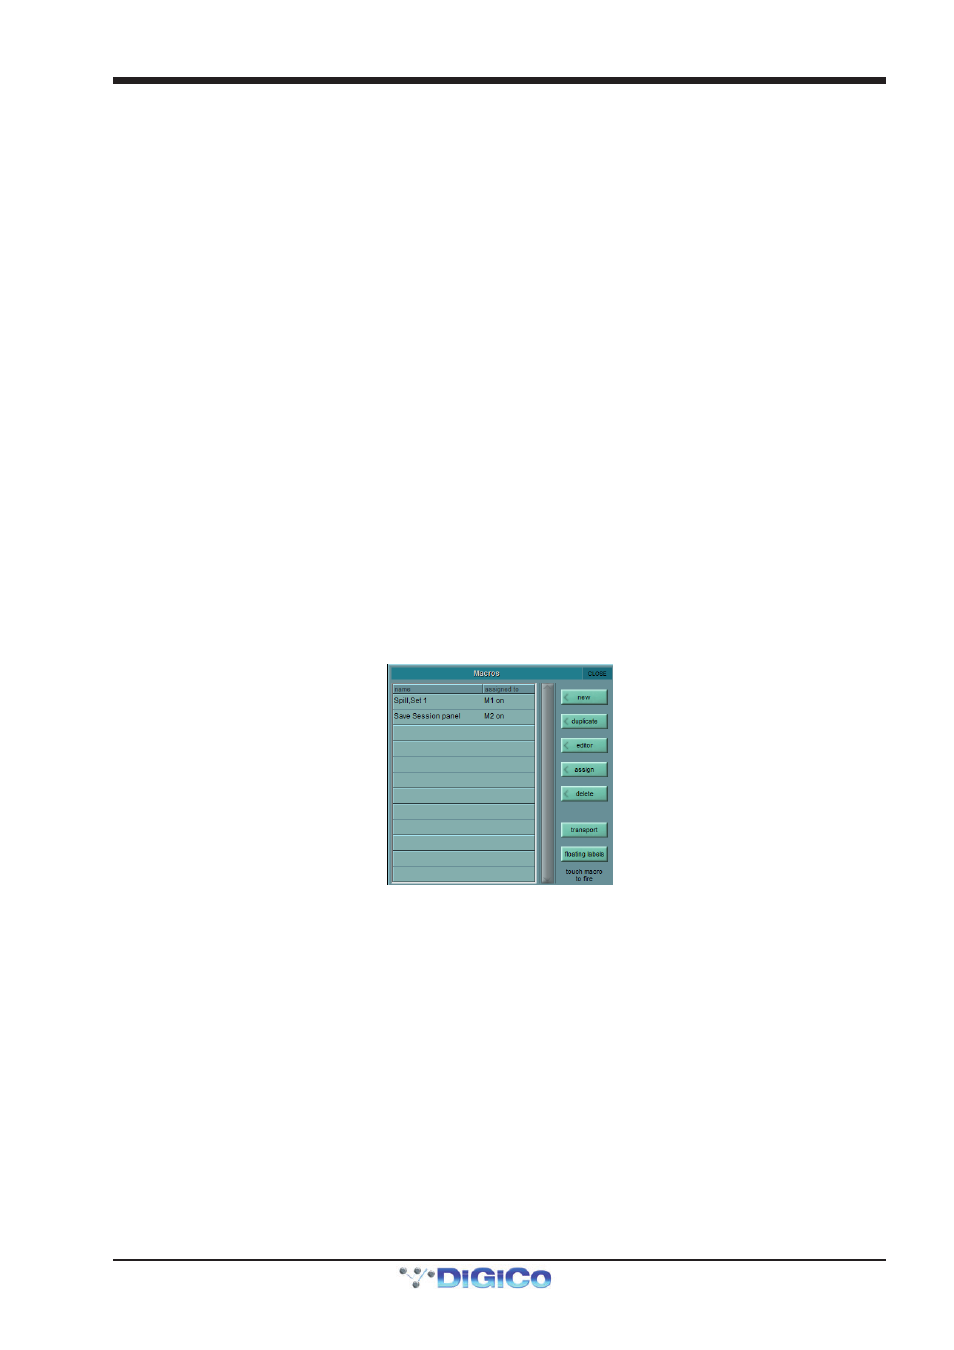
Selecting Macros from the Setup menu opens the Macros display. This display is also opened by pressing the assign button in
the macros area of the worksurface.
This is where macro commands can be assigned to the smart keys or Macro buttons in the macros area of the console surface,
as well as to the function (F) buttons on the external keyboard and to the console’s GPIs. Macros can also be fired directly from
this list by touching the macro when none of the right-hand buttons is active.
The macros area has capacity for either 8 or 40 macros, arranged in one bank of eight, four banks of 10 or eight banks of five
depending on the console. If the console has bank buttons, pressing any of the bank buttons across the top of the macros area
assigns the smart keys below them to that bank. The bank currently assigned to the smart keys is indicated by its button being
ringed green.
The Macros display includes a list of all the macro commands which have been created, along with the button to which they
have been assigned, if this has been selected. The list is scrollable using the scroll bar to the right of the list.
Note that this list therefore includes macros which have been created but have no trigger.
Pressing the Transport Button will automatically assign the console transport controls to the macro buttons overwriting any
existing assignments.
On SD8,9,11, pressing the floating labels button opens a panel on the console's master screen that shows the worksurface
macro buttons and their name label if macros have been assigned to them. Touching either the button or the label will fire the
macro.
To create a new macro, touch the new button, in the top right-hand corner of the display. To create a macro based one that
already exists, touch the duplicate button below the new button, followed by the macro you wish to duplicate. When either