Installing the access point, Wall-mounting the at-wl2411 – Allied Telesis AT-WL2411 User Manual
Page 30
Installation
30
Installing the Access Point
You can install the AT-WL2411 horizontally on a desk or counter, or you
can install it vertically to a wall using the wall bracket that ships with it.
An optional cubicle bracket is also available for mounting the
AT-WL2411 on a cubicle wall.
Wall-mounting
the AT-WL2411
To install the mounting bracket and AT-WL2411 on a sturdy surface in
accordance with local building codes, you need the following tools and
materials:
❑ Two #5 or M3 screws.
❑ Drill and drill bit appropriate for the mounting screws
❑ Screwdriver
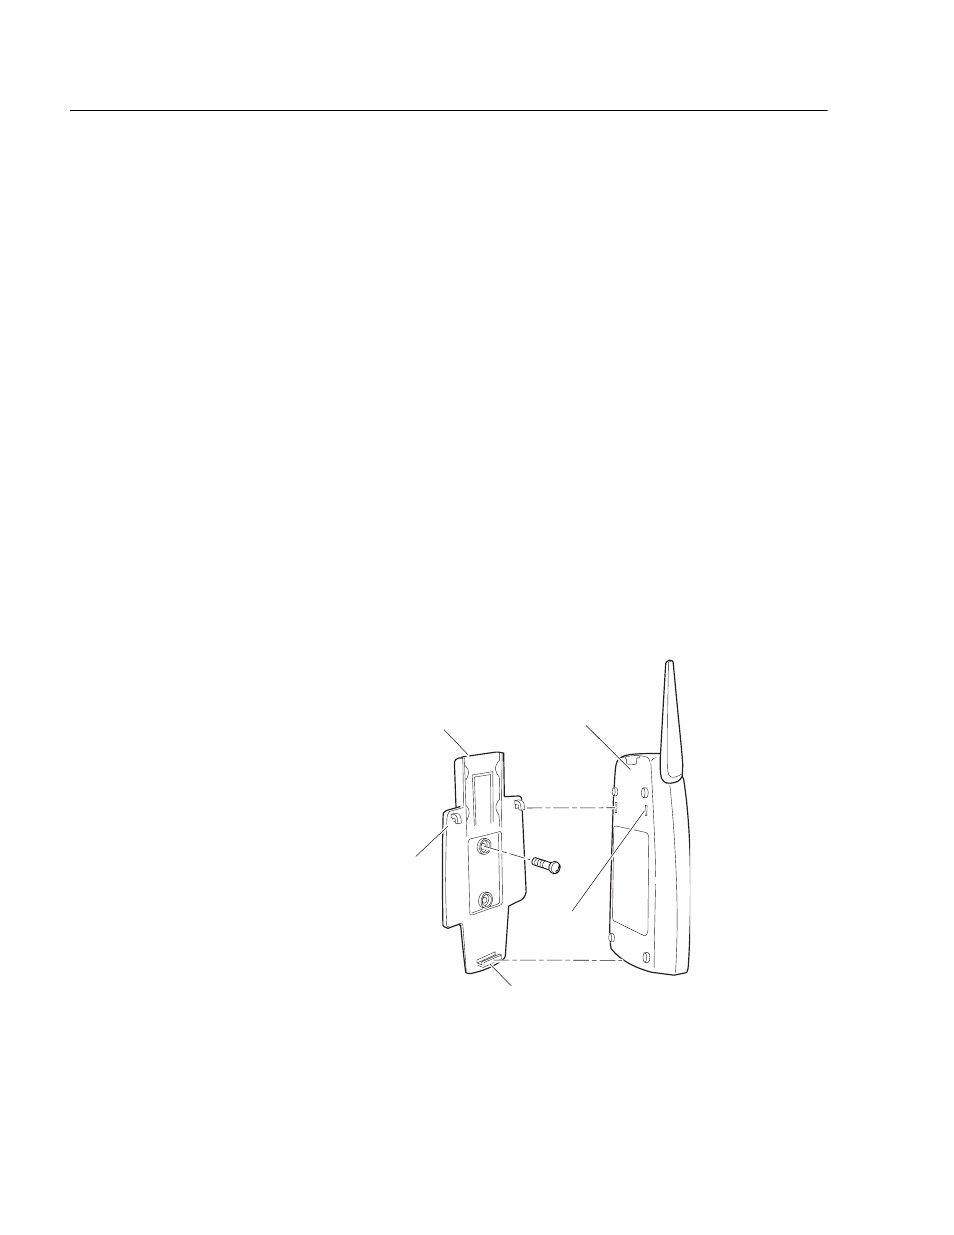
To wall-mount the AT-WL2411, perform the following procedure:
1. Using the mounting bracket as a template, mark the location of the
mounting holes on the wall.
2. Drill the mounting holes.
3. Position the wall-mounting bracket on the wall and using the M3
screws (not provided), secure the bracket to the wall, as shown in
Figure 7.
Figure 7 Wall-mounting the Access Point
Hook
(2 places)
Mounting
bracket
Slot
(2 places)
2102 back
panel
Screw
(2 places)
Clip
2102G009.eps
AT-WL2411