Pump service & repair, Figure 30 figure 31, Figure 28 figure 29 – Alamo HYDRO 15 User Manual
Page 34
HYDRO 15 (Service Manual) 09/06
© 2006
Alamo Industrial
Section 2 - 18
Figure 30
Figure 31
7.
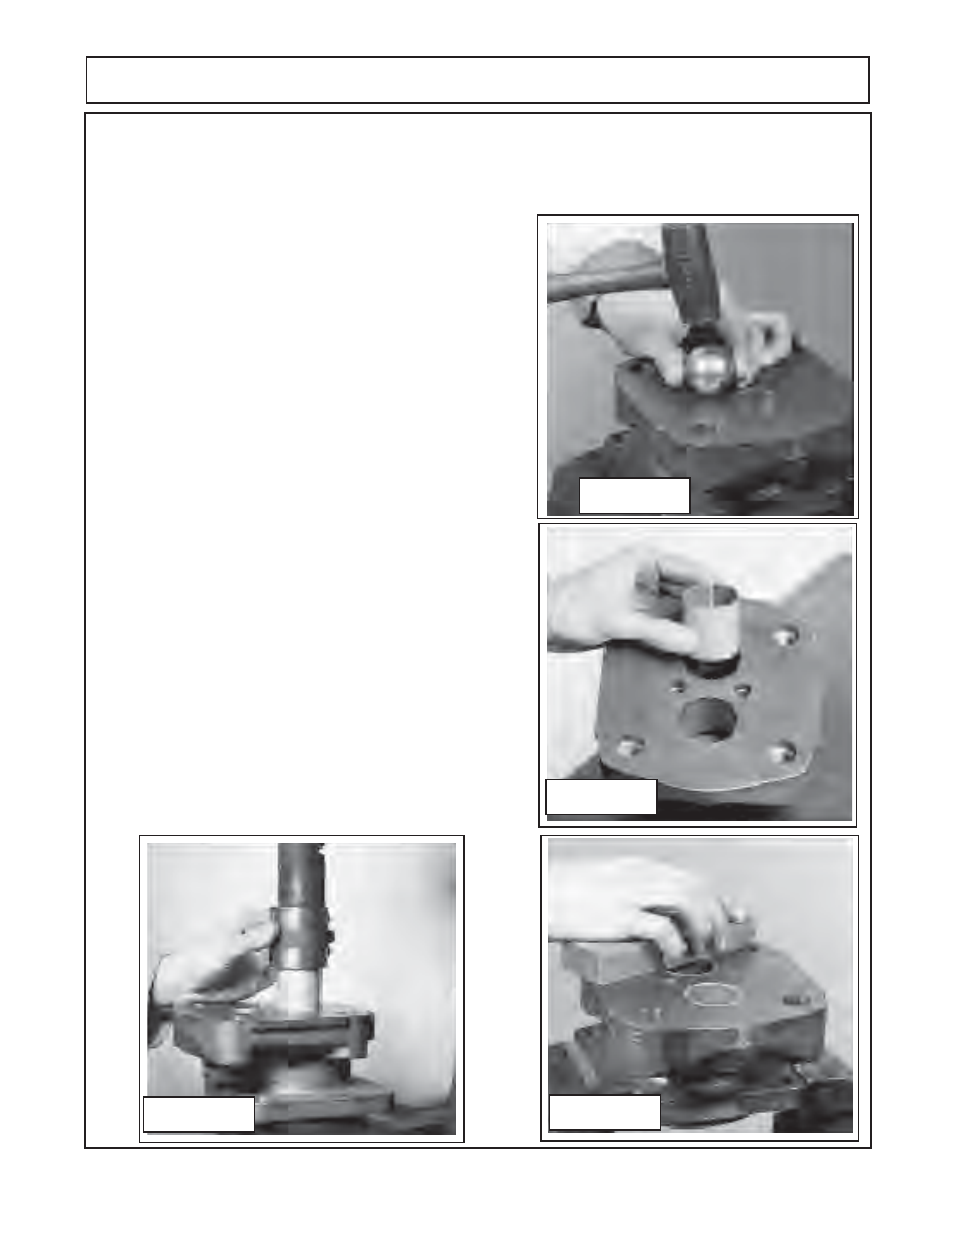
Repeat steps 1 and 2 after busings are installed
(See
steps 1 & 2).
Just as earlier if the stone is used parts it is used
on
MUST
be washed and dried . Make certain bushings are
flush with castings and there are NO burrs on the top ID of
bushings.
(figure 31).
8.
Check to make certain that the dowel pins are in place in
any new castings and that the location corresponds with the
mating casting. Before inserting any dowel pins check to make
certain holes are clean, the top of the holes do not have burrs.
To insert dowels hold the dowel in alignment with the hole.
Gently start the pin into the hole straight, tap lightly with a soft
hammer until dowel is seated into hole.
(figure 32).
Note as
shown, dowel pins have holes in the center, this is for the
studs to go through.
9.
Remove the shaft end cover from the vice and turn it over
180° and re-insert it into the vise with the splined side up (figure
34).
Before inserting the new lip seal
(figure 10 item 3)
into the
shaft end cover Coat the outer edge of the lip seal with
Permatex Aviation Form-A- Gasket™ No. 3 non-hardening
sealant or equivalent. With the metal side of the seal up, press
it into the mounting flange side of the shaft end cover with an
arbor press and bar
(see recommended tools list)
. Be careful
not to damage the lip seal. Press the lip seal in until flush with
the recess, wipe off excess sealant.
10.
Install the outboard bearing
(figure 10 item 2)
, guide the
bearing into the recess in the shaft end cover. This is a light
press fit and can be pressed in with the arbor press or it can
be lightly tapped into the bore.
DO NOT
use excessive force
to insert bearing, if it will not go with light
(continued next page)
PUMP SERVICE & REPAIR
Figure 28
Figure 29
6.
Bushings should be pressed into the bores one at a time, Use the special installation tool
(figure 5 Tools
recommended list)
and an arbor pres. Be sure that the groove (or seam) are positioned as stated in
step 5
previously
. Be sure to support casting so they are square and level to the arbor press and the bushings are
straight before attempting to press them in. The bushing must be pressed into the bores flush with the casting
face
(figure 30).