Optional axle level lift cylinder repair – Alamo HYDRO 15 User Manual
Page 100
HYDRO 15 (Service Manual) 10/06
© 2006
Alamo Industrial
Section 5 - 26
OPTIONAL AXLE LEVEL LIFT CYLINDER REPAIR
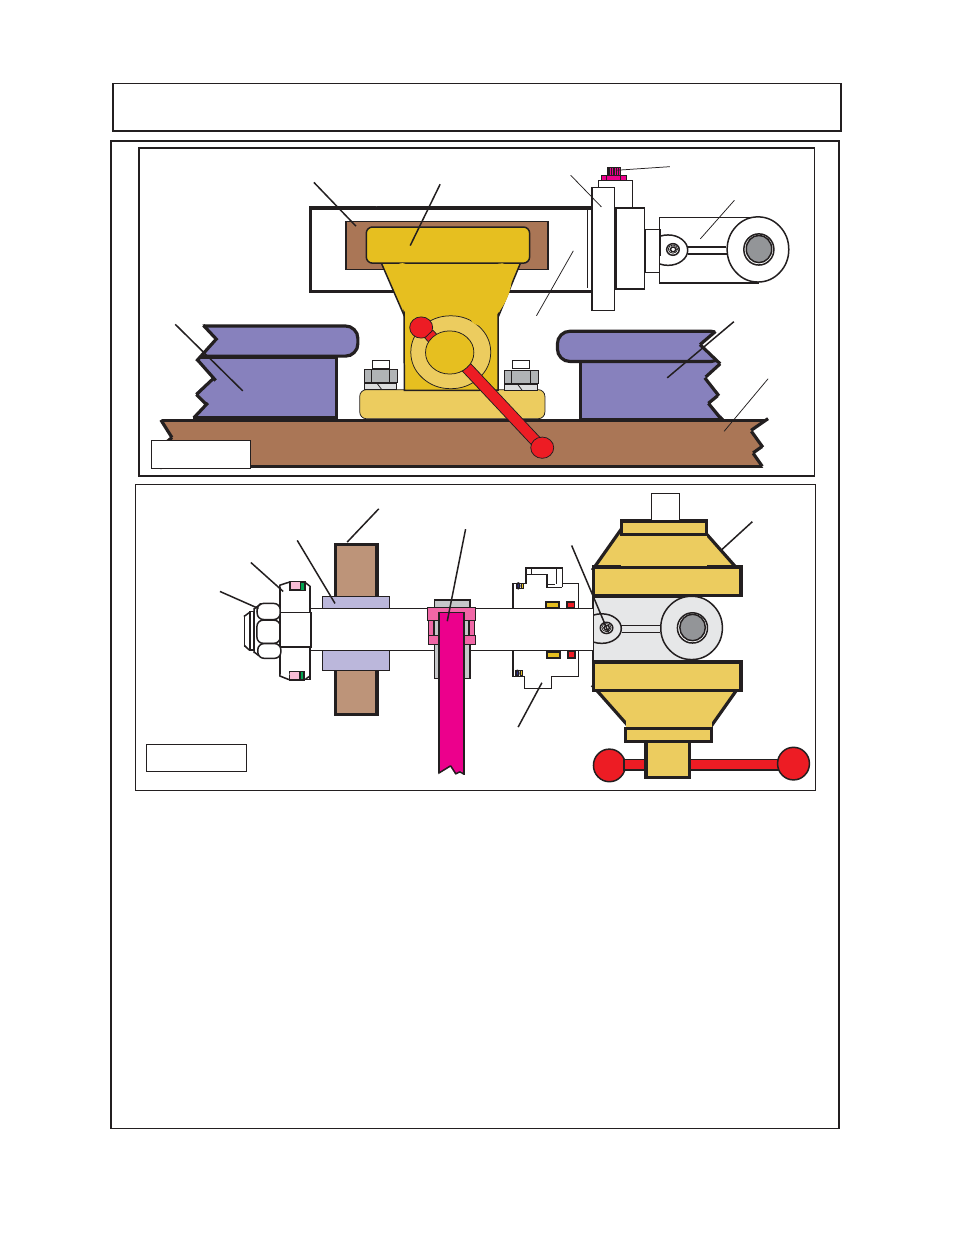
10.
Remove piston nut
(figure 4 & 5)
, the Piston from the cylinder rod. Move the support block and
the strap wrench
(figure 4 & 5)
Slide the cylinder head down the cylinder rod and off
(figure 5)
11
remove the setscrew from the cylinder rod clevis (figure 4 clevis set screw). There is a nylon
thread protector under the setscrew to protect the thread on the cylinder rod, it will most likely stay
in the threaded hole
(see figure 5).
The cylinder rod will screw out of clevis, it has RH threads, if
it cannot be turned by hand
DO NOT
use any type of tool that will damage the cylinder rod. Use
a strap wrench that only uses the strap to grab the rod
(see figure 4& 5)
. Screw the cylinder rod
completely out of the clevis.
Clean & Inspect Cylinder Components: (Axle Level Lift Cylinder Optional)
1.
Clean and inspect parts
(figure 6)
, check cylinder components, for wear, operation damages,
condition of materials. Make certain the piston, cylinder rod, barrel, base clevis, cyl head, rod
clevis, tie-rods and nuts, clevis set screw, cylinder rod. Remove the old seals and seal components
(figure 4, 5 & 6).
Inspect the tie-rods and the tie-rod hex nuts. The tie-rods may need the threads
cleaned and/or straightened.
12345678901234
12345678901234
12345678901234
12345678901234
12345678901234
12345678901234
12345678901234
12345678901234
12345678901234
12345678901234
12345678901234
12345678901234
12345678901234
12345678901234
12345678901234
12345678901234
12345678901234
12345678901234
12345678901234
12345678
12345678
12345678
12345678
12345678
12345678
12345678
123456
123456
123456
123456
123456
123456
Figure 4
123456
123456
123456
123456
123456
Bench Vise
Strap Wrench
Wood Support Block
Soft Non-Scratching Material
Cylinder Head
Clevis Set Screw
12
12
12
12
12
12
12
12
1234567
1234567
1234567
1234567
1234567
1234567
1234567
1234567
1234567
1234567
1234567
1234567
1234567
1234567
1234567
1234567
1234567
1234567
1234567
1234567
123
123
123
123
123
123
123
Piston
Piston Nut
1234
1234
1234
1234
1234
Wood or other soft material
Bench Vise
Drain Pan
Drain Pan
13
Work Bench
9
5
3
Figure 3