Leveling control rods service & repair – Alamo HYDRO 15 User Manual
Page 139
Section 10 - 3
HYDRO 15 (Service Manual) 09/06
© 2006
Alamo Industrial
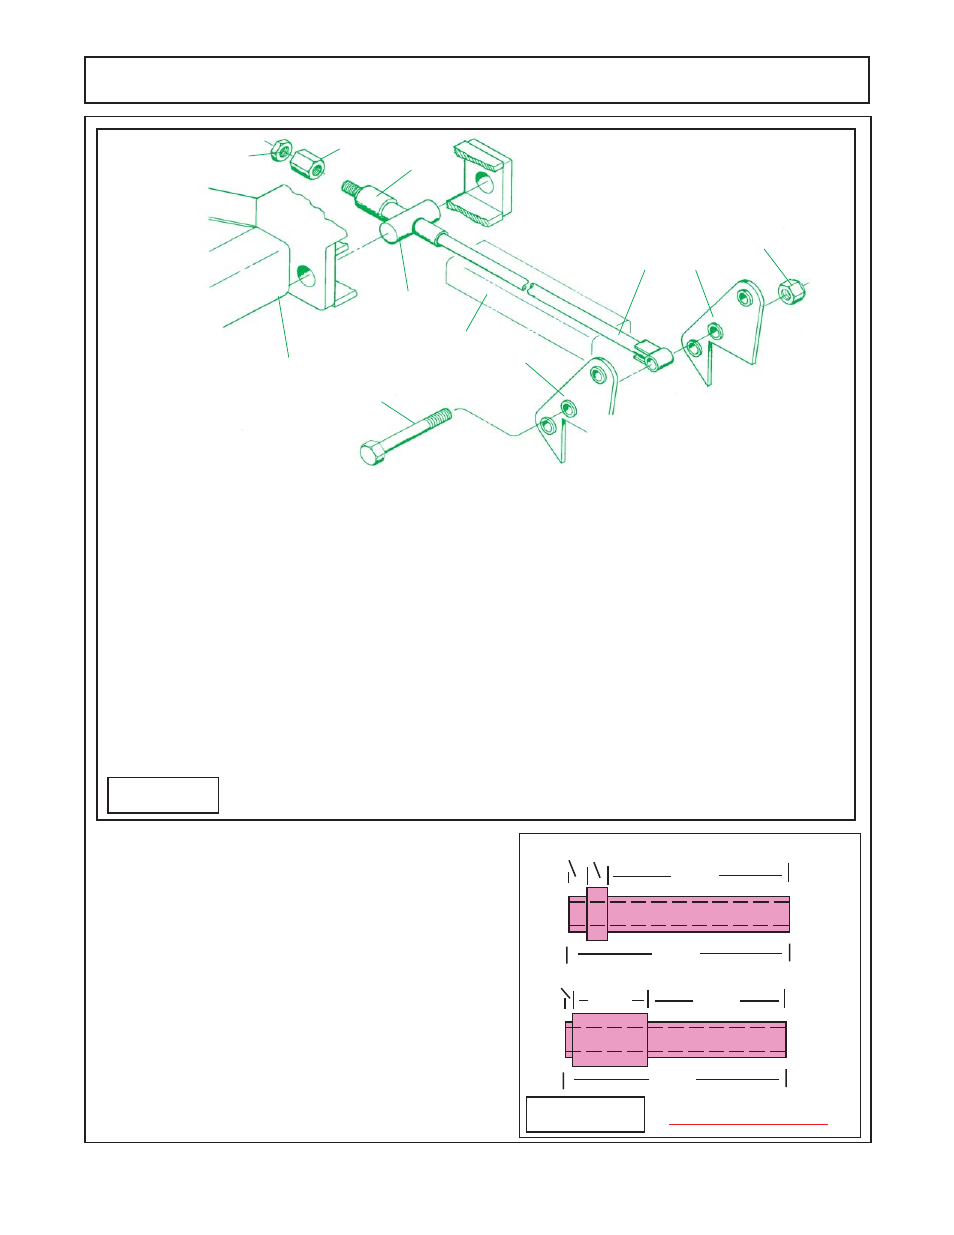
Leveling Control Rods Service & Repair
1/2"
6-7/8"
1/2"
7-7/8"
P/N 00758833
2-1/2"
5-1/8"
1/4"
7-7/8"
P/N 00755264
Figure 4 Item 3
Figure 4
Figure 5
1
2
3
4
5
6
7
8
9
10
9
Item
Qty
Qty
Description
Sng
Dbl
1
1
0
Level Rod Weldment (112" Long) Single Control Rod
0
2
Level Rod Weldment (110" Long) Dual Control Rod
2
1
2
Swivel Bar
3
1-ar
2-ar
Bushing Weldment (A - Dim. 2-1/2" Long)
See Figure 5
1-ar
2-ar
Bushing Weldment (A - Dim. 1/2" Long)
See Figure 5
4
1
2
Hex Adjusting Nut
5
1
2
Bolt, Hex Head
6
1
2
Locknut, Top Lock
7
ref
ref
Tongue Weldment
8
ref
ref
Center Section Weldment
9
ref
ref
Axle Wedment
10
1
1
Jam Nut
5.
Under stand the Control Rod (s) from rear axle to
tongue, quantity of parts will depend on single or
double control rods. The control rod connects to the
rear axle weldment
(item 9)
with a bolt and locknut
(item 6
), connects to the tongue with swivel bar
(item
2)
and bushing weldment
(item 3)
. There have been
two bushing weldments used, the same type that is
removed is the type that should be replaced
(figure 4
& 5 item 3).
The function of these control rods is to
keep the mower leveled from front to rear.
6.
Inspect the tongue clevis
(figure 1 through 3)
and
the control rod components
(figure 4 & 5)
to make
certain the components are correct and the mower is
connected to the tractor draw bar correctly
(figure 2).
The single control rod is shown or the RH side control rod, the LH control rod
when dual control rods are used will be the same components as the RH