Blade & blade carrier service & repair, Blade & blade carriers service & repair, Figure 3 figure 2 – Alamo HYDRO 15 User Manual
Page 134: Figure 1, Pan carrier bar carrier
HYDRO 15 (Service Manual) 09/06
© 2006
Alamo Industrial
Section 9 - 2
Blade & Blade Carriers Service & Repair
1.
Make certain the mower and tractor are secured in a safe and proper parked position, hydraulic (axle
and wings) lowered or secured by the transport bars. Make certain that tractor is safely parked according to
tractor manufacturers recommendations. Tractor should be secured (or dis-abled) in a way that it cannot be
started unless the serviceing technician is ready for it to be started.
Never get under any equipment unless
it is secured and supported by sufficent jackstands, DO NOT depend on hydraulics or brackets to support
equipment if you are going to be under it, this is important!
See the Operators Manual for recommended
Maintance schedules and recommendations.
2.
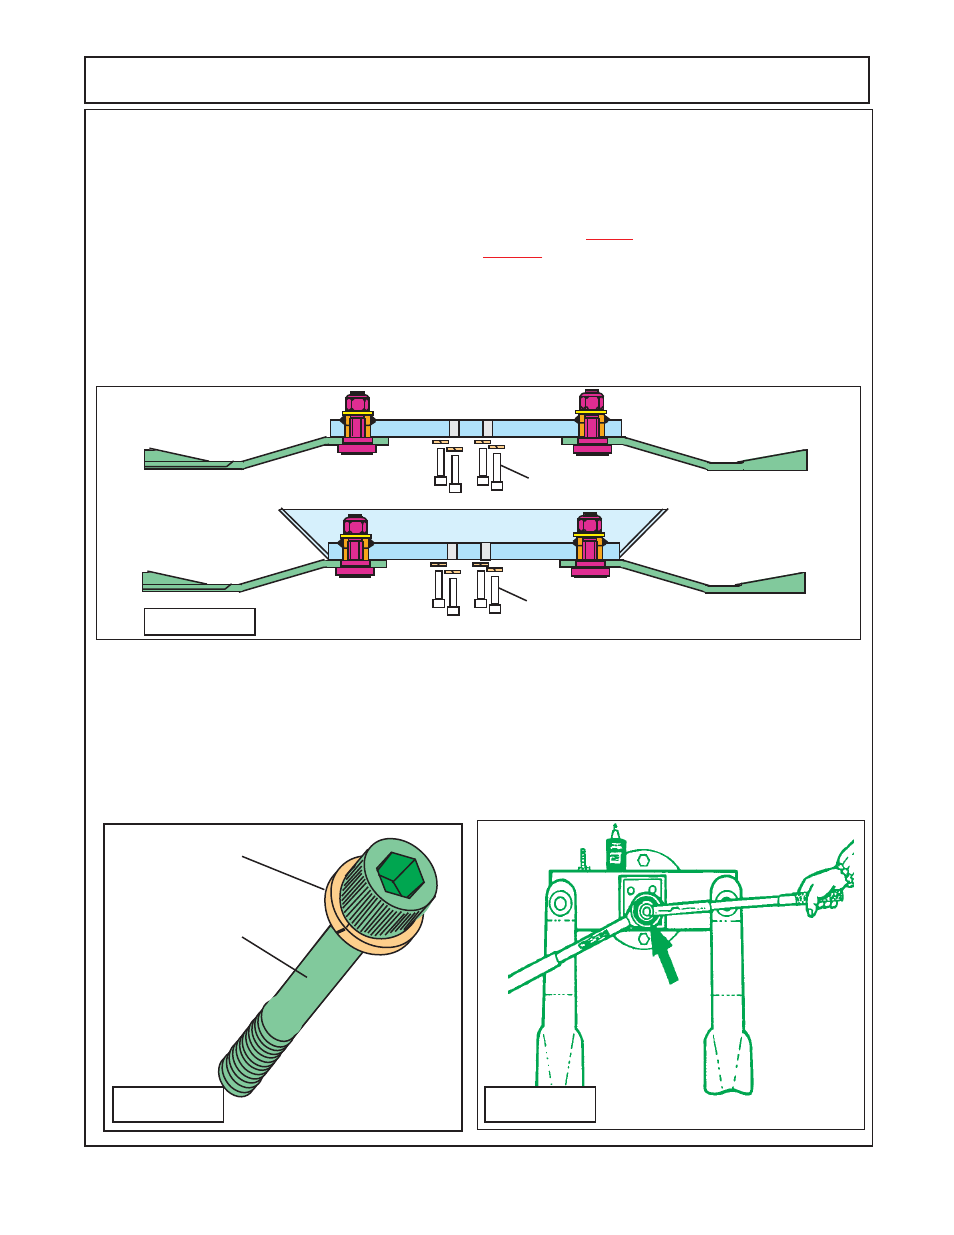
There are blade carriers option of bar carrier or pan carrier
(figure 1)
. The basic mounting design of the
connecting blade carriers to the spindles are the same, and will follow the same directions even with the fact
some of the components are different.
Blade & Blade Carrier Service & Repair
3.
Blade Carrier Spindle Mounting Bolts, These bolts hold the blade bar onto the spindle and must be
torqued when being installed. These are high strength Allen head bolts
(figure 2)
and should be replaced with
the proper length of bolt, never install a longer bolt than was removed. If longer bolts are installed damage will
occur . Always replace the lockwasher
(figure 2)
when reinstalling the bolts, it is not recommended to use
the lockwashers twice. When changing or installing a blade bar, place one drop of Loctite on threads of each
bolt before installing it in place. Tighten the bolts diagonally
(in an X pattern)
to assure that the blade bar
pulls up evenly.
Torque the bolts to 400 ft./lbs.
(figure 3)
in increments, example 300 ft lbs then 350 ft lbs, then the last
to 400 ft lbs. This will help to make certain the blade carrier is pulled up evenly to the spindle..
Figure 3
Figure 2
Allen Head Bolt
Lockwasher
Figure 1
Carrier Retaining Bolts & Lockwashers
123
123
123
12
12
12
12
12
123
123
123
12
12
12
12
12
123
123
12
12
12
12
12
12
123
123
123
12
12
12
12
12
Pan Carrier
Bar Carrier
Carrier Retaining Bolts & Lockwashers
123
123
12
12
12
12
12
12
123
123
12
12
12
12
12
12
12
12
12
12
12
12
12
12
12
12
12
12
12
12
12
12