Tire - wheel - hub service & repair, Figure 6 wheel hub re-assembly, Figure 7 – Alamo HYDRO 15 User Manual
Page 129: Figure 8
Section 8 - 5
HYDRO 15 (Service Manual) 09/06
© 2006
Alamo Industrial
Tire - Wheel - Hub Service & Repair
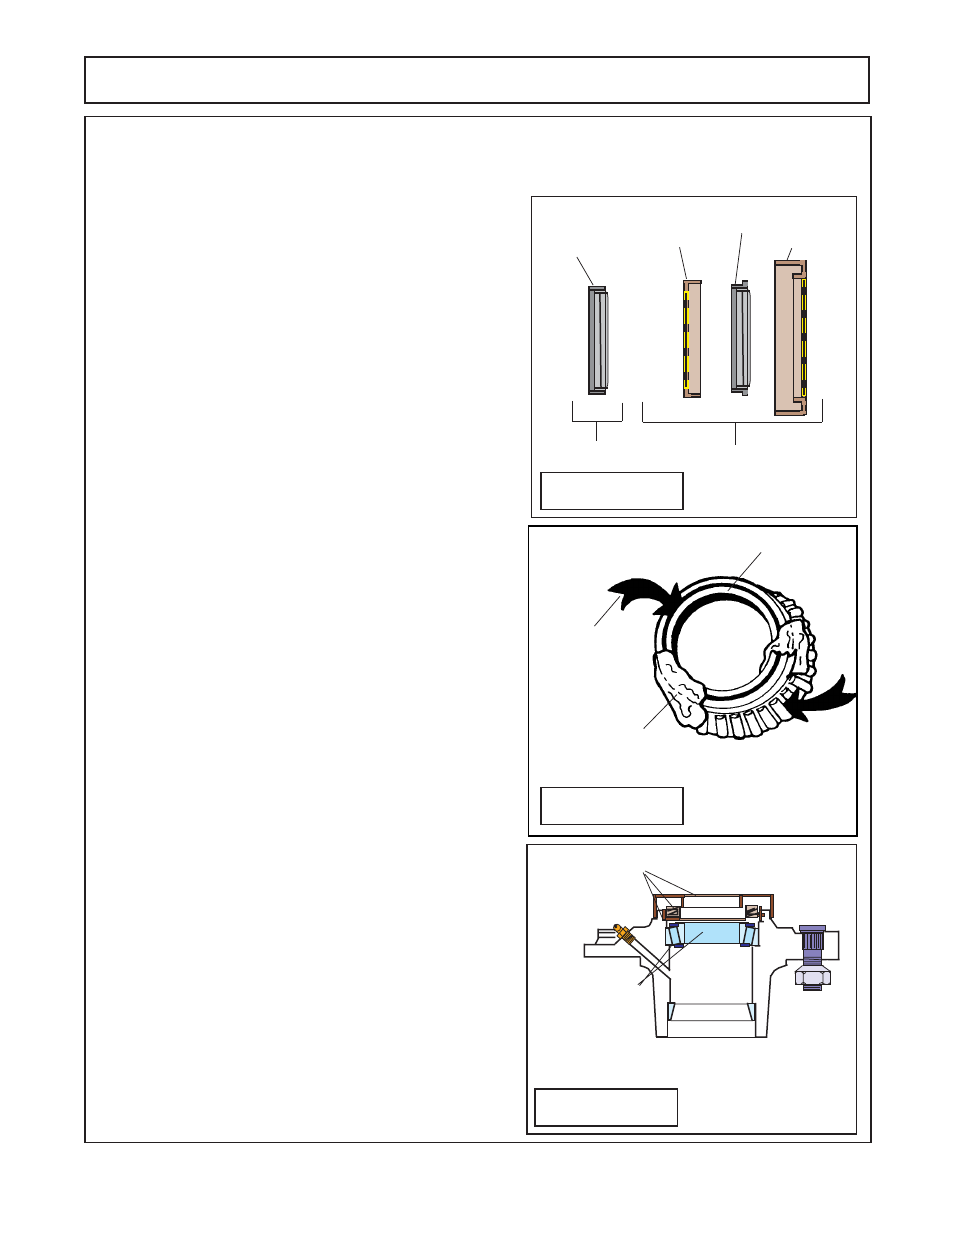
One Piece Seal
Seal
Adapter
Seal
Seal
Protector
Three Piece Seal
Seal
XXXX
XXXX
XXXX
XXXX
XXXX
XXXX
XXXX
X
XXXX
XXXX
XXXX
XXXX
XXXX
XXXX
XXXX
X
FIGURE 6
Wheel Hub Re-Assembly:
Important Note:
There are
two types of hubs (figure 3 &
4)
that have been used, these are best Identified by the
seal type. The earlier type has a one piece seal
(figure 3).
The later type has a three piece seal (seal, inner seal
adapter and outer seal protector). If the hub you are working
on has a one piece seal it must be re-assembled using the
components of the one piece seal hub. If it is a three piece
seal
(figure 4)
it must use components for three piece seal
hub. The parts for the two different hubs (bearings or seals)
won't interchange. Check which you have before ordering
parts. See
figure 3 &
4
for items referenced in the steps of
dis-assembly.
1.
Inspect the wheel hub and hub components
(figure 3 &
4 item 1 through 14 )
, they should not have noticeable wear
or wear that in any way would make them un-serviceable.
Bearing Cones and cups must be replace together, do not
use a used bearing part against a new bearing part, the
bearings will fail as bearings wear on the cones and cups to
match each other. Lay all the new and/or serviceable parts
out on a clean surface
(figure 5) .
2.
Install new bearing cups
(items 9 & 10)
into hub if
needed. If the cups need to be replace they should be
pressed in or installed with a driver designed for bearing
cup installation
(figure 3 & 4)
. cups are fully seated into the hub squarely and completely (figure 8). 3. Pack Wheel bearing Cones (items 6 & 7) . This can be done with a bearing packing tool or it can be done by hand. the roller cage (figure 7) all the way around and completely. If grease is not pushed in this is important! Lay the Hub with the outer bearing opening down and insert the inner bearing cone that has (figure 8). 4. Install wheel seal, Now is when the correct seal must chosen and installed. If old style 1 piece seal (figure 5 & 6) is used, drive the seal in to the wheel hub using the correct seal driver. Make If new style 3 piece seal (figure 6 & 8) is used, coat the OD of seal adapter with a Locktite type sealer. Drive the (figure 8). Coat the ID of the seal with light coat of grease. FIGURE 7 Roller Cage Grease must be pressed between rollers and inner race and it must be pressed out around rollers FIGURE 8 Innser Bearing Cone with inner bearing cup installed 3 Piece Wheel Seal
Grease must be pushed through
to bearings around rollers and out the top and around rollers
of bearing cones, they are not properly packed with grease,
been properly packed with grease
certain the seal ID has light coat of grease on it.
seal adapter into the hub with the open side up, this open
side is the recess for the seal. Make certain seal adapter is
seated into hub completely. Insert the seal into the seal
adapter and drive it into the adapter until it is seated