9 clean the belt surface – QuickLabel Vivo! Touch User Manual
Page 131
Maintenance
Vivo! Touch User Guide
117
5
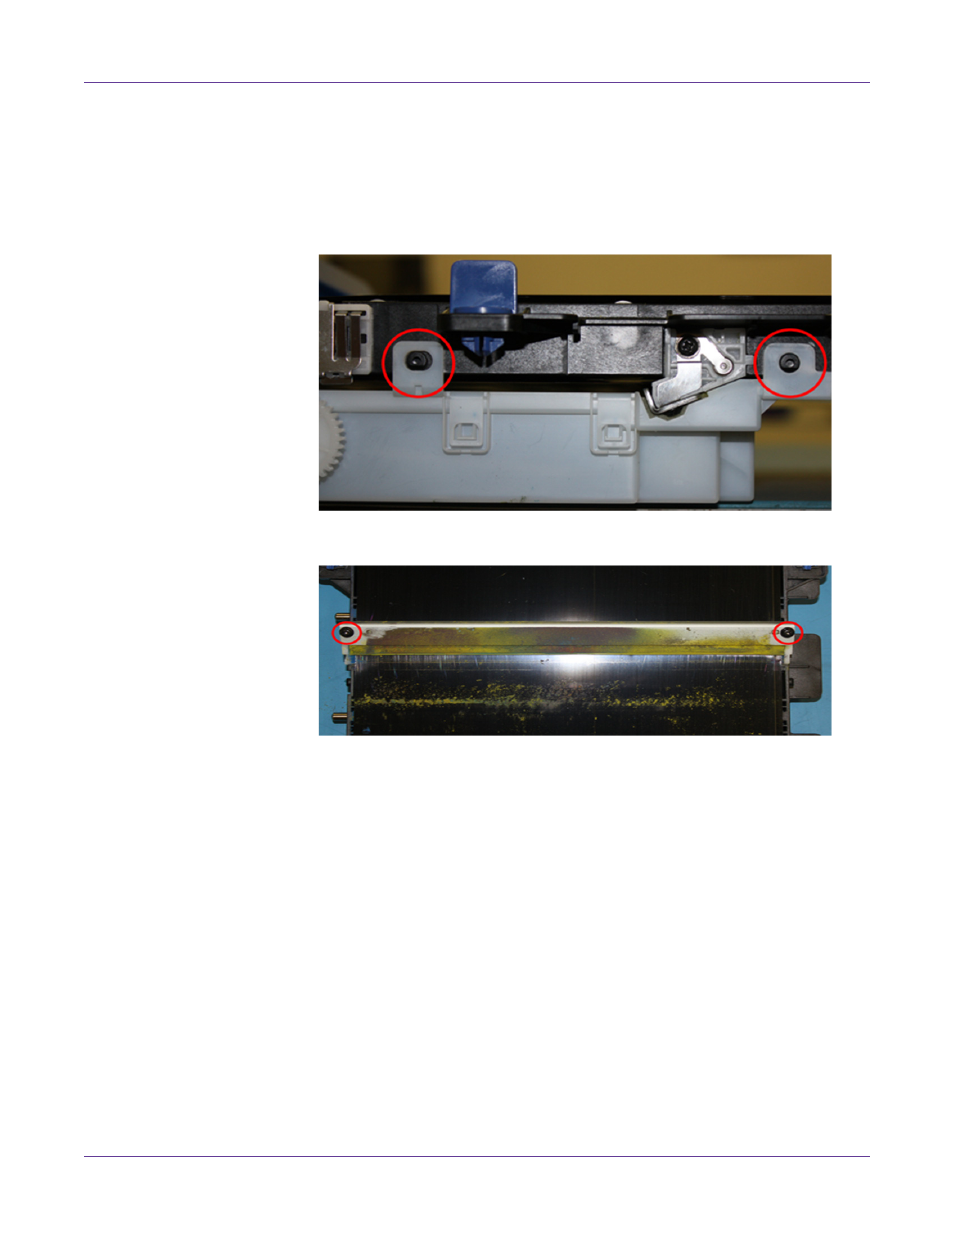
The waste toner collection reservoir is secured by four plastic pins (two on each
side). Carefully disengage the tabs on the toner collection reservoir (with a small,
slotted screwdriver) and remove the reservoir from the belt assembly.
Caution: Keep the image belt upright to prevent toner spillage.
Note: Use caution when disengaging the tabs, as they are fragile.
6
Remove the two screws that hold the wiper in place.
7
Clean the edge of the wiper with a lint-free cloth and/or isopropyl alcohol. If
adhesive is present, you can use an adhesive cleaner solvent that is safe for plastic
and metal surfaces. If you use a solvent, clean the solvent residue with isopropyl
alcohol.
8
Reassemble the wiper and toner collection reservoir. The wiper holder has two
pins that are used to align the wiper. Ensure the wiper is seated properly before
securing it into place.
9
Clean the belt surface.
10
Lower the image belt into place, with the blue bar at the front and the drive gear
towards the rear of the printer. Insert the drive gear into the corresponding gear in
the rear left corner inside the printer. Lower the belt flat inside the printer.
Turn the two blue image belt fasteners clockwise. This will lock the belt to the
printer chassis.
11
Replace the four image drums, complete with their toner cartridges, into the
printer in the correct sequence: cyan (nearest the media exit), magenta, yellow, and
black (nearest the media entry).