Futaba 4PX 2.4GHz FASST T-FHSS S-FHSS User Manual
Page 38
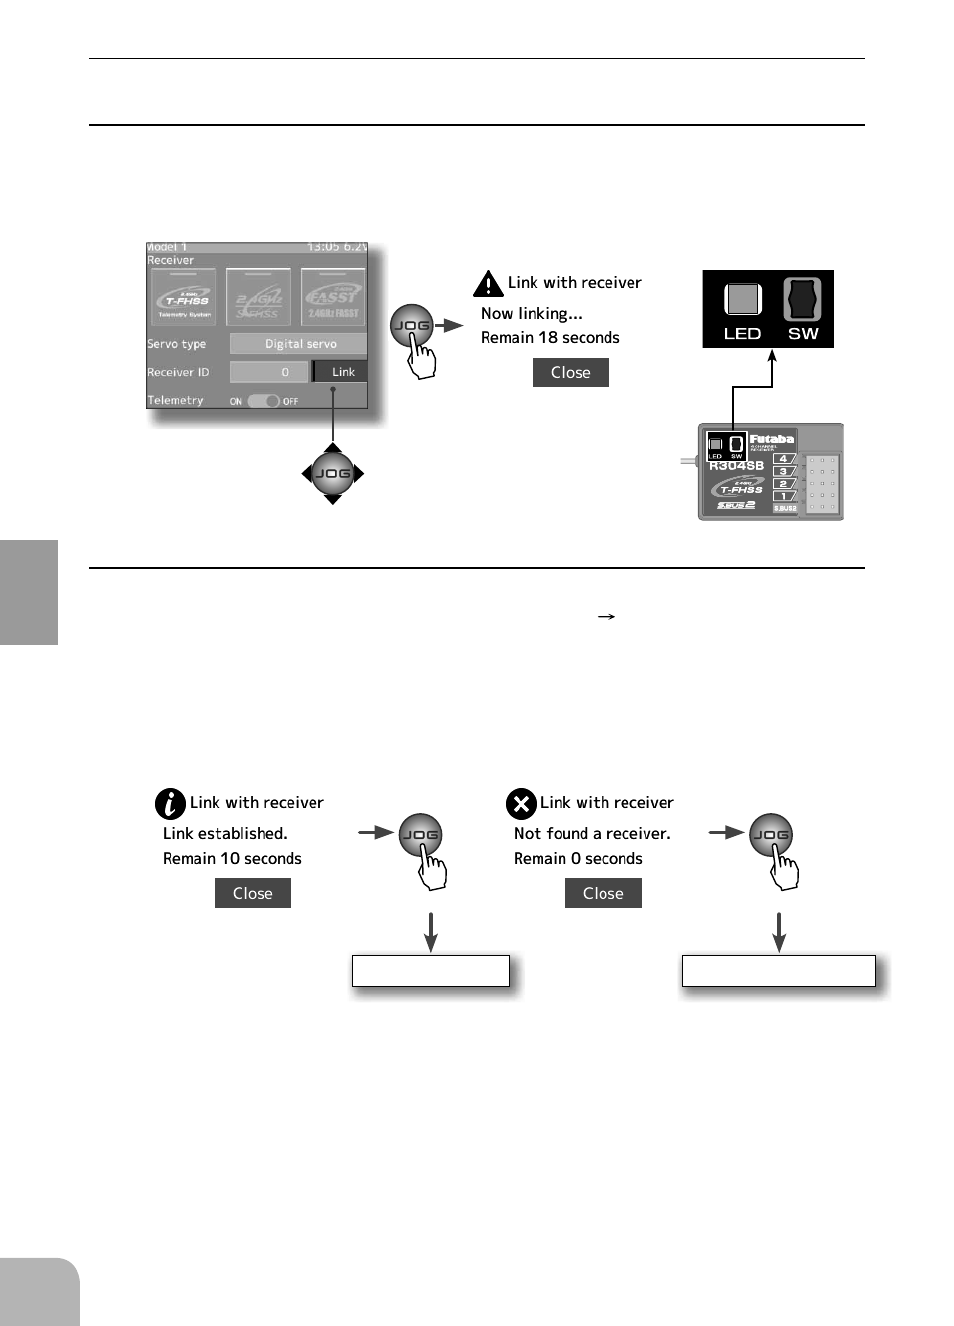
Link failed
Link established
R304SB
The link is completed.
Repeat the linking operation
Press
Press
Press
38
In
itial S
e
t-
Up
3
Bring the transmitter and receiver within 50cm of each other (antennas do not touch) and
turn on the receiver power.
4
Move the cursor to "Link" by T4PX transmitter (JOG) button up or down operation. When
the (JOG) button is pressed, a chime will sound and the T4PX will enter the link mode for
20 seconds. During this 20 seconds link mode, press the receiver tactile switch for at least 2
seconds.
5
During the 20 seconds link mode, press the receiver tactile switch for at least 2 seconds.
The LED blinks red and then changes to a greenish red
green steady light. When the
T4PX makes a beeping sound and the message "Link with receiver" appears on the screen,
release the receiver tactile switch. This ends reading of mutual ID and displays the memo-
rized receiver ID number on the T4PX screen. If the "Receiver not found" error screen is dis-
played, linking failed. Check the set contents and repeat the linking operation.
*
The T4PX and a telemetry system T-FHSS receiver (R304SB, etc.) memorize the IDs linked
last at each model memory. Since only one receiver ID is memorized at each model mem-
ory, multiple T-FHSS receivers cannot be used with the same model memory. When a re-
ceiver at the same model memory is changed, re-linking is necessary even if the receiver is
already linked with the transmitter.
When using multiple T-FHSS telemetry receivers, link each receiver with each T4PX model
memory. However, one receiver can be linked with multiple model memories. The telemetry
function communication status can be checked at the T4PX home screen.