Local management screen hierarchy, Accessing local management, Establishing a telnet connection – Cabletron Systems HSIM-W6 User Manual
Page 135
Chapter 7: General Configuration Using Local Management
HSIM-W6 User’s Guide
121
3.
Repeat steps 1 and 2 until the Main Menu screen displays.
4.
Use the arrow keys to highlight the EXIT command at the bottom of the Main Menu screen.
5.
Press ENTER. The HSIM-W6 Local Management Password screen displays and the Local
Management session ends.
Local Management Screen Hierarchy
Local Management consists of a series of menu screens that provide a path to each of the Local
Management function screens. Navigate through Local Management by selecting items from the
menu screens.
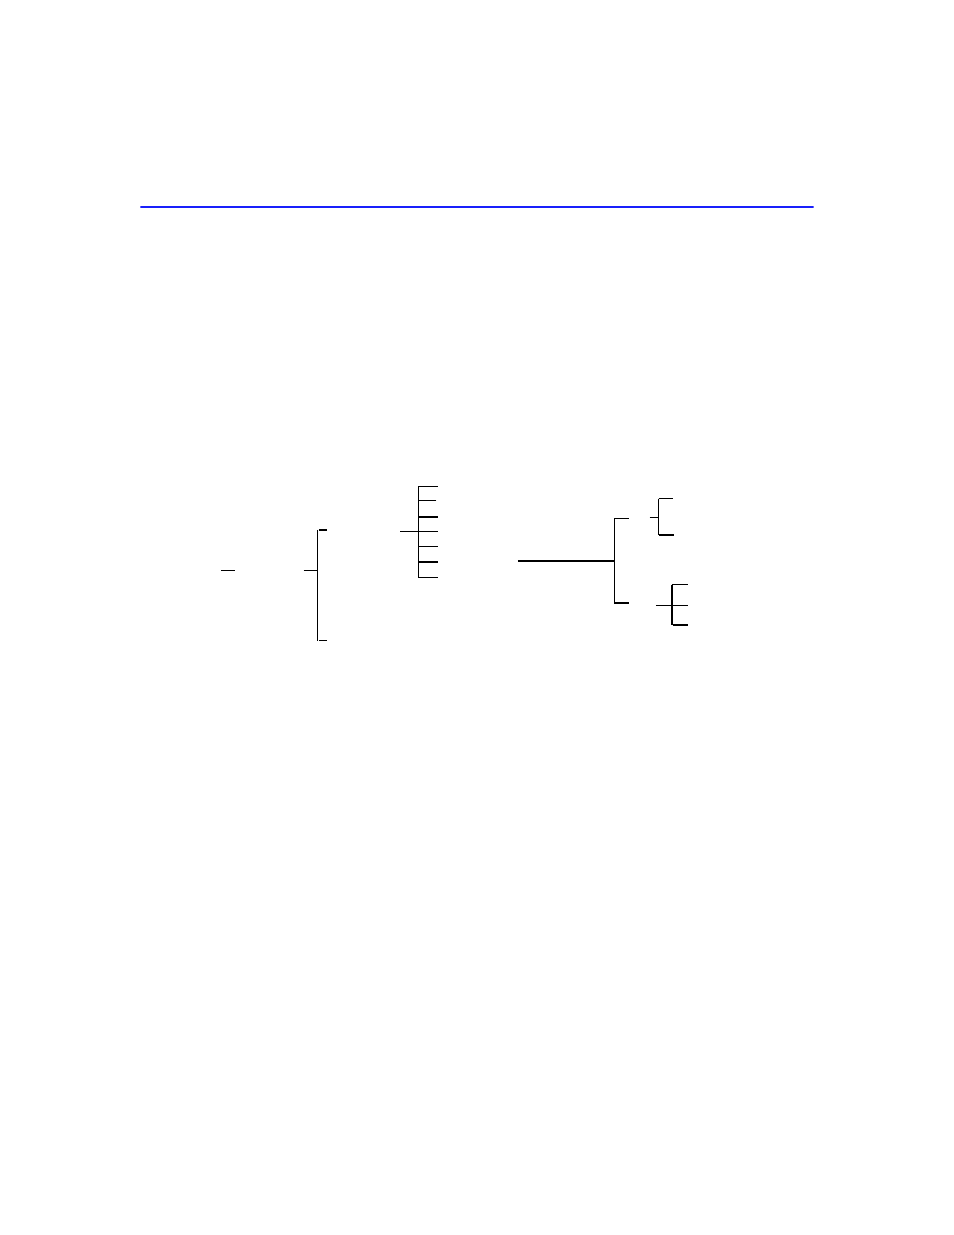
shows the hierarchy of the Local Management screens.
Figure 50
Hierarchy of Local Management Screens
Accessing Local Management
This section explains how to access and use the Local Management menu screens. Menu screens
provide a path to the setup screens and status screens.
Establishing a TELNET Connection
The HSIM-W6 is shipped with a temporary IP address of 192.168.254.254 so that your computer
can communicate with it over your Local Area Network (LAN) through a TELNET connection.
However, to establish a TELNET connection, your computer must be on the same subnet as the
HSIM-W6. Cabletron Systems recommends that you assign a temporary IP address of
192.168.254.253 to your computer to ensure that both devices are on the same subnet. TELNET
connections to the host device require the community name passwords assigned at the SNMP
Community Names screen or if you are doing an initial configuration, use the default password
public. Refer to the SNMP Community Names section of this manual for additional information
about community names.
Main Menu
Password
Setup Menu
System Level
SNMP Community Names
SNMP Traps
MIB Navigator
Flash Download
Bridge Setup
Router Select
WAN Setup
IP
IPX
IP Configuration
IP RIP
IPX Configuration
IPX RIP
IPX SAP