Configuring ip and netmask information, Figure 7 network tab, 7 network tab – HP Brocade 4Gb SAN Switch for HP BladeSystem c-Class User Manual
Page 44
44
Managing your fabrics, switches, and ports
Configuring IP and netmask information
When you configure IP and netmask information for the Core Switch 2/64 or SAN Director 2/128, the
configuration is on a logical-switch basis. This means that for each logical switch, you must also configure
IP and subnet mask information individually.
To configure IP and netmask information:
1.
Launch the Switch Admin module as described on
2.
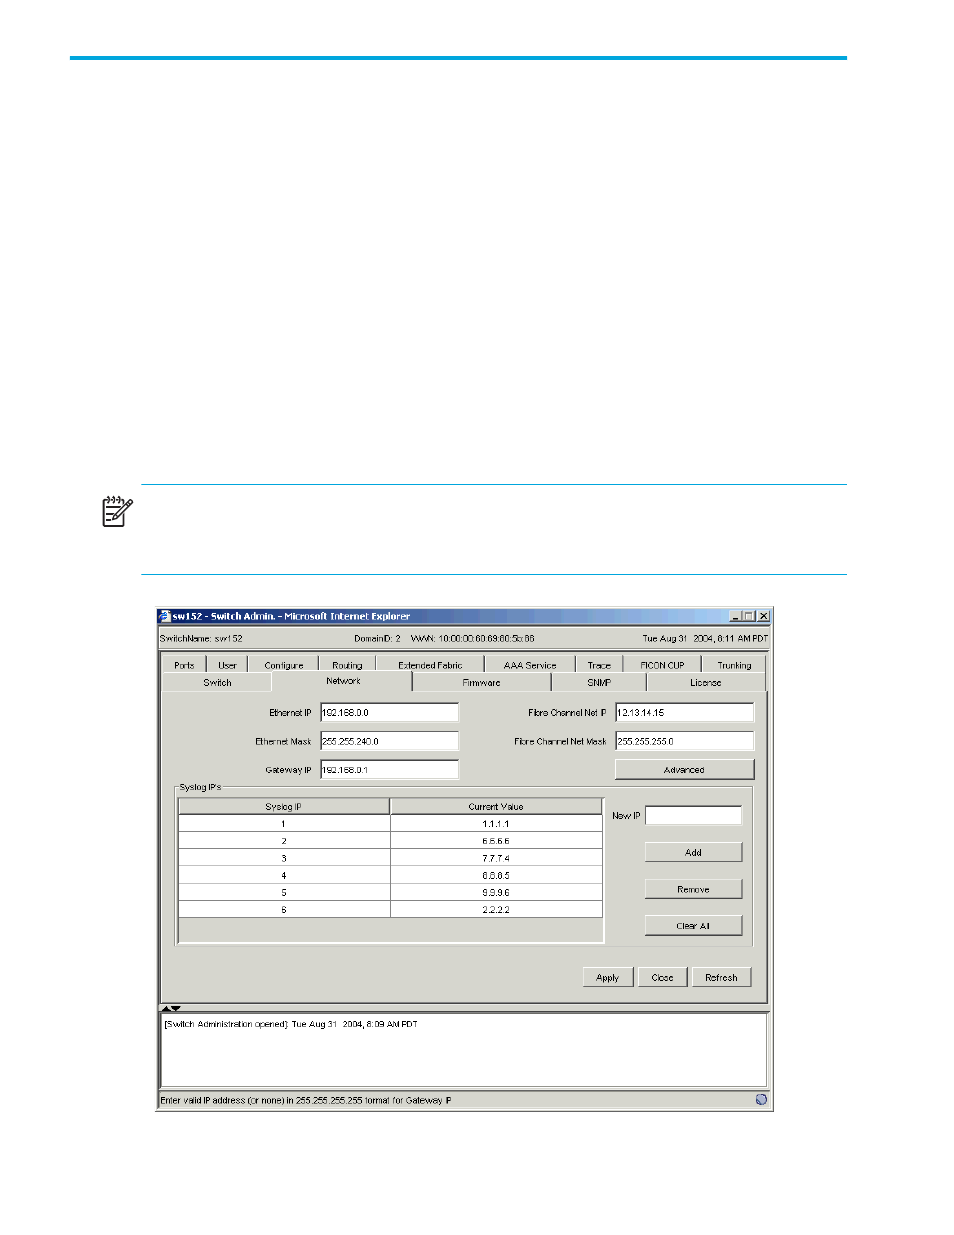
Click the Network tab (see
).
3.
Type a new value in the appropriate field (for example,
123.123.123.123
).
4.
For the Core Switch 2/64 or SAN Director 2/128 only:
a. Click Advanced.
b. Enter a valid IP addresses for the Ethernet IP and subnet mask for CP0 and CP1.
c. Click OK to return to the Network tab.
5.
Click Apply.
6.
Exit and relaunch Advanced Web Tools to continue working.
NOTE:
When changing the Ethernet IP/netmask, the Gateway IP, or the Fibre Channel net IP/netmask
from Advanced Web Tools, there is a normal loss of network connection to the switch. If the IP properties
changed, you must close all current windows and restart Advanced Web Tools with the new IP address.
Figure 7
Network tab