Telos Zephyr Xstream User Manual
Page 275
USER’S MANUAL
Section 13: Deep Tech Information and Troubleshooting 263
It is possible to shift the nominal inputs levels 4 dB lower (i.e. 4 dB more sensitive) therefore
resulting in 0dBu(Professional)/‐15dBu(Consumer) levels. This is done by changing JP5 & JP6 on
the audio board. See below for the possible settings.
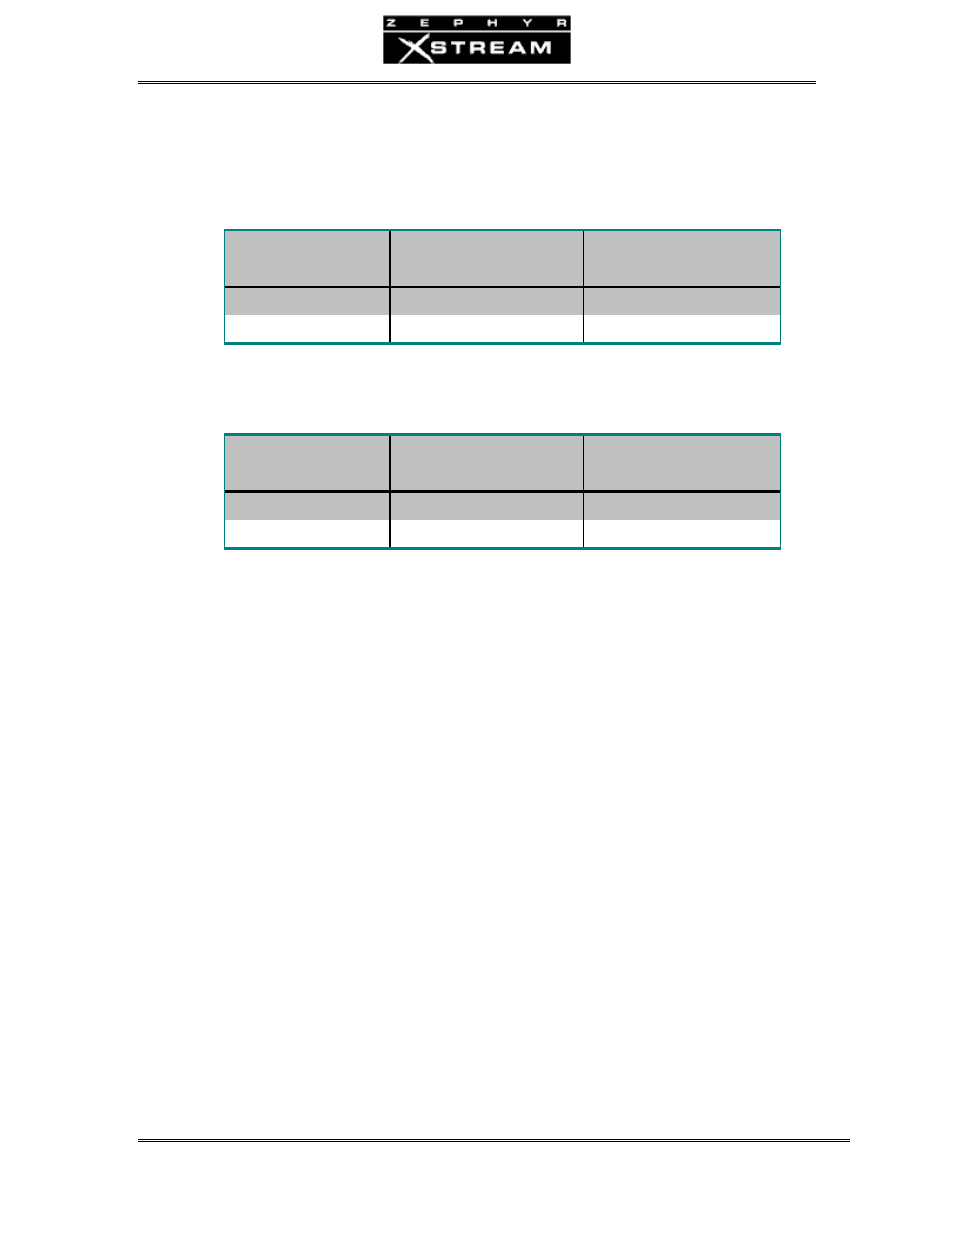
Early production units:
JUMPER SETTING
(JP5&6)
Menu Setting:
Professional
Menu Setting:
Consumer
Right Pins
+4 dBu nom. (+22 clip)
-11 dBu nom. (+7 clip)
Left Pins
0 dBu nom. (+18 clip)
-15 dBu nom. (+3 clip)
Most units have the following jumpers:
JUMPER SETTING
(JP10 & 11)
Menu Setting:
Professional
Menu Setting:
Consumer
Pins 1&2 and 5&6
+4 dBu nom. (+22 clip)
-11 dBu nom. (+7 clip)
Pins 2&3 and 4&5
0 dBu nom. (+18 clip)
-15 dBu nom. (+3 clip)
To change the input level operating range:
1. Remove the top cover as described above.
2. With the front of the Xstream facing you, look for the AES/EBU socket PC
board protruding towards you from the rear panel. Below this board, at the
bottom of the chassis, you will find jumper blocks JP5 & JP6 (early hardware
revs) or JP10 & 11 (most units). Set the jumpers as desired (see tables
above).
3. Replace the top cover as described above.
4. Set the Input Level Option in the AUDIO menu to “Consumer” or
“Professional” as desired (see table, above).
Assigning the XLR outputs to monitor mix 1 (MX and MXP version only)
Newer model MX/P units allow the XLR outputs to be assigned to Local Mix 1 instead of Local
Mix 2. To change this setting:
1. Remove the top cover as described above.
2. Note that there are two boards in the unit. The board to the left (when
viewed from the front of the unit) is the MIC Audio Board.