Control recording using av studio – Epiphan Pearl Mini Live Video Production System User Manual
Page 34
Pearl Mini User Guide
Control recording using AV Studio
3. Copy the Device ID for the channel you want to pair.
4. On another tab in your browser, login to your AV Studio account at
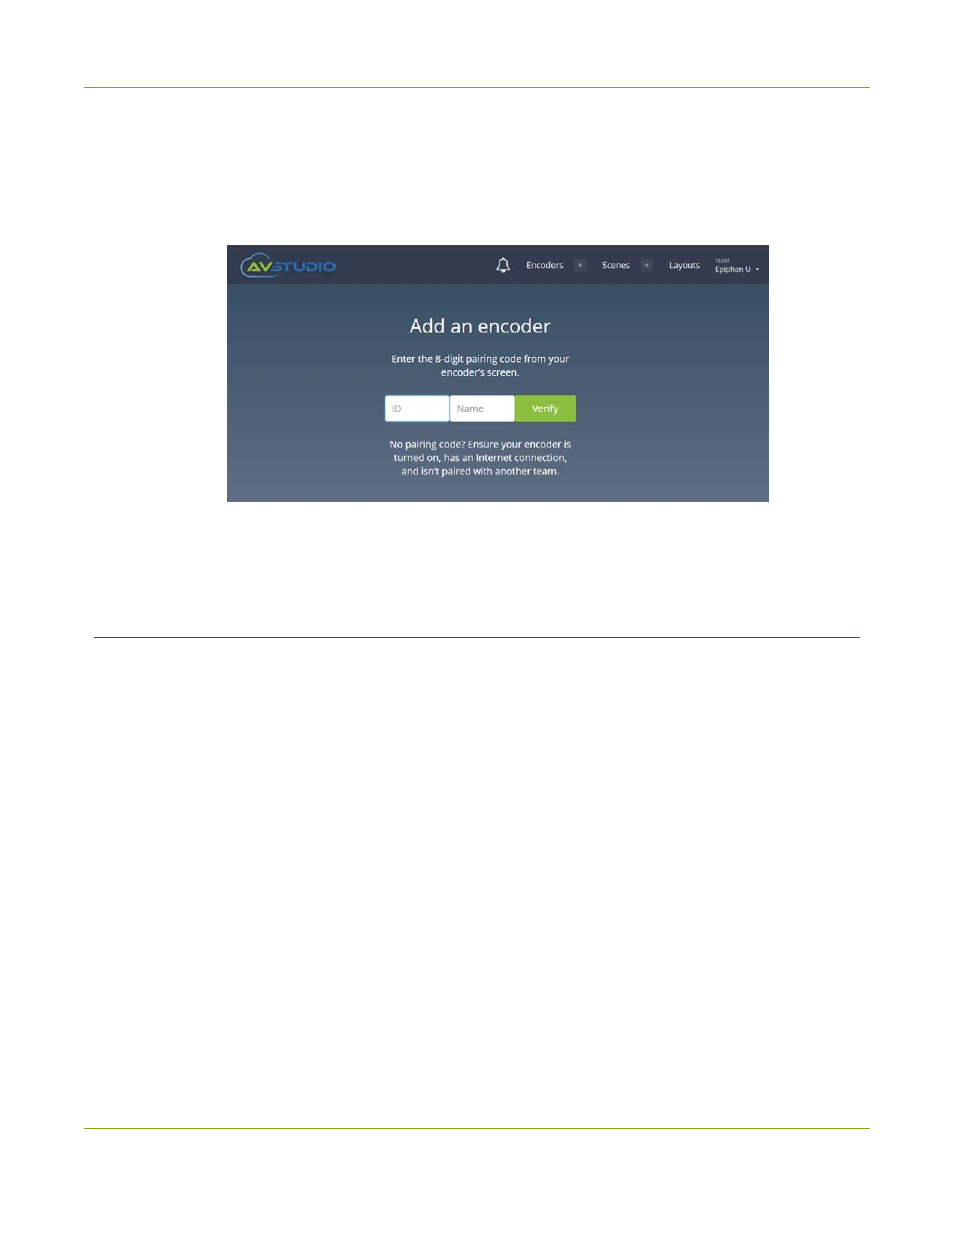
5. In the top header bar, click the plus sign beside
Encoders
. The encoder pairing page opens.
6. Paste the Device ID in to the ID field and give your channel a name, then click
Verify
.
Your channel is now paired with your AV Studio account. It appears on the Encoders page in AV Studio
and the channel's pairing status updates to
paired
on the AV Studio status page in the Admin panel.
Control recording using AV Studio
You can start and stop recording the channels on Pearl Mini remotely from AV Studio.
Important considerations
l
The file recording type for the channel you are controlling and recording using AV Studio must be set to
MP4 and the maximum file size supported is 500 MB. To set the recording type and maximum file size
for a channel, see
Configure recording settings, file size and type
l
Do not configure AFU for a channel that is paired with AV Studio.
l
Recordings do not automatically upload to AV Studio. You must manually upload recordings from
within AV Studio if you want to do any post-production on them using AV Studio. Some costs are
incurred when uploading recordings to a pay-as-you-go AV Studio account.
l
Deleting recordings using the Admin panel that have already been uploaded to AV Studio does not
remove the recordings from AV Studio.
l
Deleting a channel using the Admin panel that it is paired to AV Studio causes the encoder to
permanently go offline in AV Studio. Recordings that were previously uploaded are still available in AV
Studio until you delete the encoder in AV Studio.
To start and stop recording using AV Studio:
23