Manage ca and self-signed certificates – Epiphan Pearl Mini Live Video Production System User Manual
Page 113
Pearl Mini User Guide
Manage CA and self-signed certificates
8. Click
Apply
when you're done.
9. Reboot Pearl Mini when prompted. After the system has finished rebooting, log back in to the Admin
panel as
admin
and verify that all changes were applied.
If you need to delete the user certificate or private key, click
Delete certificate
.
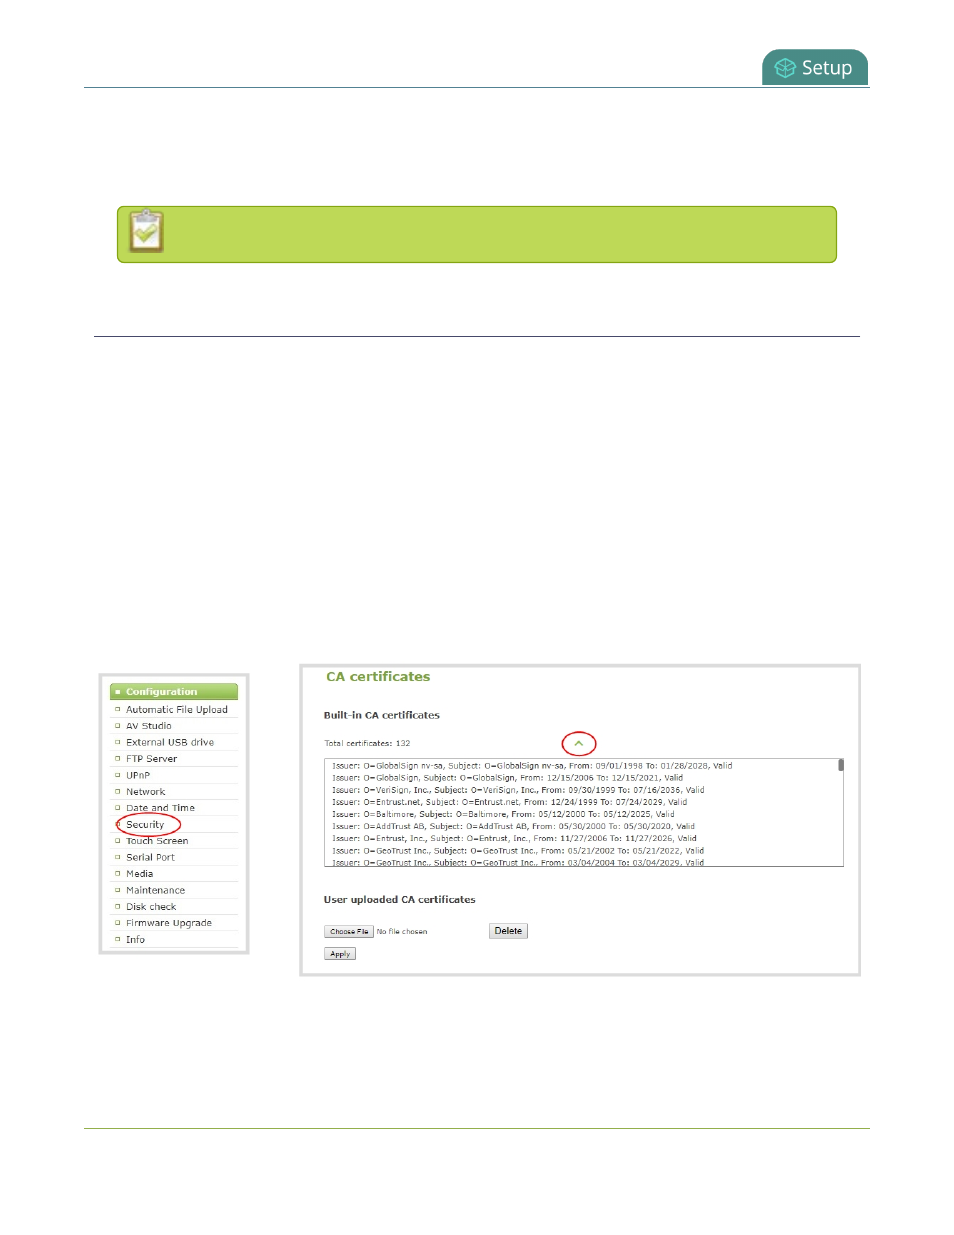
Manage CA and self-signed certificates
You can view the list of CA and self-signed certificates that come preloaded on Pearl Mini. CA and self-signed
certificates are used for server authentication if
Verify server's identity
is selected when 802.1x network
Configure 802.1x network security and manage user certificates
You can add more CA signed and self-signed certificates using the Admin panel, as well as delete any
certificates that you've uploaded. You cannot delete any of the built-in CA certificates that came preloaded on
Pearl Mini.
To manage CA and self-signed certificates on Pearl Mini using the Admin panel:
1. Login to the Admin panel as
admin
.
2. From the Configuration menu, select
Security
. The Security configuration page opens.
3. Under CA certificates, click the arrow head to expand the list of built-in CA and self-signed certificates
that came preloaded on Pearl Mini.
4. To upload a new CA or self-signed certificate, click
Choose File
and select the certificate you want to
upload. Then click
Apply
. The uploaded certificate is added to a list of user uploaded CA certificates.
102