Pencil tool options, Drawing flares, Drawing – Adobe Illustrator CC 2015 User Manual
Page 87: Flares
82
Drawing
Last updated 6/5/2015
Note: Depending on where you begin to redraw the path and in which direction you drag, you may get unexpected
results. For example, you may unintentionally change a closed path to an open path, change an open path to a closed
path, or lose a portion of a shape.
Pencil tool options
Double-click the Pencil tool to set any of the following options:
Fidelity
Controls how far you have to move your mouse or stylus before a new anchor point is added to the path. The
higher the value, the smoother and less complex the path. The lower the value, the more the curves will match the
pointer’s movement, resulting in sharper angles. Fidelity can range from 0.5 to 20 pixels.
Smoothness
Controls the amount of smoothing applied when you use the tool. Smoothness can range from 0% to
100%. The higher the value, the smoother the path. The lower the value, the more anchor points are created, and the
more the line’s irregularities are preserved.
Fill New Pencil Strokes
(Illustrator only) Applies a fill to pencil strokes you draw after selecting this option, but not to
existing pencil strokes. Remember to select a fill before you draw the pencil strokes.
Keep Selected
Determines whether to keep the path selected after you draw it. This option is selected by default.
Edit Selected Paths
Determines whether or not you can change or merge a selected path when you are within a certain
distance of it (specified with the next option).
Within: _ pixels
Determines how close your mouse or stylus must be to an existing path in order to edit the path with
the Pencil tool. This option is only available when the Edit Selected Paths option is selected.
Drawing flares
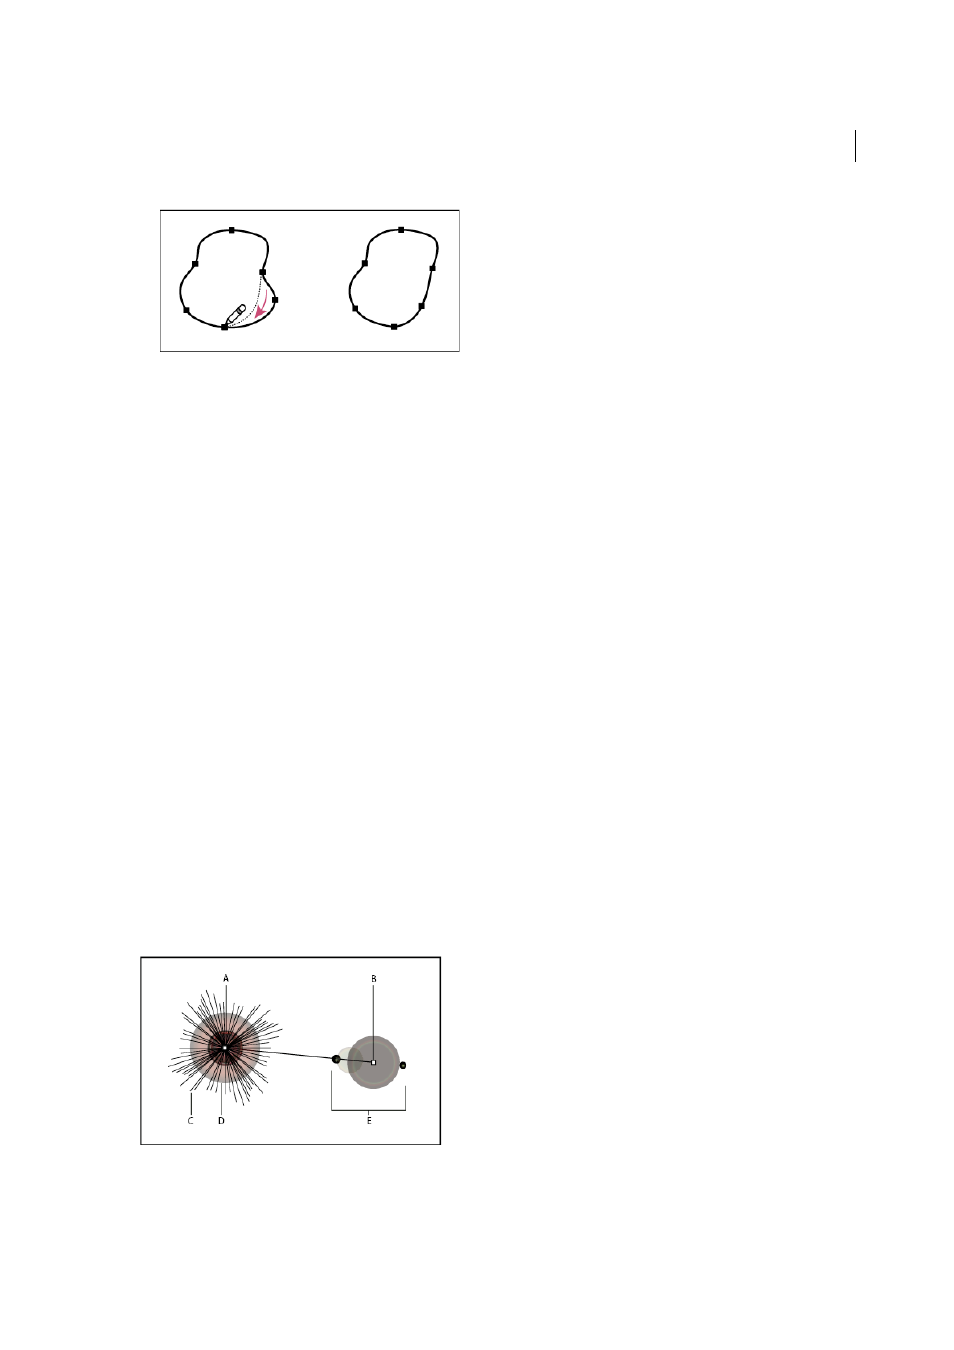
The Flare tool creates flare objects with a bright center, a halo, and rays and rings. Use this tool to create an effect similar
to a lens flare in a photograph.
Flares include a center handle and an end handle. Use the handles to position the flare and its rings. The center handle
is in the bright center of the flare—the flare path begins from this point.
A Center handle B End handle C Rays (shown black for clarity) D Halo E Rings
To learn more about creating and editing flares, see this topic in web Help.