Adept s600 Cobra User Manual
Page 113

Chapter 8: IP-65 Option
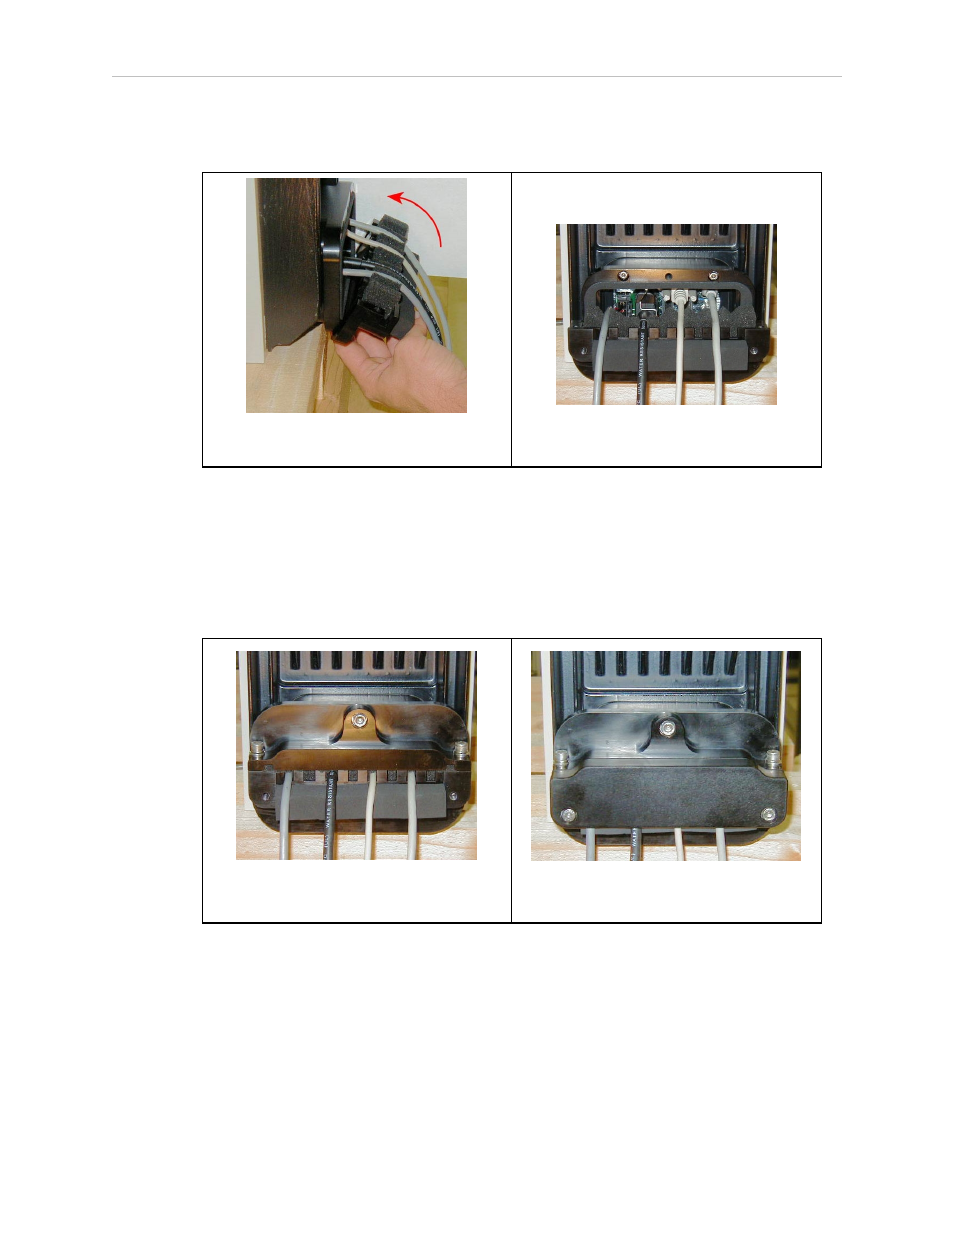
c. Finally push down on the flange to secure it against the housing. See Figure 8-5
for the lower flange in the installed position.
Figure 8-4. Installing Lower Flange
Figure 8-5. Lower Flange in Position
5. Seat all of the cables by pushing down into the foam on the lower flange.
6. Attach the upper flange to the lower flange using two M6 x 20 screws, two M6 lock
washers, and two M6 flat washers. Make sure none of the cable are pinched or crimped
when installing the upper flange.
7. Attach the flange assembly using one M6 x 20 screw, one M6 lock washer, and one M6
flat washer. See Figure 8-6.
Figure 8-6. Upper Flange Installed
Figure 8-7. Splash Guard Installed
8. Install the splash guard using two M6 x 20 screws, two M6 lock washers, and two M6
flat washers. See Figure 8-7.
8.3 Robot Outer Link Cover Removal and Reinstallation
The robot outer link cover has special sealing hardware to ensure nothing can enter the inside
of the robot. If you need to remove the outer link cover from the robot for any reason, please
follow the procedures below.
Adept Cobra s600/s800 Robot, User’s Guide, Rev L1
Page 113 of 128
