Cub Cadet I-Beam Style User Manual
Page 79
3-60
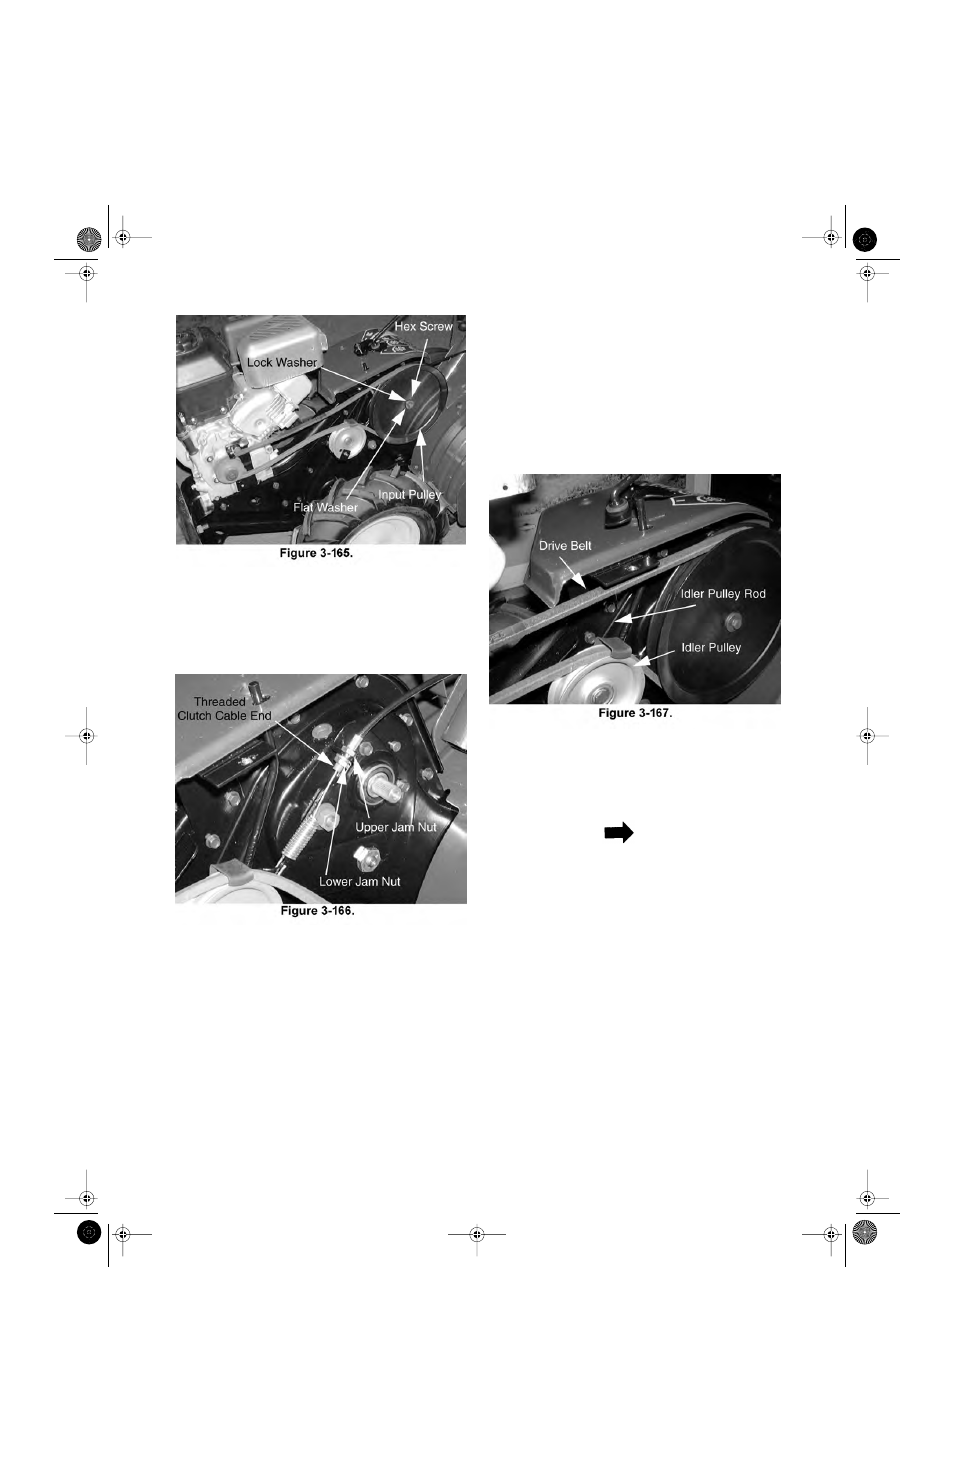
9.Remove the input pulley from the input shaft.
10.Loosen the lower jam nut securing the
threaded clutch cable end to the tiller case
bracket using two 1/2" wrenches. See Figure
3-166.
11.Rotate the lower hex nut until it is flush with the
threaded clutch cable end and tighten the upper
jam nut to the bracket.
12.Secure the upper jam nut to the tiller case
bracket using two 1/2" wrenches.
13.Assemble the input pulley and the belt cover to
the tiller in the reverse order above.
IMPORTANT: Perform the Neutral Clutch
Cable Adjustment section and the Primary For-
ward Clutch Cable Adjustment section prior to
operating the tiller.
Idler Pulley Rod Adjustment
IMPORTANT: After the Primary and Secondary
Forward Clutch Cable Adjustment sections
have been performed, the belt may be exces-
sively stretched. When the belt stretches, the
idler pulley rod may need to be adjusted. See
Figure 3-167.
1.Make certain the engine is off and the clutch
bail is released.
2.Shift the gear selector to all the forward
modes.
NOTE
If the indicator bracket touches the idler pulley
rod (with the clutch control bail disengaged),
perform the following steps:
3.Disconnect and ground the spark plug wire
against the engine.
4.Remove the hairpin and clevis pin securing the
left wheel assembly to the wheel shaft.
5. Slide the left wheel assembly away from the
belt cover.
6.Remove both torx screws securing the top of
the belt cover to the tiller casing using a male
T27 torx. See Figure 3-168.
Tillers.fm Page 60 Tuesday, February 19, 2002 1:28 PM