Chore performer chipper shredder vacuum – Cub Cadet I-Beam Style User Manual
Page 110
4-1
4
REPLACING THE CHIPPER BLADE/REMOVAL AND
REINSTALLATION OF THE IMPELLER ASSEMBLY:
Figure 4-1.
NOTE
Prior to performing impeller removal, remove
the vacuum bag or blower chute from the unit.
1.
Remove the front hub caps.
2.
Remove the shoulder screws securing the
front wheels using a 3/4" socket.
NOTE
There is a wave washer located on the outside
of the wheel and a bell washer on the inside of
the wheel. The cupped side of the bell washer
rests against the pivot arm.
3.
Remove the shoulder screws securing the
pivot arms and height bracket adjusters (not
shown) to the front support brace using a 3/8"
socket. See Figure 4-2.
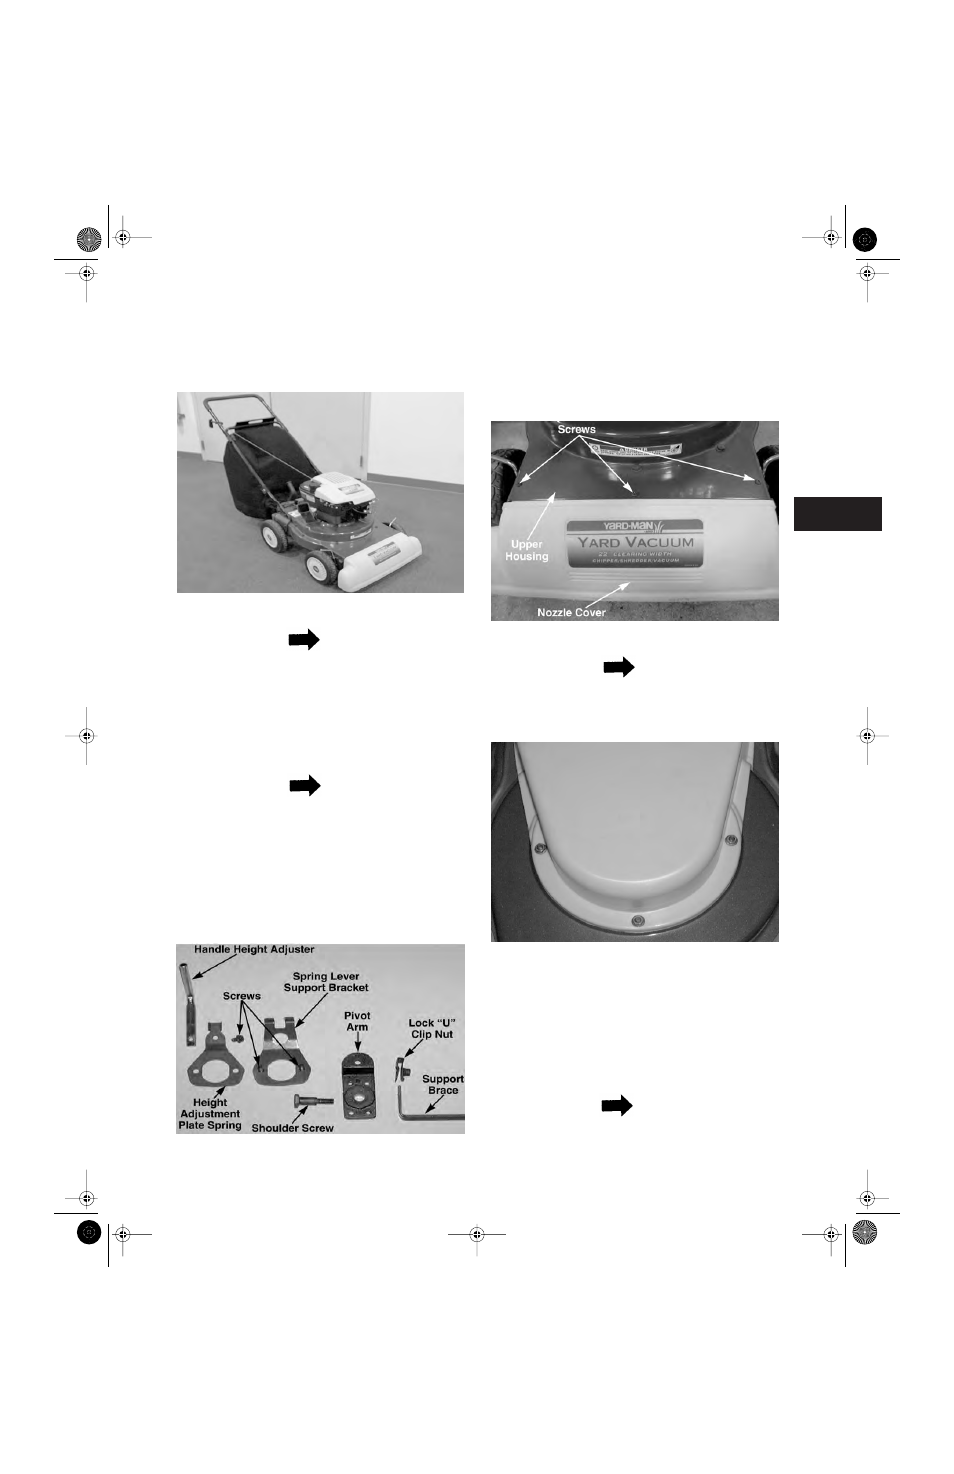
Figure 4-2.
4.
Remove the three screws on the upper hous-
ing that secure the nozzle cover to the upper
housing, using a phillips screwdriver. See Fig-
ure 4-3.
Figure 4-3.
NOTE
It is not necessary to remove the three hex cap
screws and lock nuts securing the nozzle
cover to the lower housing. See Figure 4-4.
Figure 4-4.
5.
Remove the nine screws securing the lower
housing to the upper housing using a 1/2"
wrench and a 1/2" socket.
6.
Remove the lock nut that secures the flail
screen to the lower housing using two 1/2"
wrenches.
NOTE
It is not necessary to remove the flail screen
from the unit.
CHORE PERFORMER
CHIPPER SHREDDER VACUUM
CHIPPER SHREDDER VACUUM.fm Page 1 Tuesday, February 19, 2002 2:19 PM