Cub Cadet I-Beam Style User Manual
Page 76
3-57
3
6.Secure the eyebolt to the clutch bail with the
cap screw, flat washers, and elastic lock nut
using a 7/16” socket and a 7/16” wrench.
7.Grasp the bail and slowly close it to the upper
handle bar assembly.
NOTE
If the bail has too much resistance and does
not want to close to the upper handle bar,
loosen the threaded cable end two turns at a
time until the bail closes to the handle bar com-
fortably with a slight amount of resistance. See
Figure 3-158.
NOTE
If the bail closes with no resistance and the
clutch cable does not straighten out, tighten
the threaded cable end two turns at a time until
the bail closes to the handle bar comfortably
with a slight amount of resistance.
8.Secure the eyebolt to the threaded cable end
with the jam nut loosened earlier using a 7/32”
wrench and a 3/8” wrench.
NOTE
DO NOT over tighten the clutch control cable
or damage may occur.
IMPORTANT: Make certain the Clutch Cable
Adjustment is performed prior to operating the
tiller.
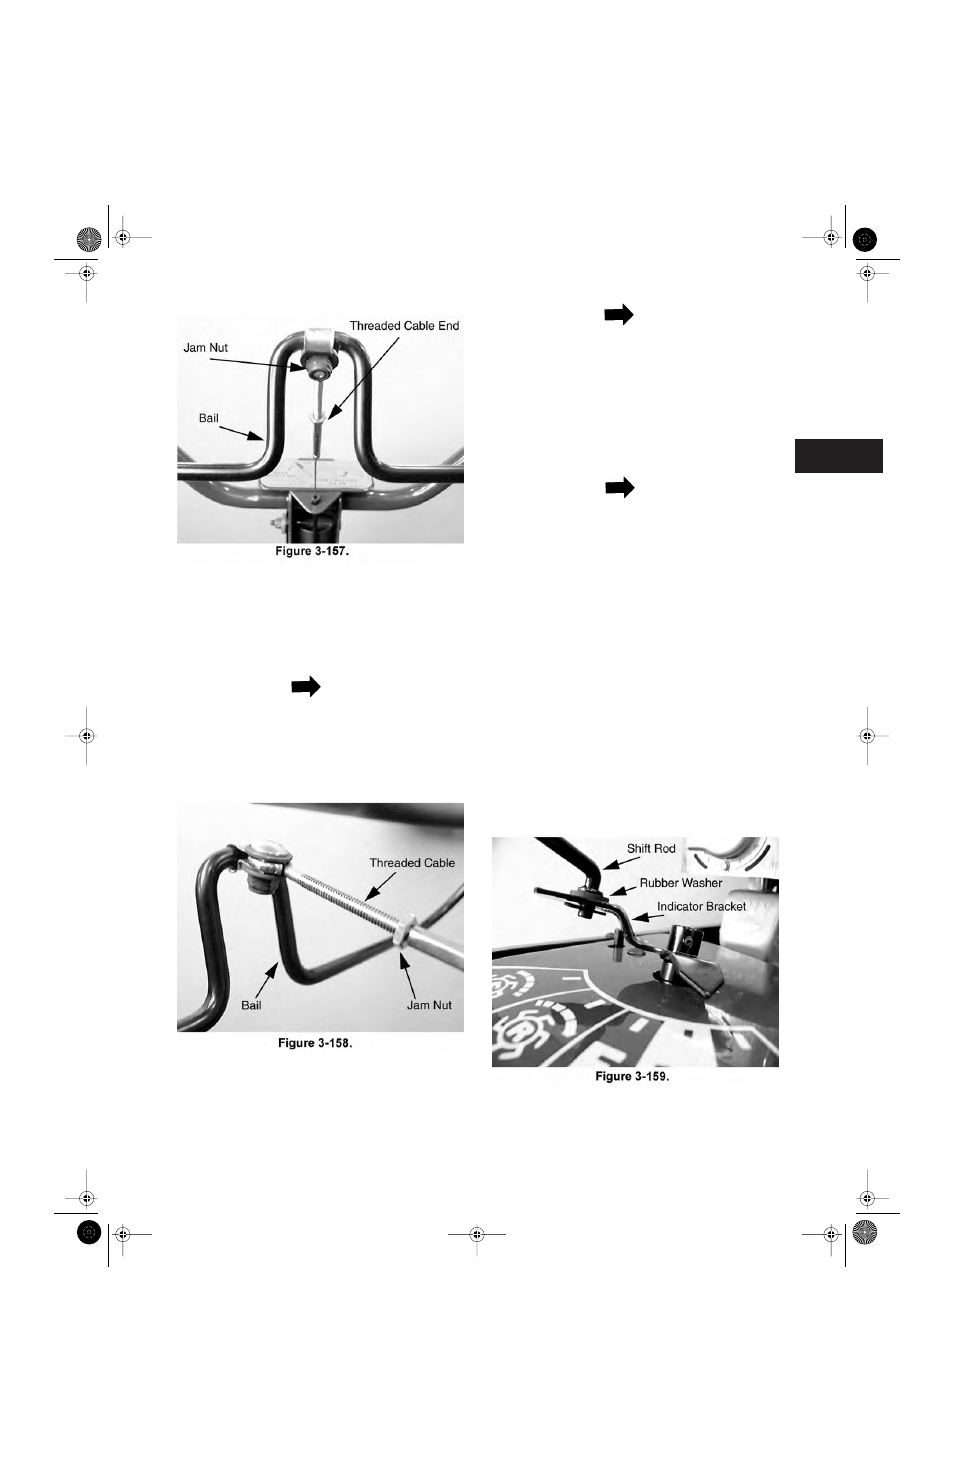
Shift Control Rod Installation
1.Remove the hairpins from the ends of the shift
control rod.
2.Identify the long and short angled ends of the
shift control rod.
3.Make certain the rubber washer is in place on
each end.
4.Insert the short angled end of the shift control
rod through the indicator bracket and secure it
with the hairpin removed earlier. See Figure 3-
159.
5.Insert the long angled end of the shift control
rod through the gear selector handle and
Tillers.fm Page 57 Tuesday, February 19, 2002 1:28 PM