Cub Cadet I-Beam Style User Manual
Page 5
1-4
5.
Remove the V-belt from the idler pulley. See
Figure 1-11.
Figure 1-11
6. Grasp the idler bracket assembly and pull
inward until the belt can be removed from the
spindle assembly.
NOTE
The torsion spring applies tension to the belt
brake at rest, and must be moved away from
the belt for removal.
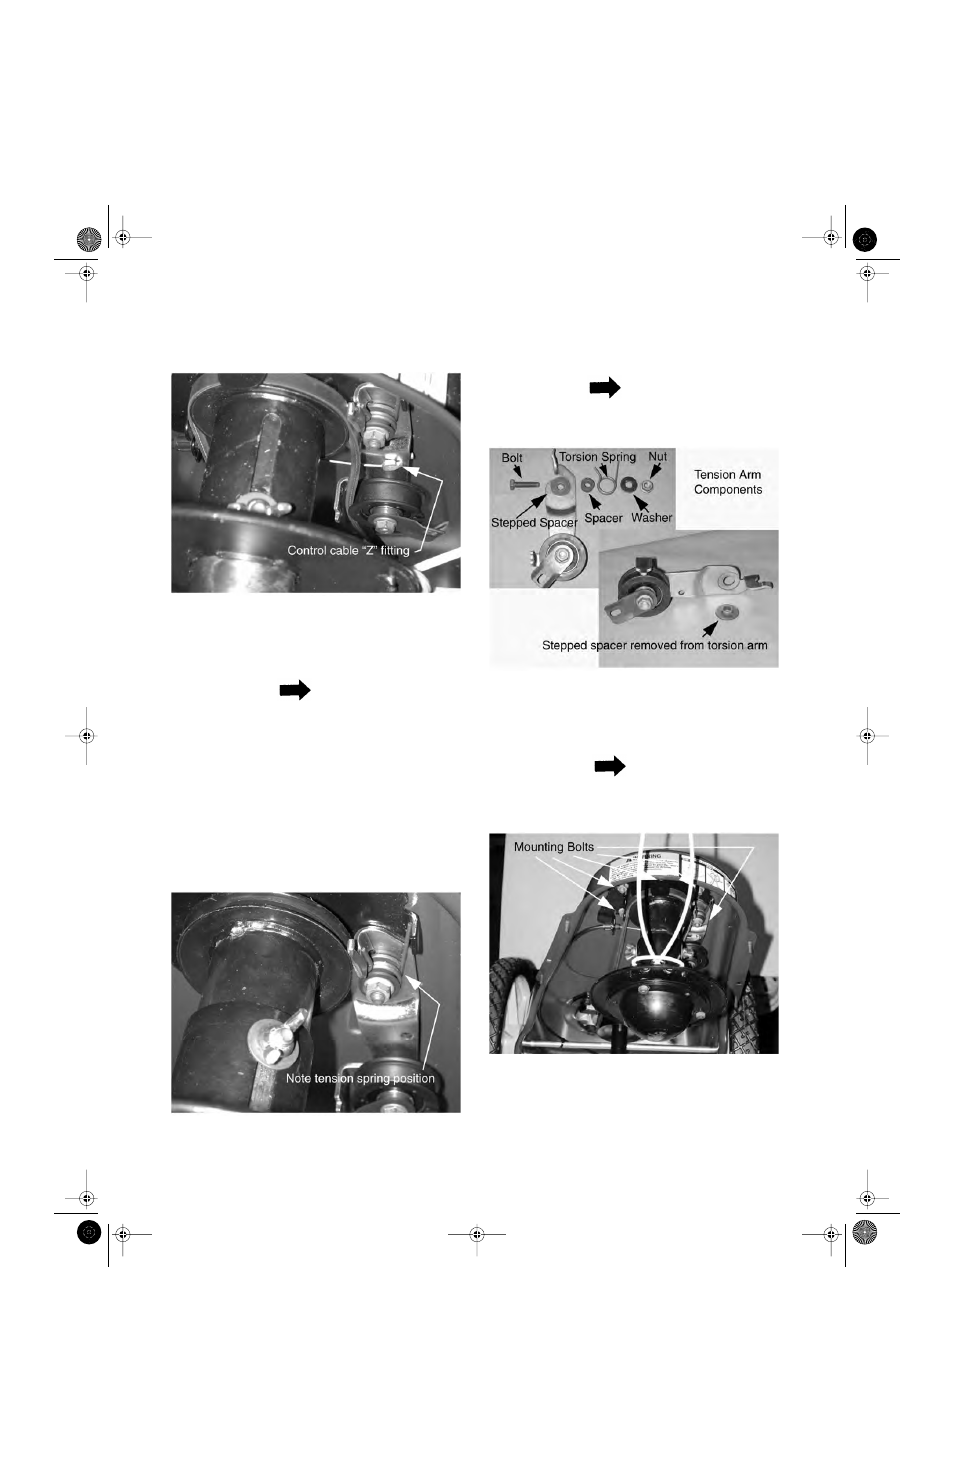
7.
Unhook the “Z” fitting (at the end of the
engagement cable) from the idler bracket.
See Figure 1-12.
8.
Loosen the center hex bolt securing the spin-
dle assembly to the trimmer base from the
top, using a 1/2" wrench.
Figure 1-12
9.
Remove the hex nut and hex bolt that hold the
tensioner pulley arm to the trimmer base
using a 1/2" wrench.
NOTE
Record the mounting hardware as you
remove it. See Figure 1-13.
Figure 1-13.
10. Remove the remaining five bolts which
secure the spindle to the trimmer base using
a 1/2" wrench.
NOTE
Three of these bolts will also hold the belt
keeper in position. See Figure 1-14.
Figure 1-14.
11. Remove the center bolt from the spindle.
12. Remove the spindle.
13. Follow instructions in the reverse order to
assemble.
01 String Trimmers.fm Page 4 Tuesday, February 19, 2002 1:05 PM