Log splitter hydraulic cylinder removal – Cub Cadet I-Beam Style User Manual
Page 273
6-74
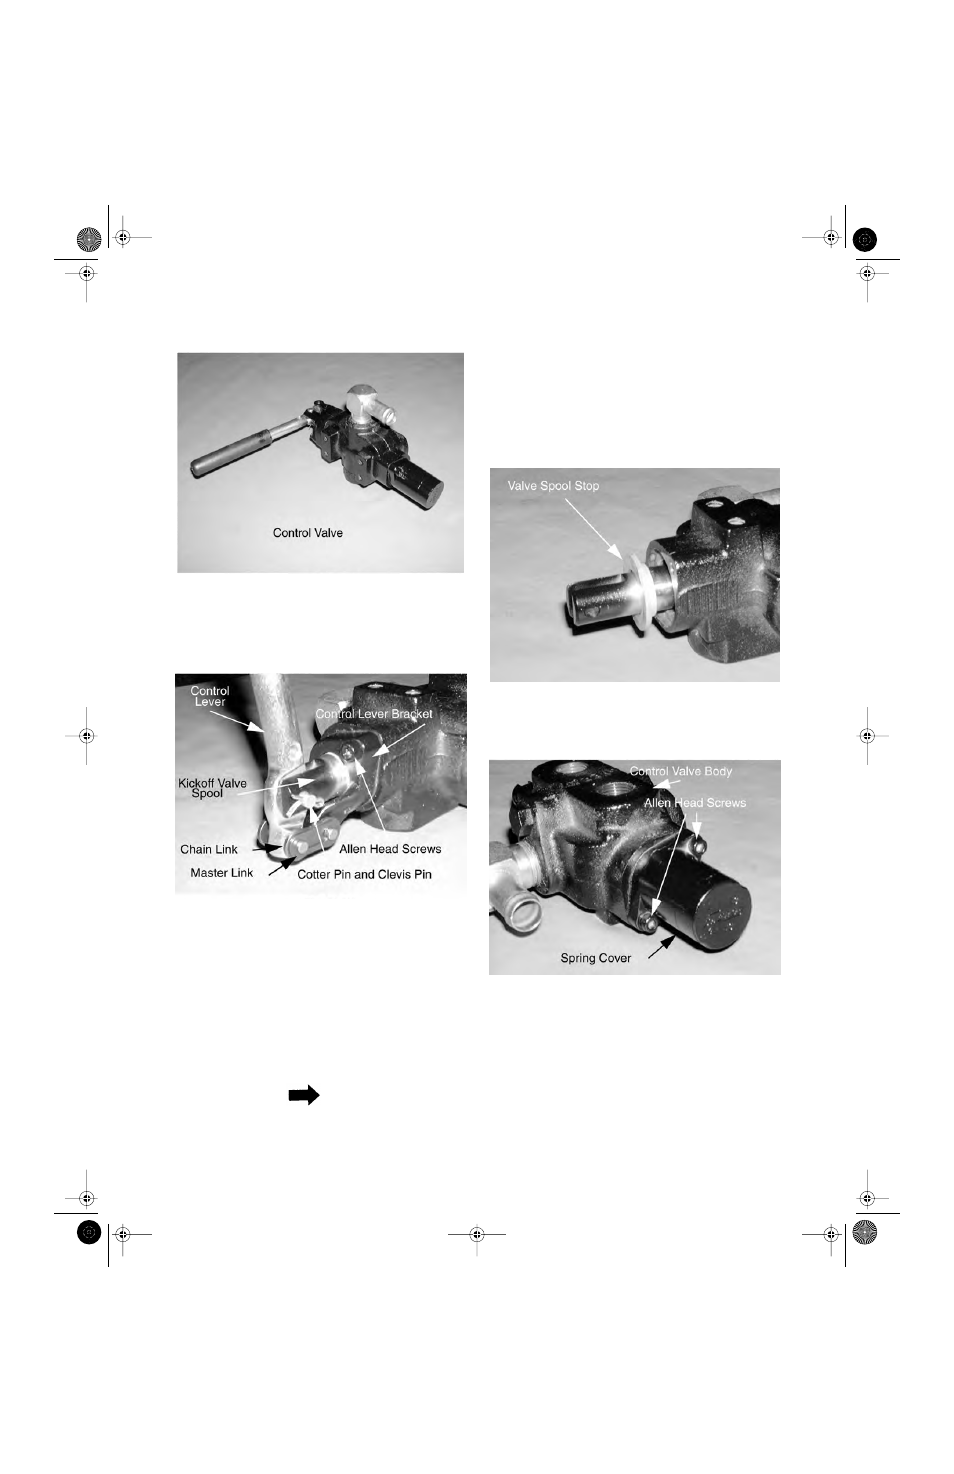
1. Remove the cotter pin and clevis pin securing
the control lever assembly to the control lever
bracket using a pair of needle nose pliers. See
Figure 6-129.
2. Remove the master link and the chain link
securing the control lever assembly to the kick-
off valve spool using a pair of pliers.
3. Remove the control lever from the from the
kick-off valve spool.
4. Remove both allen head screws securing the
control lever bracket to the control valve hous-
ing using a 3/16" allen wrench.
NOTE
Loctite the screws during assembly.
5. Mark the control lever bracket and control
valve body for orientation using a sharp object.
6. Remove the control lever bracket from the con-
trol valve body.
7. Remove the valve spool stop from the control
valve body. See Figure 6-130.
8. Rotate the control valve assembly 180
degrees. See Figure 6-131.
9. Remove both allen head screws securing the
spring cover to the control valve body using a
3/16" allen wrench.
10. Mark the spring cover and control valve body
for orientation using a sharp object.
11. Remove the spring cover from the control
valve body.
Log Splitter Hydraulic Cylinder Removal
Figure 6-128.
Figure 6-130.
Figure 6-131.
Figure 6-129.
Log Splitters 2.fm Page 74 Wednesday, February 20, 2002 1:35 PM