Setting up the controller as a safety slave, Create safety slave i/o data – Rockwell Automation 1752-L24BBBE SmartGuard 600 Controllers User Manual User Manual
Page 87
Rockwell Automation Publication 1752-UM001E-EN-P - June 2014
87
Configure Your Controller for DeviceNet Communication
Chapter 7
Setting Up the Controller as a
Safety Slave
As a safety slave, the controller can perform safety I/O communication with a
maximum of 4 connections, by using up to 16 bytes per connection. These
connections can be either single-cast or multi-cast. However, for 1 multicast
connection, the total number of masters that can be communicated with is 15.
For the SmartGuard controller to perform safety I/O communication as a safety
slave, safety slave I/O data must be created and safety I/O connections must be
configured in the safety master.
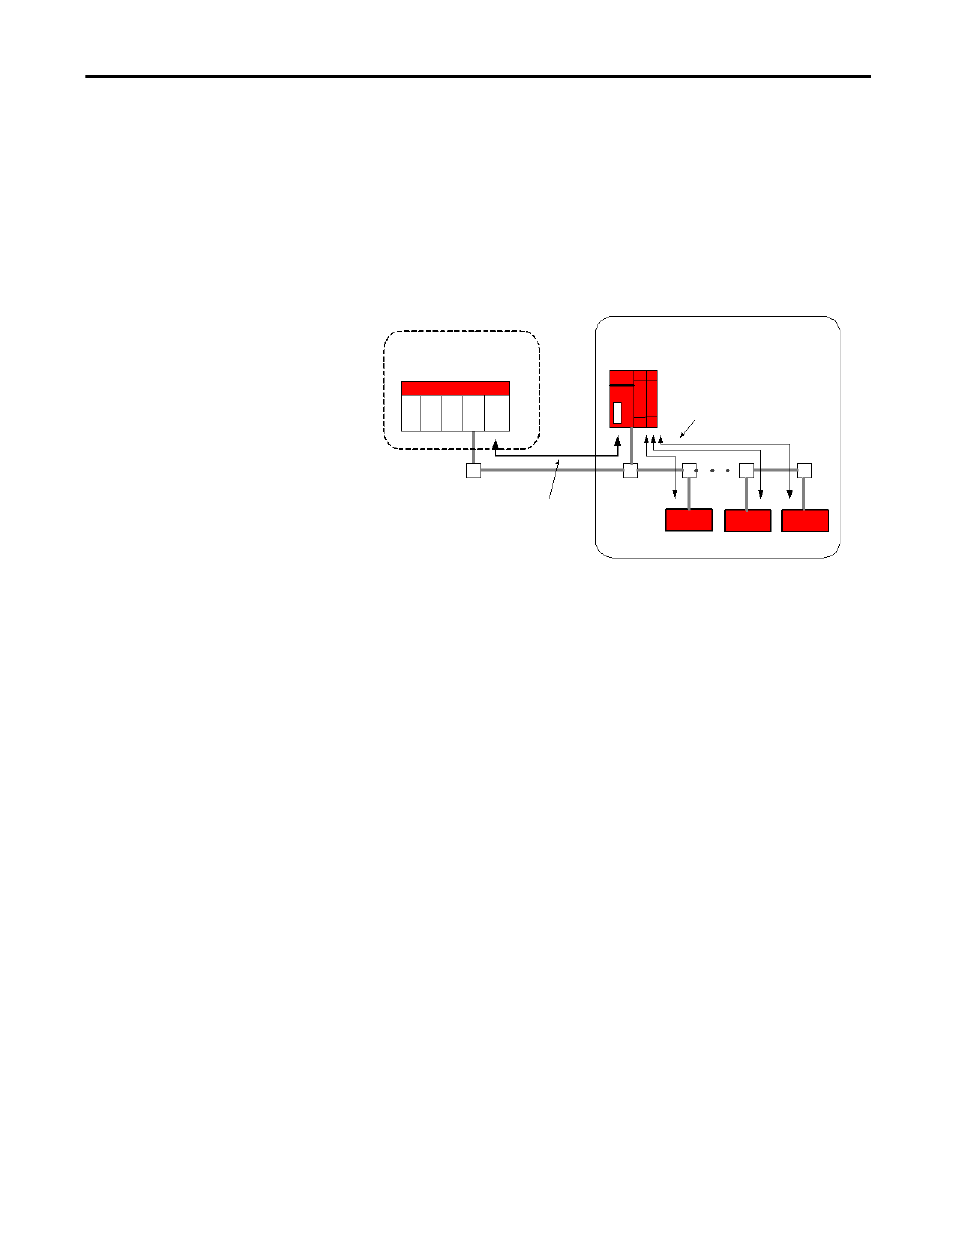
Figure 19 - SmartGuard Controller as Safety Slave and Safety Originator
When the controller operates as a safety slave, you can configure the safety slave
assemblies to transfer local I/O data (monitor data), controller and I/O status
data, and distributed I/O data to a safety master. The safety master can also write
safety data to the slave SmartGuard controller, which it can use in its application
program.
When status data is set, the status is allocated at the beginning of the remote I/O
area, with status data preceding local I/O data. User-registered I/O tags follow.
Status areas that are not set are not reserved. All valid data is allocated with no
unassigned areas.
Create Safety Slave I/O Data
Follow these steps to create a safety slave assembly.
1.
In RSNetWorx for DeviceNet software, right-click the SmartGuard
controller that will act as the safety slave and choose Properties.
GuardLogix System
Safety PLC
Safety Originator
SmartGuard Controller
Safety Slave
Safety Originator
Safety Communication
Safety Communication
CIP Safety I/O Modules
Safety
Control
System