Apple Cinema Tools 4 User Manual
Page 137
To use batch reverse telecine
1
Place all the clips that you want to process in one folder.
2
Choose File > Batch Reverse Telecine.
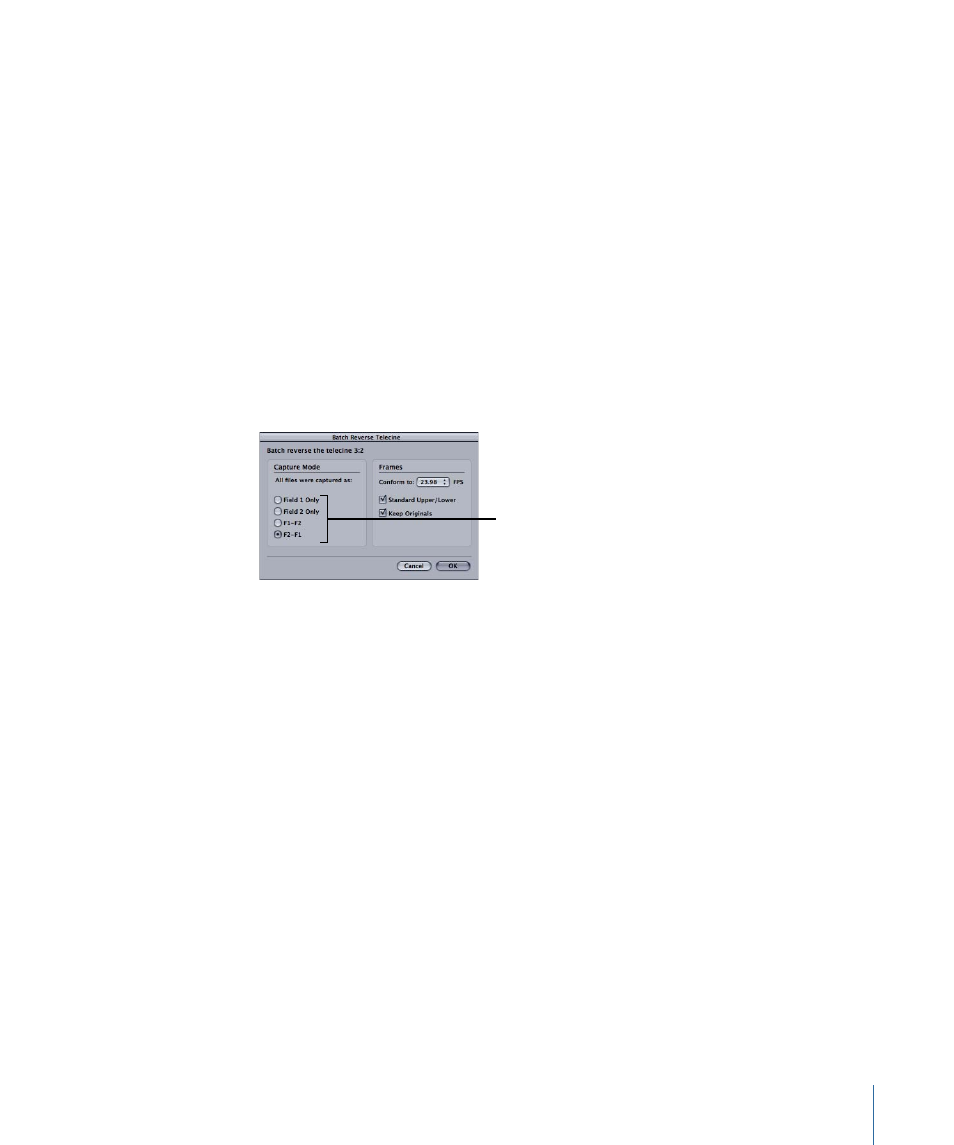
3
In the dialog that appears, select any source clip file in the folder that contains the source
clips, then click Choose.
4
In the Batch Reverse Telecine dialog that appears, select the capture mode that indicates
the correct field capture for the clip:
• Field 1 Only: Select this option if the video contains only field 1.
• Field 2 Only: Select this option if the video contains only field 2.
• F1 - F2: Select this option if the video contains both fields, and field 1 is the dominant
field (the first field to appear).
• F2 - F1: Select this option if the video contains both fields, and field 2 is the dominant
field.
Select the field capture
information for this clip.
See
Determining the Field Capture Information
for details.
Note: If Cinema Tools finds pull-down information embedded in the source clips, a simpler
version of this dialog appears. See
Removing 2:3:3:2 or 2:3:2:3 Pull-Down with Cinema Tools
for more information.
5
From the “Conform to” pop-up menu, choose the frame rate that allows you to maintain
or restore audio/video sync:
• 23.98: This frame rate is useful if you want to later use the Final Cut Pro pull-down
feature that lets you output 23.98 fps video as 29.97 fps video. (See
You Can Apply to 23.98 fps Video
for more information.)
• 24.0: You may want to conform and edit the clips at this rate if you plan to include
them in a project that contains other clips that are exactly 24 fps.
Note: If the audio and video are contained in the same clip, and you choose 24.0 from
this pop-up menu, the Reverse Telecine feature increases the audio speed by a very
small percentage so that it is in sync with 24 fps instead of 23.98 fps.
6
Leave the Standard Upper/Lower checkbox selected.
137
Chapter 8
Preparing the Source Clips for Editing