Grass Valley Xplay Vertigo Suite v.5.0 User Manual
Page 24
Xplay User Manual
2-15
Getting started with Xplay
5.
Open Xplay’s Device Manager by selecting T
OOLS
>D
EVICE
M
ANAGER
.
The D
EVICE
C
ONFIGURATION
window appears with the available output devices already
listed in the device table. If the desired device is not listed, refer to
for
instructions on how to add a device to the Device Manager.
6.
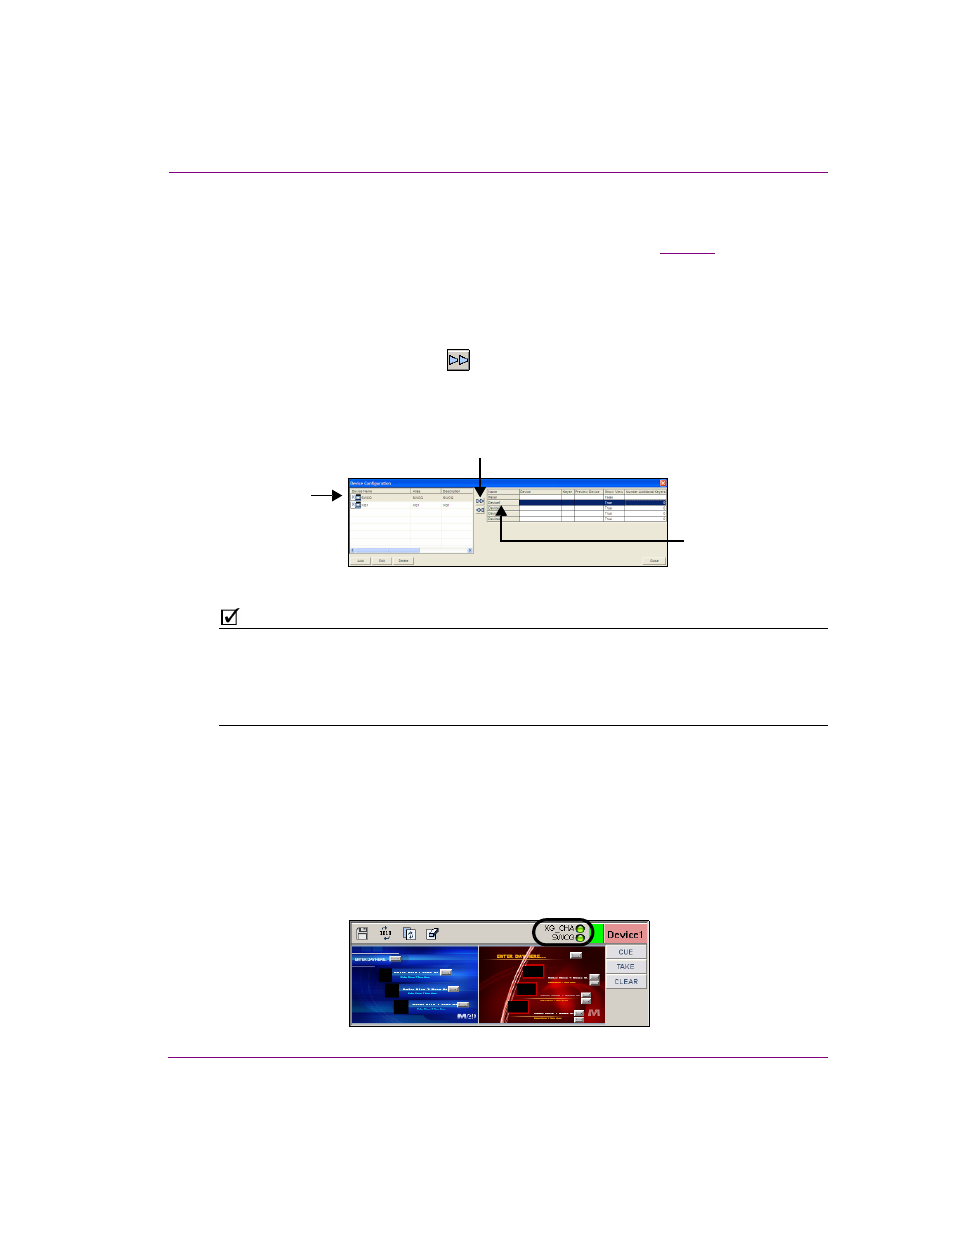
To assign an output device with a Device View:
a.
In the Active Device table, click the
AME
column to select the row.
b.
In the Device Configuration table, select the device that you want to assign to the
Device View selected in the Active Device table.
c.
Click the right-arrow button
to establish the association.
The device is immediately added to the Active Device table. It is also added to the
Device View on the Xplay interface.
d.
Repeat the above steps for each of the device views in the Active Device table.
Figure 2-10. Associating a device with one of Xplay’s Device Views
N
OTE
By default, the device views in Multi-Device layout are named D
EVICE
1, D
EVICE
2,
D
EVICE
3...etc. You are not obligated to keep these default names. To personalize the device
views by assigning them a new name, right-click on the K
EYER
S
TATE
button (the device’s
name in the Device View’s toolbar) and select the R
ENAME
command. The Keyer State button
will now display the new name, as does the Active Device table in the Device Manager
7.
Once a device is added to the Active Device table, you can complete the remaining
properties associated with each of the Device Views:
• K
EYER
: The keyer value tells Xplay on which layer of the output device to playout the
playlist element (0 is the bottom-most level).
• Preview: (Optional) Assigns a device from the Device Configuration table to be a
preview device. This allows you to preview the playout of a playlist item when it is cued
and then playout on the assigned device when it is taken to air. Like an output device,
the preview device’s name and connection status LED are displayed in the Device
View’s toolbar.
Step B
Step A
Step C