Altera Low Latency Ethernet 10G MAC User Manual
Page 19
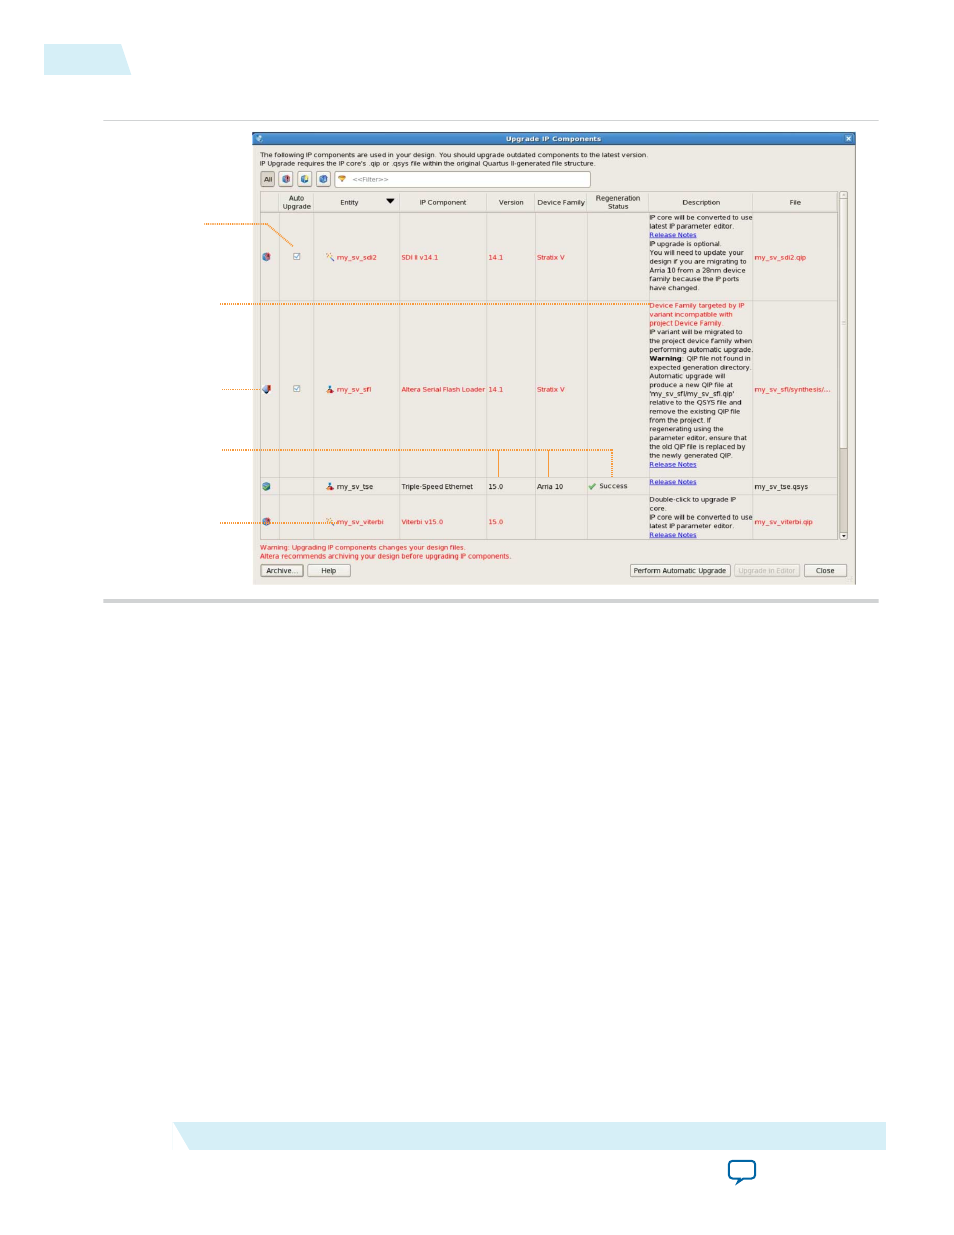
Figure 2-5: Upgrading IP Cores
Double-click to
upgrade in editor
(no auto upgrade)
Upgrade required
Migration details
Supports Auto
upgrade
Upgrade success
1. Click File > Open Project and open the Quartus II project containing IP for migration to another
device in the original version of the Quartus II software.
2. To specify a different target device for migration, click Assignments > Device and select the target
device family.
3. To display IP cores requiring migration, click Project > Upgrade IP Components. The Description
field prompts you to run auto update or double-click IP cores for migration.
4. To migrate one or more IP cores that support automatic upgrade, ensure that the Auto Upgrade
option is turned on for the IP core(s), and then click Perform Automatic Upgrade. The Status and
Version columns update when upgrade is complete.
5. To migrate an IP core that does not support automatic upgrade, double-click the IP core name, and
then click OK. The parameter editor appears.
a. If the parameter editor specifies a Currently selected device family, turn off Match project/
default, and then select the new target device family.
b. Click Finish to migrate the IP variation using best-effort mapping to new parameters and settings.
A new parameter editor opens displaying best-effort mapped parameters.
c. Click Generate HDL, and then confirm the Synthesis and Simulation file options. Verilog HDL is
the defauilt output file format specified. If your original IP core was generated for VHDL, select
VHDL to retain the original output format.
2-10
Migrating IP Cores to a Different Device
UG-01144
2014.12.15
Altera Corporation
Getting Started with LL Ethernet 10G MAC