Chapter 6 normal mode – KEYENCE LS-5000 User Manual
Page 46
Chapter 6 Normal Mode
40
6
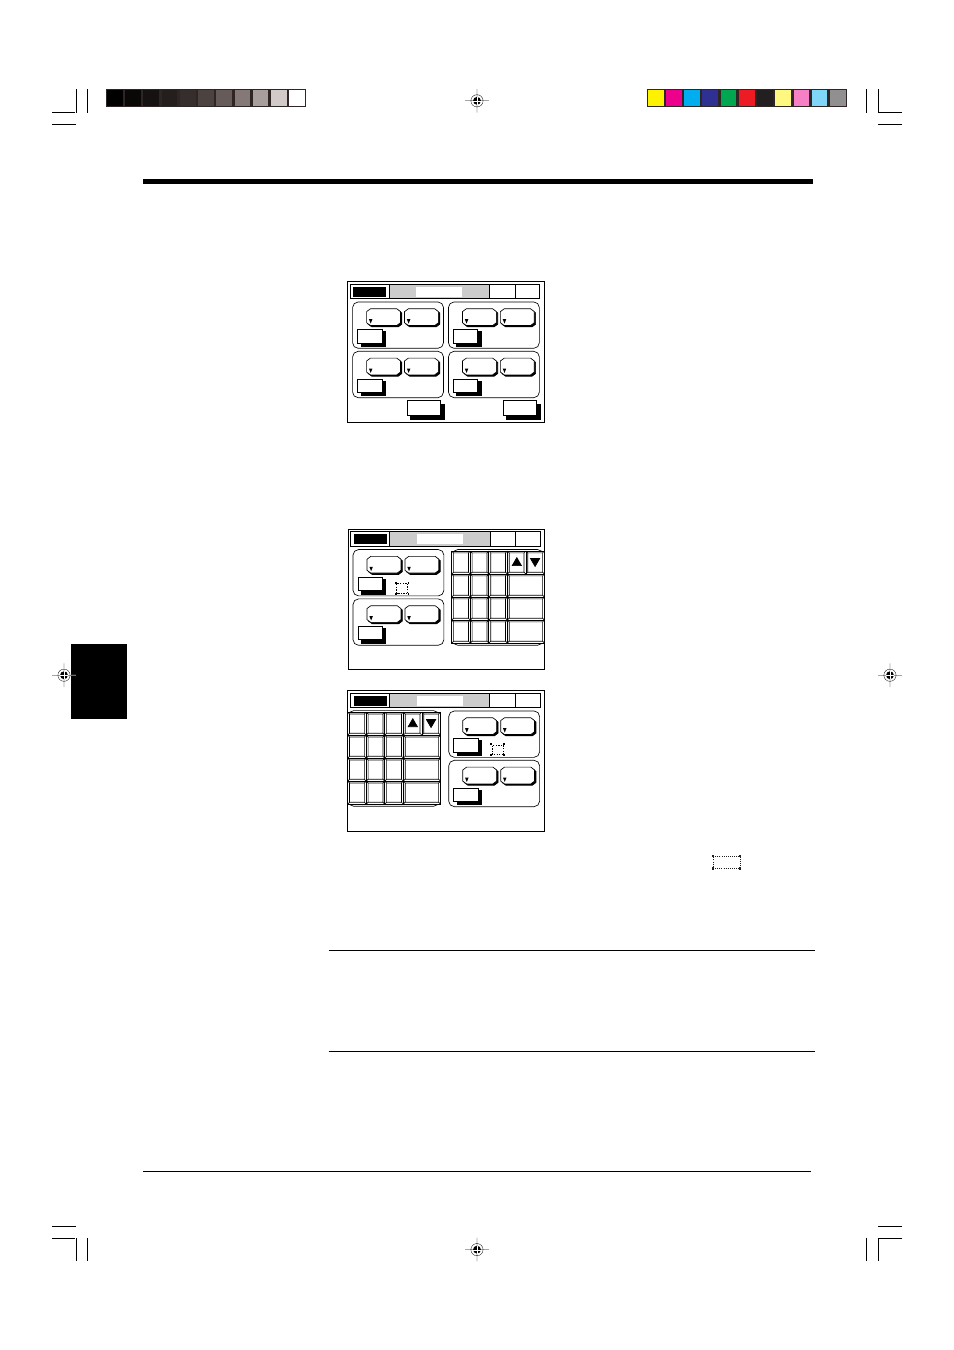
■ Procedure for Setting Edge Number (Only when SEG is selected.)
1. Select the AREA SETUP screen.
Perform steps 1 and 2 described on the previous page to go to the screen
shown below.
2. Set the EDGE number.
Press the [SET] button corresponding to the area for which you wish to set the
edge number.
You can enter a value in the space indicated by the dotted line
.
Enter a value using the numeric keys, and press [ENTER] key.
Press [ESCAPE] to complete the entry.
Press [CANCEL] to cancel the entry. The value returns to the previous value.
Note 1: The edge number (m,n) must conform to the condition: m < n.
When “m” is larger than “n”, the “ERR” message is displayed and the entered value
cannot be accepted.
Note 2: When you press the [HELP] button, descriptions about the measuring mode
(DIA, T.EDGE/B.EDGE and SEG) are displayed on the screen.
LASER ON
AREA SETUP
NOR
MAL
P. 1
SEG
HEAD1
( 2, 3)
ESC
HELP
SET
HEAD No.
SEGMENT
SEGMENT
SEGMENT
SEGMENT
EDGE No.
A1
SEG
HEAD1
( 2, 3)
SET
HEAD No.
EDGE No.
A2
SEG
HEAD1
( 2, 3)
SET
HEAD No.
EDGE No.
A3
SEG
HEAD1
( 2, 3)
SET
HEAD No.
EDGE No.
A4
LASER ON
AREA SETUP
NOR
MAL
P. 1
SEG
HEAD1
( 2 , 3)
SET
HEAD No.
EDGE No.
A1
SEGMENT
SEGMENT
SEG
HEAD1
( 2, 3)
SET
HEAD No.
EDGE No.
A2
8
7
5
6
4
2
3
1
.
-
0
9
ENTER
CANCEL
ESCAPE
( 2 , 3)
LASER ON
AREA SETUP
NOR
MAL
P. 1
SEG
HEAD1
SET
HEAD No.
EDGE No.
A3
SEGMENT
SEGMENT
SEG
HEAD1
( 2, 3)
SET
HEAD No.
EDGE No.
A4
8
7
5
6
4
2
3
1
.
-
0
9
ENTER
CANCEL
ESCAPE