Apple Shake 4 Tutorials User Manual
Page 77
Tutorial 2
Intermediate Skills
77
6
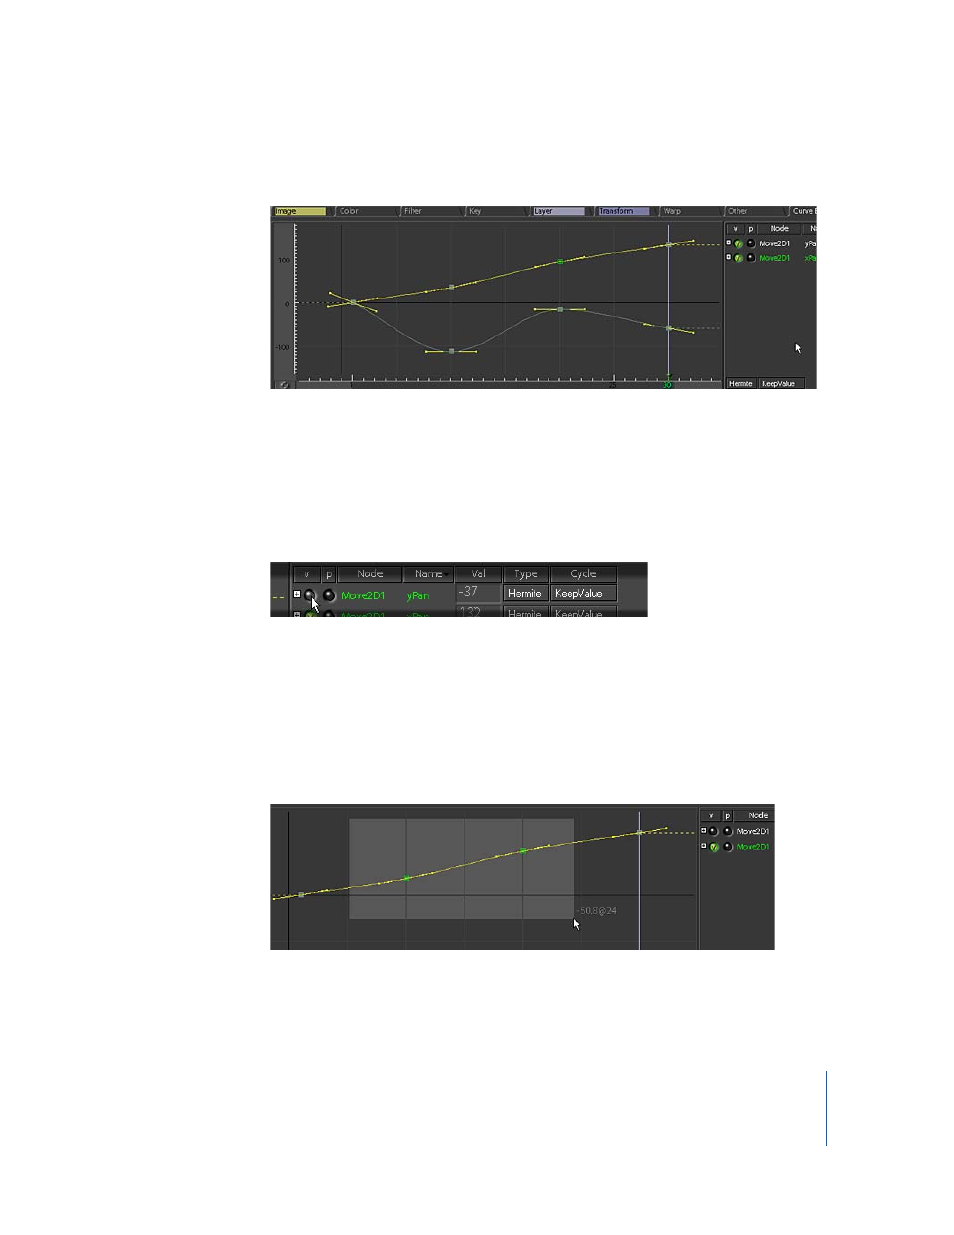
Click the Curve Editor 2 tab (in the Tool tabs) to view the animation curves.
Note: To expand the window, position the pointer in the Curve Editor and press the
Space bar. Press the Space bar again to reset the Curve Editor window.
Here you’ll see the curves for the two pan parameters that you animated: xPan and
yPan. The points on the curves indicate the places where you set keyframes in the Time
Bar. To the right of the curves, you’ll see the individual curve channels.
7
Click the Visibility button for the yPan parameter to hide this curve.
Notice that the xPan curve basically follows a linear path. Yours might look different,
but in the example shown here, the xPan was animated so that wawa2 moves from left
to right as it “hops.” As you can see, the xPan curve actually has more keyframes than it
needs to create that linear movement.
8
Drag a selection box around all the keyframes—excluding the first and last
keyframes—on the xPan curve. Then, press Delete (near the Page Up/Page Down keys)
or Backspace to remove the extra keyframes.
9
Click the Visibility button for the yPan parameter to display this curve again.