Creating a handmade macro – Apple Shake 4 Tutorials User Manual
Page 226
226
Chapter 8
Working With Macros
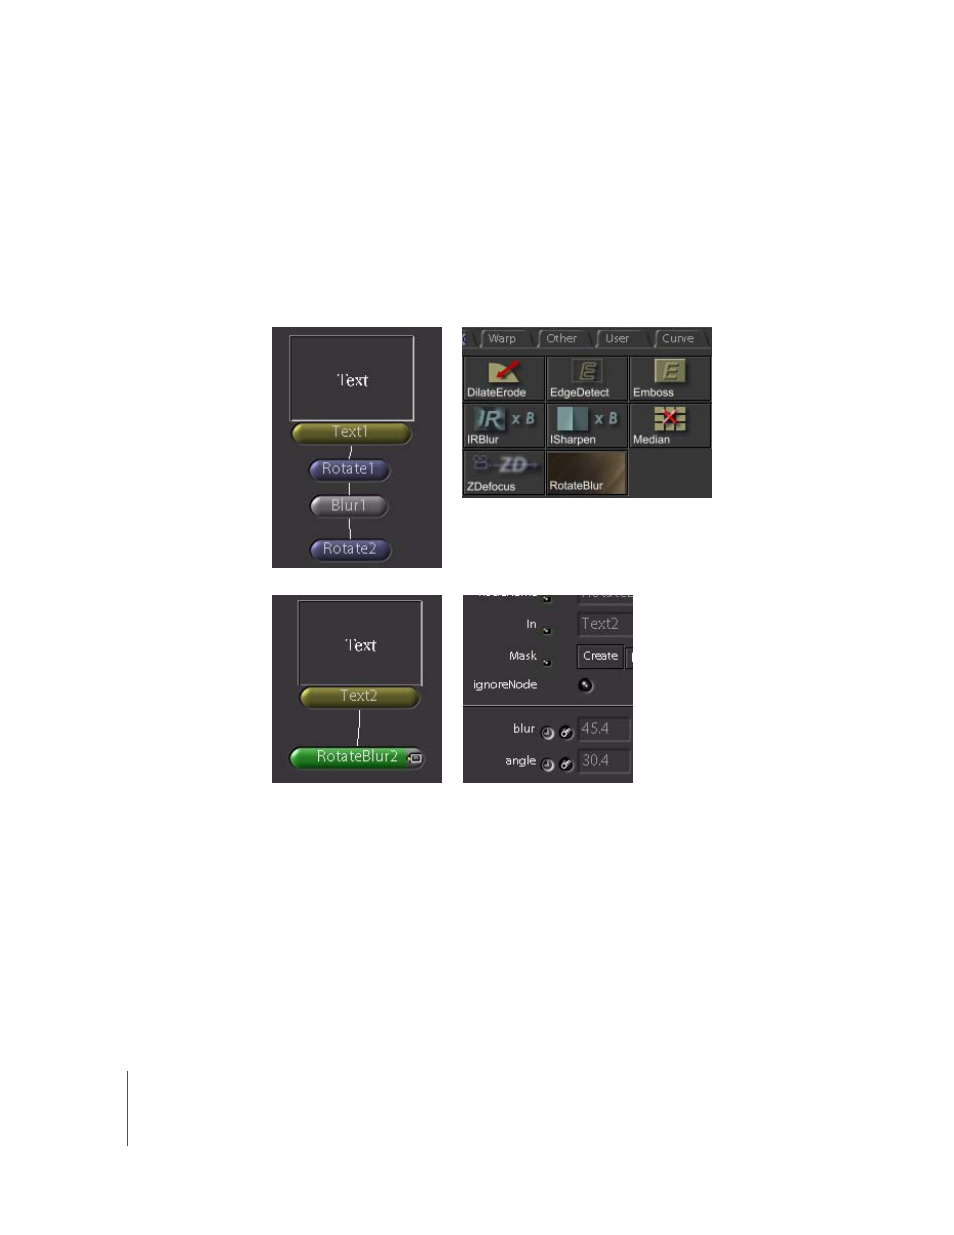
The following images demonstrate the creation of a macro. The first image shows four
connected nodes—the Text node and the three nodes that combine to create a blur
effect. Following a long, arduous process, the second image shows the completed
macro attached to an icon (RotateBlur icon) in the Filter Tool tab. The third image shows
the completed macro, the RotateBlur node, applied in the tree—it looks like any other
node. The last image demonstrates that only the angle and the blur parameters from
the original nodes are exposed in the Parameters tab of the new node.
Creating a Handmade Macro
The first step in a macro is to build the desired effect—for the purposes of this
example, a “RotateBlur” node—using normal nodes.
To build the node tree:
1
Create an Image–Text node.
2
Attach a Transform–Rotate node.
3
Attach a Filter–Blur node.
- Numbers '09 (254 pages)
- Keynote '09 (247 pages)
- Pages '09 (279 pages)
- Boot Camp Mac OS X v10.6 Snow Leopard (19 pages)
- Boot Camp Mac OS X v10.6 Snow Leopard (18 pages)
- iWork '09 (372 pages)
- Mac OS X v10.6 Snow Leopard (7 pages)
- GarageBand '08 (102 pages)
- iDVD '08 (35 pages)
- GarageBand '09 (122 pages)
- iWeb (37 pages)
- iMovie '08 (50 pages)
- Boot Camp (Mac OS X v10.5 Leopard) (27 pages)
- Boot Camp (Mac OS X v10.5 Leopard) (25 pages)
- Mac OS X v10.5 Leopard (16 pages)
- Mac OS X (622 pages)
- Mac OS X Server (Version 10.6 Snow Leopard) (197 pages)
- Mac OS (42 pages)
- Mac OS X Server (Upgrading and Migrating For Version 10.4 or Later) (97 pages)
- iMovie HD (47 pages)
- iMovie HD (83 pages)
- MAC OS 7.6.1 (4 pages)
- Mac OS X Server (Extending Your Wiki Server For Version 10.5 Leopard) (45 pages)
- Mac OS X Server Ver 10.4 (35 pages)
- Mac OS X Server v10.6 (76 pages)
- Mac OS X Server v10.6 (97 pages)
- Macintosh Japanese Language Kit (30 pages)
- Xserve (Early 2008) DIY Procedure for Hard Drive (3 pages)
- Xserve (8 pages)
- Xserve (60 pages)
- GarageBand 3 (98 pages)
- Remote Desktop 3.1 (191 pages)
- Motion 5.1.1 (1090 pages)
- Workgroup Server 8150/110 (144 pages)
- Aperture (476 pages)
- Xserve Intel (Late 2006) DIY Procedure for Optical Drive Cable (6 pages)
- Xserve Intel (Late 2006) DIY Procedure for Optical Drive Cable (7 pages)
- Network Services Location Manager Network (8 pages)
- Macintosh System 7.5 (114 pages)
- Macintosh System 7.5 (65 pages)
- Macintosh System 7.5 (126 pages)
- DVD Studio Pro 4 (656 pages)
- Keynote '08 (204 pages)
- Xsan 2 (Second Edition) (11 pages)
- LiveType 2 (157 pages)