Displaying different channels in the viewer – Apple Shake 4 Tutorials User Manual
Page 22
22
Chapter 1
Shake Basics
The gray square on the right side of the background node—it’s supposed to be a tiny
text field—indicates that this node is selected for editing in the Parameters tab. So why
is this useful? In a real composite—you’ll have one soon—you’ll often want to adjust a
node while viewing the end result at the final output node in your script.
We mentioned contextual help for screen controls, and this also works to get
information about nodes. As you pass the pointer over a node (no need to click), the
resolution, bit depth, node name and type, and channels are displayed in the Info field
of the Shake window. For example, move the pointer over the FileIn node named
background, and you’ll see that it stores an 8-bit image, with RGB channels, and a
resolution of 720 x 486 pixels.
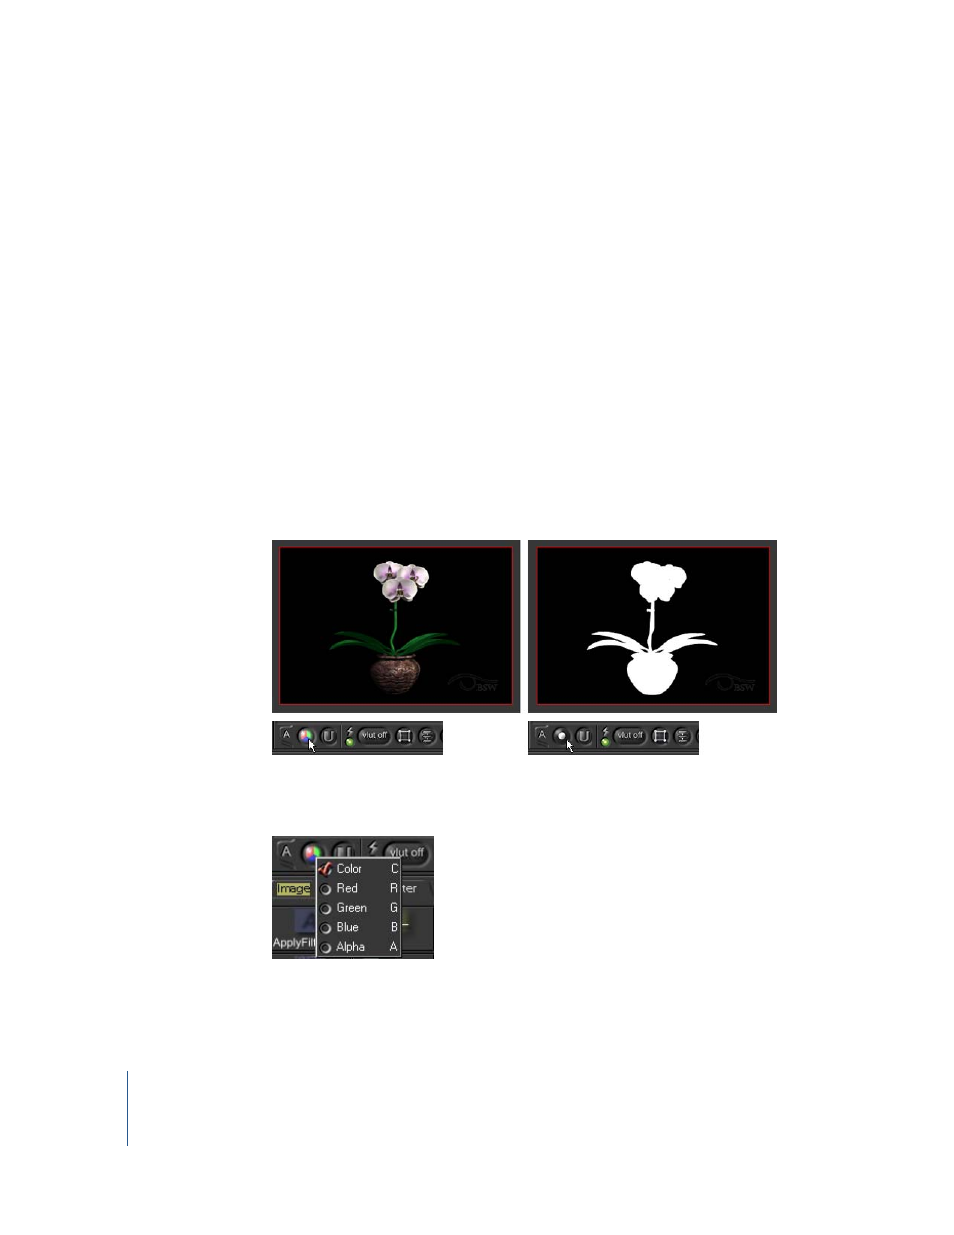
Displaying Different Channels in the Viewer
Use the View Channel button to toggle the display of different channels in the Viewer.
This is important when you want to check the quality of matte edges or transparencies
in the alpha channel. You’ll also need to view independent R, G, or B channels for many
color-correction operations. For example, click the View Channel button to toggle to
the alpha channel view.
There you see the alpha channel. However, nobody actually uses the View Channel
button. Remember when you right-clicked this button to see the hot keys?
Use the hot keys when the pointer is in the Viewer to quickly view a channel (C, R, G,
B, or A).