Using the shake panels – Apple Shake 4 Tutorials User Manual
Page 13
Chapter 1
Shake Basics
13
Using the Shake Panels
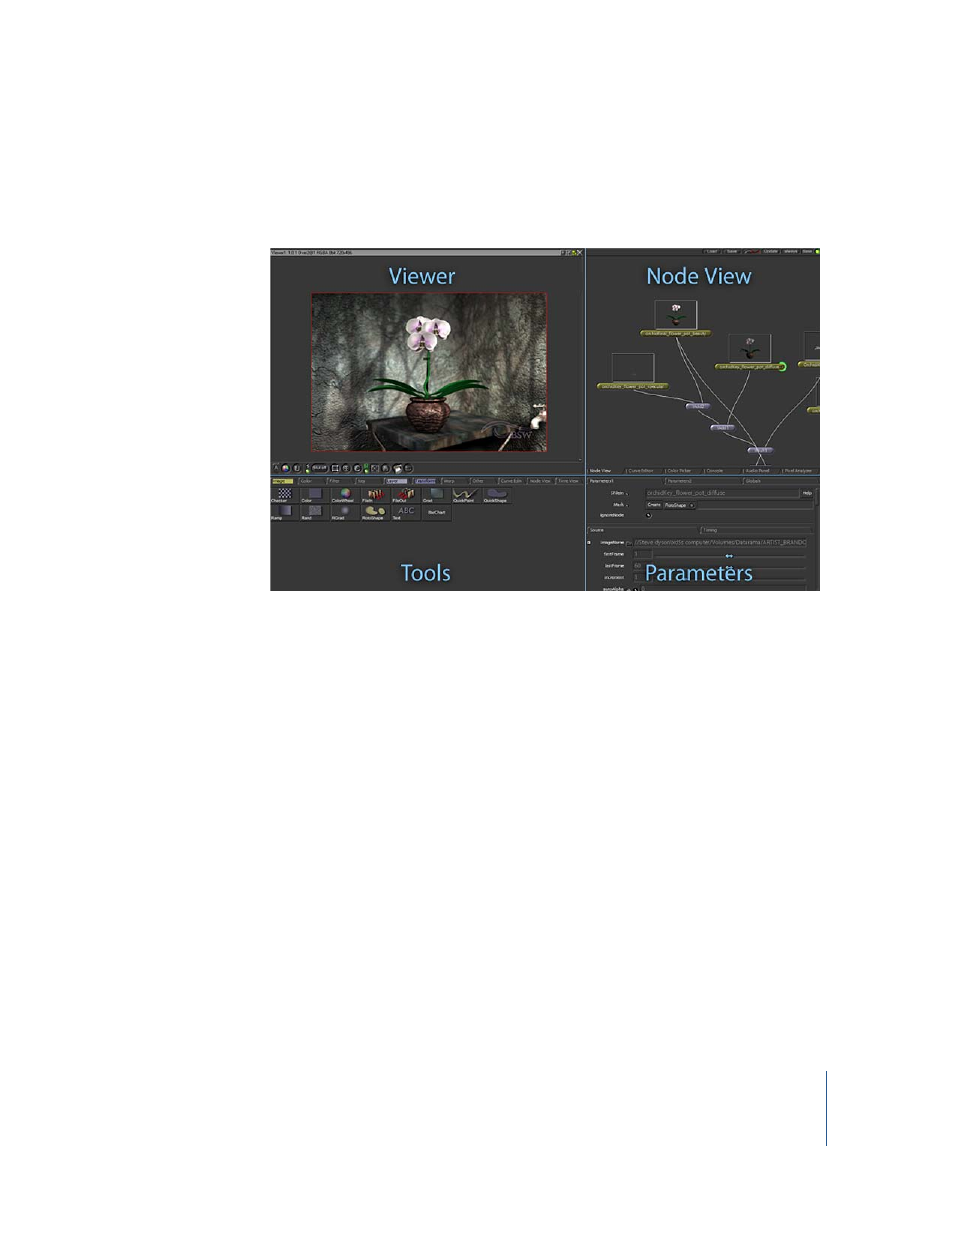
When you start Shake, you’ll notice that the interface is divided into four panels: Viewer,
Node View, Tools, and Parameters.
Each image process in Shake is accomplished by connecting items, called nodes, as a
tree structure in the Node View. The result is an overview of the images, layers, and
processes in your project. Shake projects are called scripts because the results are
stored as a list of sequential commands in a script file.
So, where do the nodes come from? The Tools panel lists the objects and functions—
the nodes—that you can add to your script. The Viewer shows the output of a selected
node in the script. The Viewer is also the place where you use interactive controls to
transform images and create shapes.
In the Parameters panel, you edit a selected node or change project settings on the
Globals tab. And, speaking of tabs, three of the four panels are divided into a number
of tabs that allow access to commands, additional parameters, and other functional
windows, like the Curve Editor and Audio Panel.
You don’t need to know all the screen controls at this point, but you’ll probably have
some questions while you’re working through this tutorial. Being the advanced
compositing artist that you are, you never crack open the user documentation—except
for this tutorial guide, of course—so how can you figure out what all the screen items
do? Contextual help, that’s how!