SkyTrak 6036 Service Manual User Manual
Page 426
Electrical System
9.74
Model 6036 Legacy
d. Inspection and Replacement
1. Inspect the switch terminals for continuity with the
switch in the OFF and ON positions. For additional
information, refer to Section 9.7.14, “Windshield
Washer Circuit and Troubleshooting (Option).”
2. Replace the switch if it fails any of the tests in Step
1
.
e. Installation and Testing
1. Connect the windshield washer switch to the cab
harness connector.
2. Position the switch over the rectangular switch bezel
and snap into position.
3. Connect negative (-) battery cable at the negative
battery terminal.
4. Check the washer reservoir for fluid; fill if needed.
5. Turn the ignition key switch to the RUN position and
test the windshield washer functions. Verify that fluid
is being pumped to both the front and top
windshields.
9.13.6
Windshield/Roof Washer Reservoir
and Pump
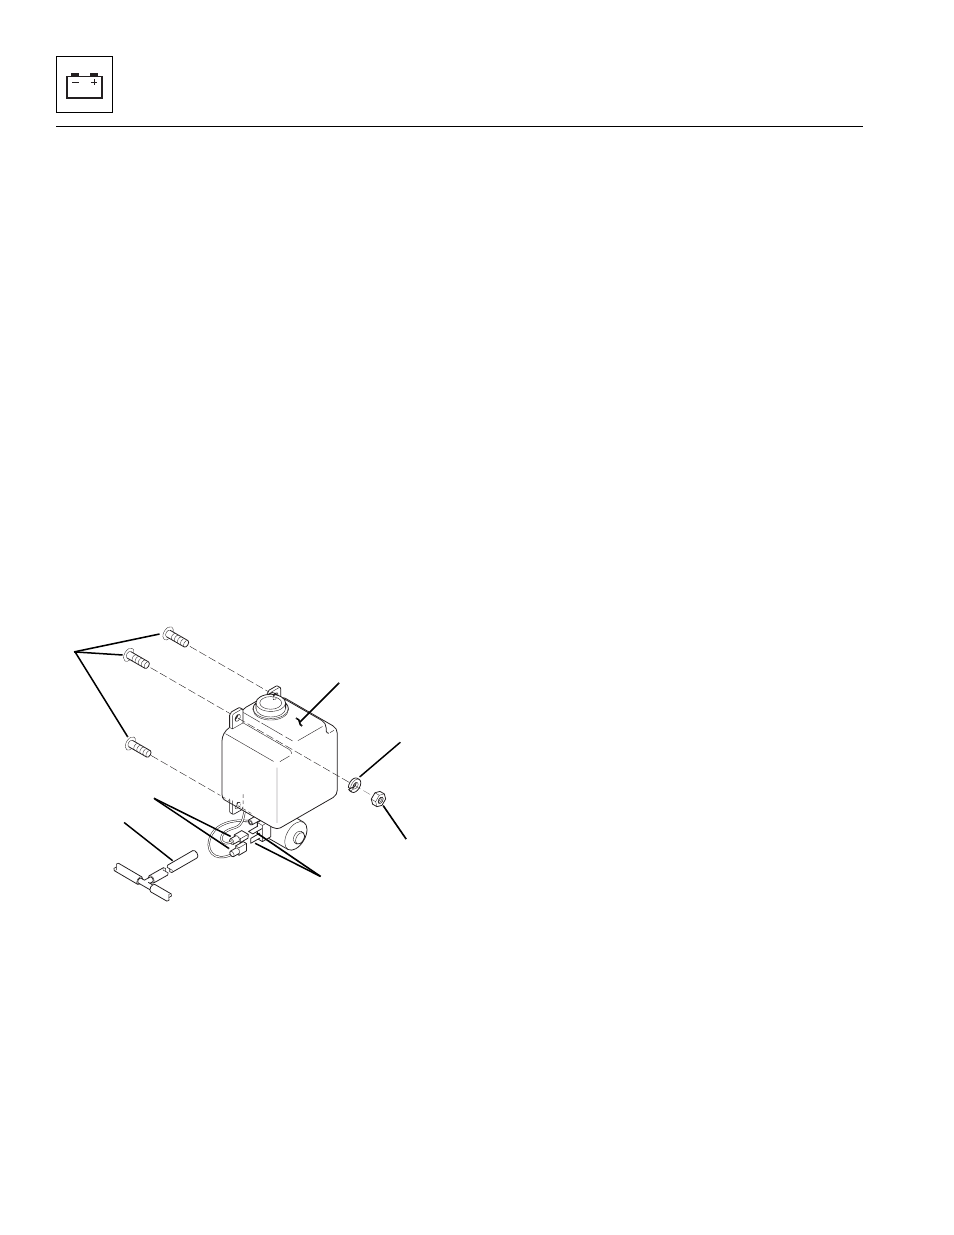
Figure 9-54 Windshield/Roof Washer Reservoir and Pump
The windshield washer motor and reservoir is a unit and
cannot be serviced separately.
a. Removal
1. Disconnect the negative (-) battery cable at the
negative (-) battery terminal.
2. Remove the nuts (Fig. 9 -54, 1) and the lockwashers
(2) from the welded washer mounting studs (3).
3. Pull the washer reservoir (Fig. 9 -54, 4) out and away
from the mounting studs.
4. Rotate the washer reservoir to gain access to wiring
connector. Label and remove the cab harness
connectors (Fig. 9 -54, 5) from the washer reservoir
connectors (6).
5. Remove the windshield washer hose (Fig. 9-54, 7)
from the reservoir.
b. Disassembly
DO NOT disassemble the pump. The pump is not
serviceable. Replace pump if found to be defective.
c. Cleaning and Drying
Without submerging the pump, clean the pump and
reservoir with an approved solvent and dry with a clean,
lint-free cloth.
d. Inspection and Replacement
1. Inspect the electrical terminals for continuity. For
additional information, refer to Section 9.7.14,
“Windshield Washer Circuit and Troubleshooting
(Option).”
e. Installation and Testing
1. Connect the windshield washer tube (Fig. 9-54, 7) to
the reservoir.
2. Connect the cab wiring harness connectors
(Fig. 9-54, 5) to the reservoir connectors (6).
3. Install the reservoir tank (Fig. 9-54, 4) onto the
welded studs (3).
4. Install the lockwashers (Fig. 9-54, 2) and nuts (1)
and secure.
5. Fill the washer fluid reservoir with washer fluid.
6. Connect negative (-) battery cable at the negative
battery terminal.
7. Turn the ignition key switch to the RUN position and
press the washer switch. Verify that fluid is sprayed
on both the windshield and roof glass.
7
MA8350
5
4
2
6
3
1