SkyTrak 6036 Service Manual User Manual
Page 187
7.9
Model 6036 Legacy
Engine: Cummins 4BT3.9
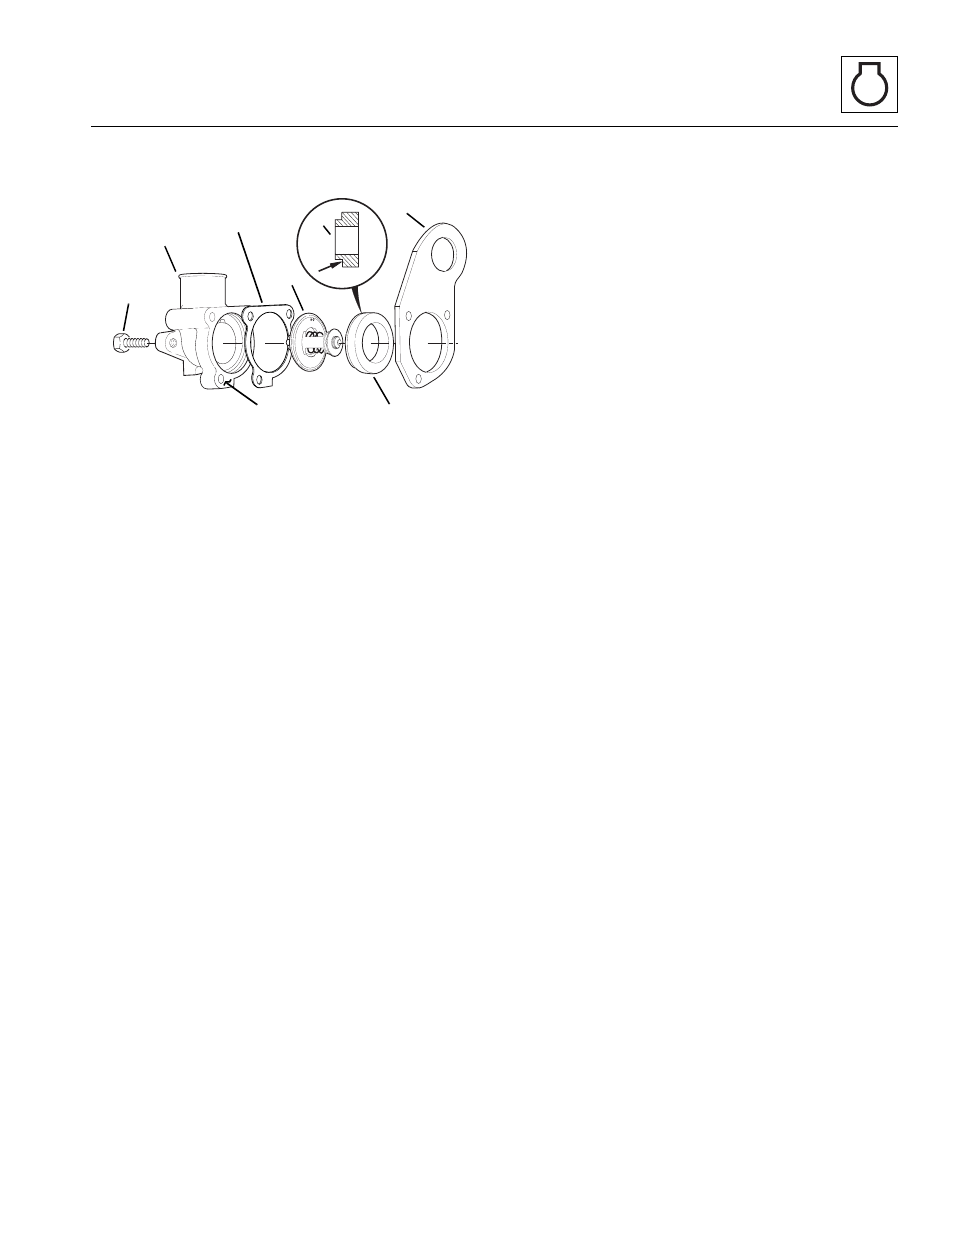
8. Remove the three capscrews (Fig. 7-6, 1) securing
the thermostat housing (2) to the engine.
Figure 7-6 Typical Engine Thermostat Housing
9. Remove the thermostat housing (Fig. 7 -6, 2), old
gasket (3), thermostat (4), thermostat seal (5) and
engine lift bracket (6). Clean all gasket surfaces (7).
DO NOT let any debris into the thermostat opening.
IMPORTANT: ALWAYS use the correct thermostat and
install a new gasket. NEVER operate the engine without
a thermostat, or engine damage will result.
b. Thermostat Installation
Note: Ensure that notched edge (arrow) of thermostat
seal (Fig. 7-6, 5) is facing the thermostat.
1. Install the engine lift bracket (Fig. 7 -6, 6), thermostat
seal (5), thermostat (4) gasket (3) and thermostat
housing (2). Secure with the three capscrews (1)
removed earlier. Torque to 18 lb/ft (24 Nm).
2. Raise the alternator (Fig. 7 -5, 2), and install the
alternator mounting capscrew (3) and alternator
bracket capscrew (1). Torque to 32 lb/ft (43 Nm).
3. Insert a 1/2" drive ratchet or breaker bar into the
automatic belt tensioner housing (Fig. 7-4, 1) and
remove the tension from the automatic belt tensioner
pulley (3). While applying pressure, install the fan
drive belt (2).
4. Connect the negative (-) battery cable (Fig. 7-2, 1).
5. Open the radiator cap (not shown), and fill the
radiator completely with a 50/50 mixture of ethylene
glycol and water. Replace and tighten the radiator
cap. Add coolant to the overflow bottle until the bottle
is 1/4 to 1/2 full. This overfilling will compensate for
any air trapped in the cooling system.
6. Run the engine to operating temperature. Visually
check for leaks with the engine running. Check the
coolant level in the overflow bottle and fill, or drain,
as necessary.
MS1160
3
4
6
5
1
7
2
5