Electrical system 9.11.1 alternator – SkyTrak 6036 Service Manual User Manual
Page 413
9.61
Model 6036 Legacy
Electrical System
9.11.1
Alternator
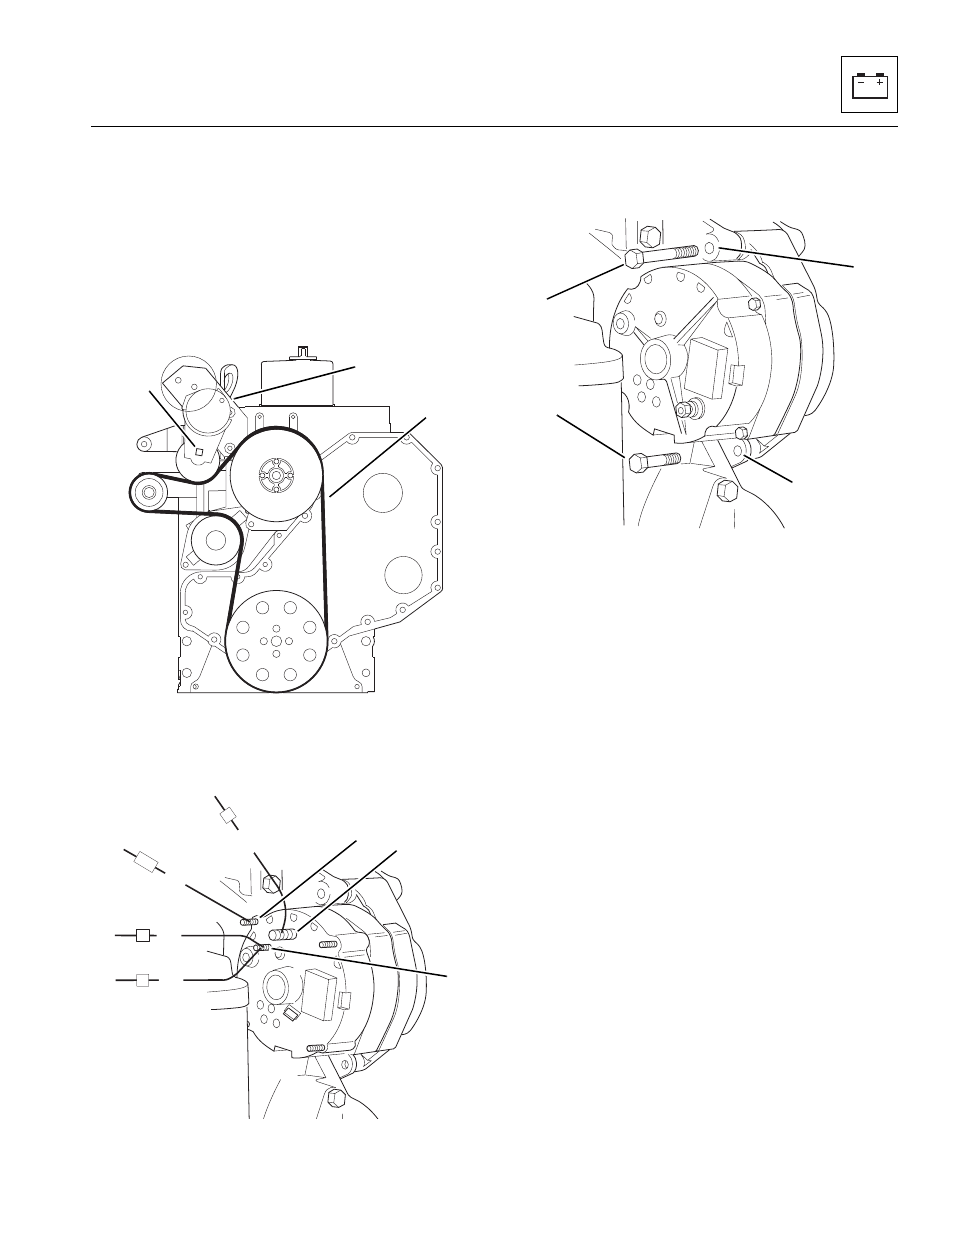
a. Alternator Removal
1. Disconnect the negative (-) battery cable at the
negative (-) battery terminal.
2. Install a 1/2" square drive ratchet into the square
hole (Fig. 9-33, 1) in the tensioner bracket (2). Turn
the ratchet to remove belt tension, and remove the
engine fan belt (3).
Figure 9-33 Alternator Tensioner Bracket
3. Label and disconnect the alternator ground wire
(Fig. 9-34, 1), D+ (2) and B+ (3) wire leads.
Figure 9-34 Alternator Wire Connections
4. Remove the lower mounting capscrew (Fig. 9-35, 1)
securing the alternator to the lower mounting hole
(2) on the engine.
Figure 9-35 Alternator Mounting
5. While supporting the alternator with one hand,
remove the upper (longer) mounting capscrew
(Fig. 9 -35, 3) from the upper alternator mount (4).
Remove the alternator from the vehicle.
b. Alternator Installation
1. Position the alternator and align with the upper
alternator mount (Fig. 9-35, 4) on the engine
bracket. Insert the upper (longer) mounting
capscrew (3) through the alternator mount. Thread
the longer capscrew into the alternator front mount.
DO NOT tighten completely at this time.
2. Align the lower alternator mount hole (Fig. 9-35, 2)
with the lower mounting bracket on the engine, and
insert the lower mounting capscrew (1). Tighten the
lower capscrew (1) and upper capscrew (3) securely.
3. At the rear of the alternator, connect the alternator
ground wire (Fig. 9-34, 1), D+ (2) and B+ (3) wire leads.
4. Place a 1/2" square drive ratchet into the square
hole (Fig. 9-33, 1) on the tensioner bracket (2).
Apply pressure against the tensioner bracket (2) and
route the fan belt (3) onto the alternator and engine
pulleys. Release and check the tensioner pulley to
verify that it is pivoting freely in order to provide the
proper tension on the belt. Check for proper fan belt
deflection. (Refer to Model 6036 Legacy Owners/
Operators Manual.)
5. Connect the negative (-) battery cable to the negative
(-) battery terminal.
1
3
2
MT1840
MA8400
B+
D+
D-
ORG
BLK
YEL
2W
G
6
38
5
RED
1
3
2
MA61902
1
3
2
4