3-10 “setting 10” integration start time and date – KYORITSU 6300 Instruction Manual User Manual
Page 40
MODEL6300
4. 14
MODEL6300
Section 4 Setting
Section
4
‣ ‧•⁈ ‥• •⁈ •• ⁈
‣ ⁂․ ⁉ ‣ ⁂‥ ⁉ ‥⁂ ‥⁉ ‥ ⁂…⁉
‧ ″
‣ •″
․ •″
‧• ″
‣•• ″ ․•• ″ ‧• •″ ‣• ••″
‣ ‧•
‧• ⁈ ‥ ••⁈
••⁈ •
• •⁈
•⁈
‣⁂
‣⁂ ․⁉
․⁉ ‣⁂
‣⁂ ‥⁉
‥⁉ ‥ ⁂‥ ⁉ ‥ ⁂…⁉
…⁉
‧″
‧″
‣ •″
•″
․•
․• ″
‧ •″
•″
‣ ••″
••″ ․ ••″
••″ ‧•
‧• •″
•″ ‣••
‣•• •″
•″
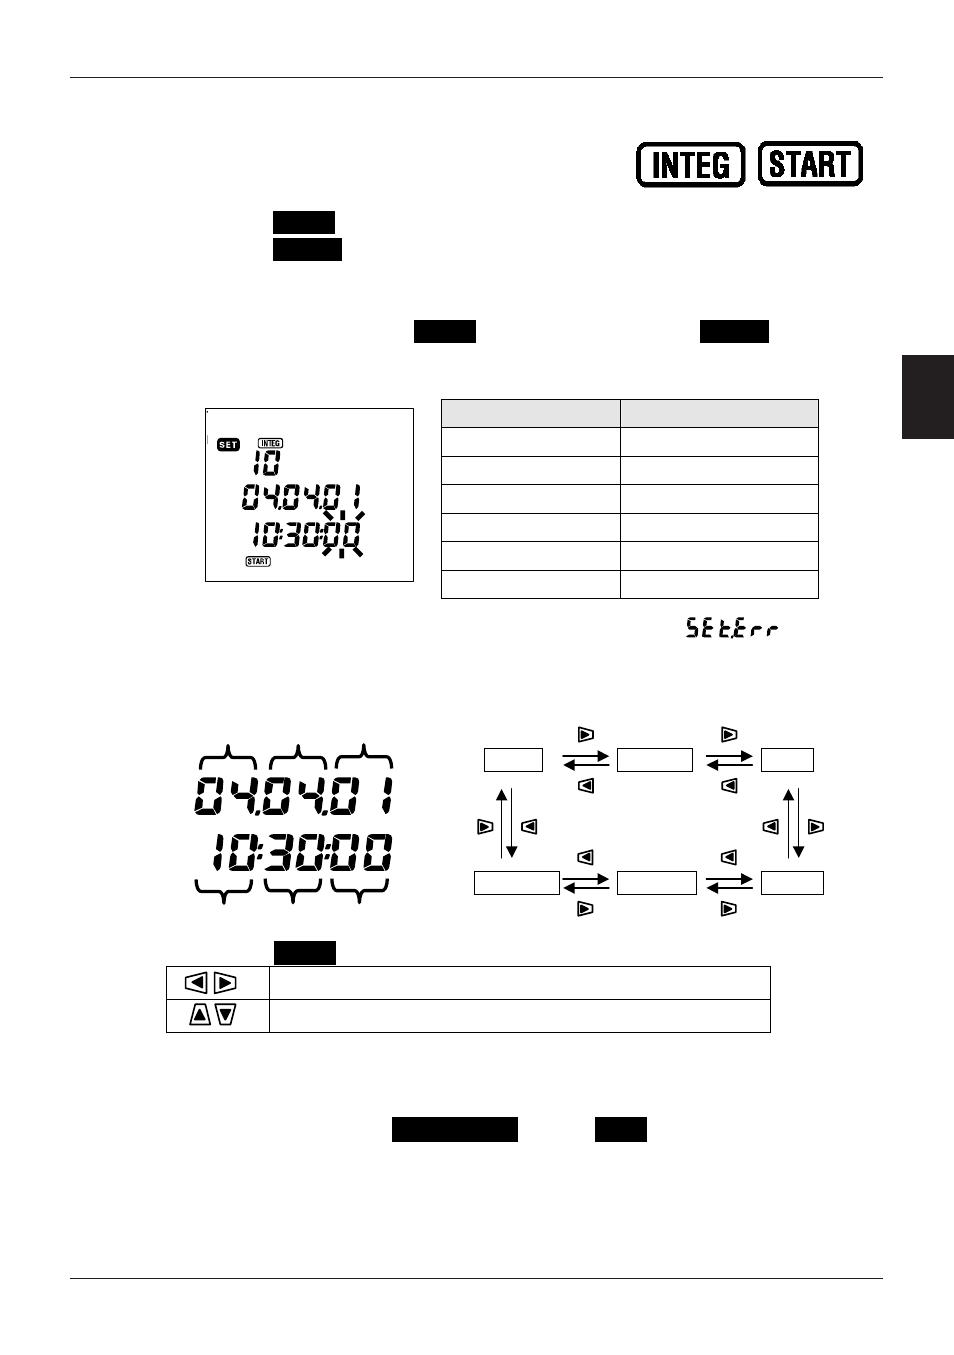
4-3-10 “Setting 10” Integration start time and date
* Using the
Cursor
key whilst in the selection screen, select “Setting 10”.
* Press the
ENTER
key to enter setting change mode.
* The current time and date plus 1 min. are displayed on the LCD, and the
seconds digit will flicker.
* Change the time with the
Cursor
key, and then press the
ENTER
key.
Time parameter
Setting range
second
00 ~ 59
minute
00 ~ 59
hour
00 ~ 23
day
01 ~ 31 (*1)
month
01 ~ 12
year
00 ~ 99 (*2)
(*1) If a date outside this range is selected, a message “ ” is
displayed and it automatically changed to 00.
(*2) Only the last 2 digits are set. (e.g. 2004
ĺ 04)
Function of
Cursor
keys
To select the desired time parameter.
To change the value of selected time parameter.
NOTE
* Although the Start time can be set in the past, integration measurement only
starts upon pressing the
STRAT/STOP
key on
Wh
range.
For more detailed information, please refer to “Section 7:Integration value
measurement” in this manual.
Month
Hour Minute
Second
Year
Day
Year
Month
Hour
Day
Minute
Second