Extron Electronics DVS 510 Series User Guide User Manual
Page 120
DVS 510 Series • Reference Information 114
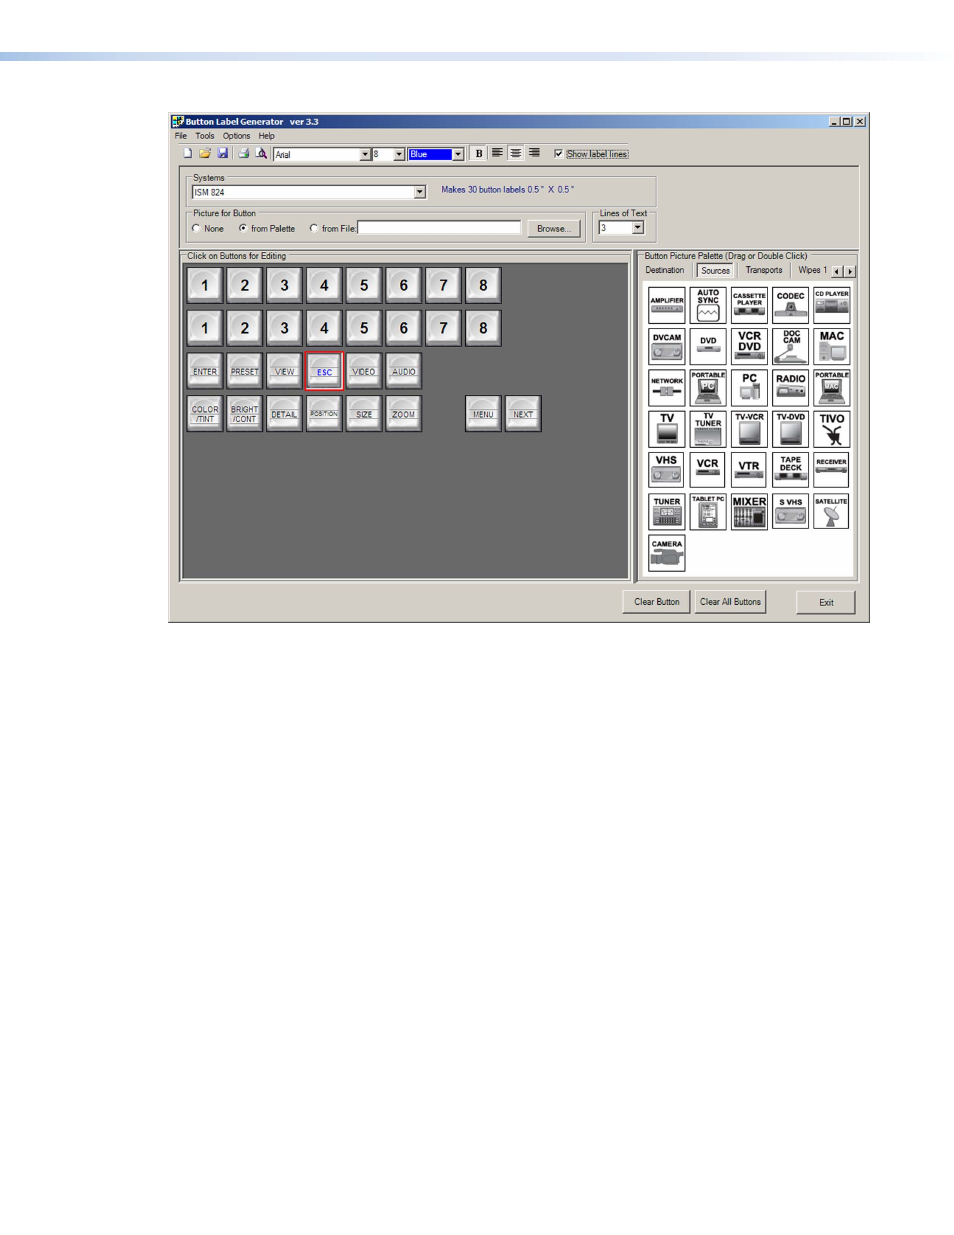
Figure 54.
Button Label Generator Window (Example)
2.
From the
Systems
pull-down menu, select a layout that most resembles the DVS 510
front panel buttons (although you can select any layout from this menu). You can also
select
Customize
Button
Layouts
from the
Tools
menu to open the
Customize
button
layout
window, on which you can create your own layout.
3.
Click on the button representation that you want to edit. A red box surrounds the
selected button.
4.
Edit the selected button by using any of the tools provided on the Button Label
Generator window. Some of the edits you can make are:
•
Enter text and select the font, text size, and text color from the drop-down menus
on the tool bar.
•
Select an icon from the
Button
Picture
Palette
and drag it to the desired
button.
•
Place a bitmap image from your computer on a selected button.
To remove all the text or the image from a selected button, click
Clear
Button
. To
remove the text and images from all the buttons, click
Clear
All
Buttons
.
To access the Button Label Generator help, select
Use
Help
from the
Help
menu.
5.
When finished creating the labels, print out your labels by selecting
from the
File
pull-down menu in the upper-left corner of the
Button
Label
Generator
window.
To save the button labels as an .xml file on your computer, select
Save
As
from the
File
menu and enter a name for the label file.