Communication with the safety system, 4function description, 4 description of the units – Pilz PSENvip RL D P User Manual
Page 50: 4 communication with the safety system
4.4
Description of the units
4
Function Description
Pilz GmbH & Co. KG, Felix-Wankel-Straße 2, 73760 Ostfildern, Germany
Telephone: +49 711 3409-0, Telefax: +49 711 3409-133, E-Mail: [email protected]
4-22
Display the adjustment image during a tool change
See chapter 7, "Commissioning"
Display of error messages and system data
See Chapter 9, "Diagnostics and Troubleshooting"
Funktion_Display_Eingabefeld_Biegewinkelmessung
Set the parameters for and display the bending angle measurement
See chapter 7, "Commissioning", chapter 8, "Operation"
4.4.4
Communication with the safety system
Communication with the safety system
4-
Funktion_Kommunikation_Allg
Communication between the PSENvip and safety system is required if
you use tools that cannot be safeguarded in compliance with the stand-
ards (see section entitled "Tool shapes", under "Safety"). This is the
case with tool classes 2 and 3. User programs that do not support com-
munication with the PSENvip can be used if you only intend to safeguard
tools of tool class 1. This is the case with older versions of the PSENvip,
for example.
Communication between the PSENvip and the PLC safety system is
conducted via digital inputs and outputs. Some inputs and outputs on
the PSENvip have another function compared to normal mode.
Communication only occurs in the system status TEST. This status is
adopted
After power-up.
After a tool change.
After a 0/1 pulse edge at the input System-Init.
Periodically every 2 minutes.
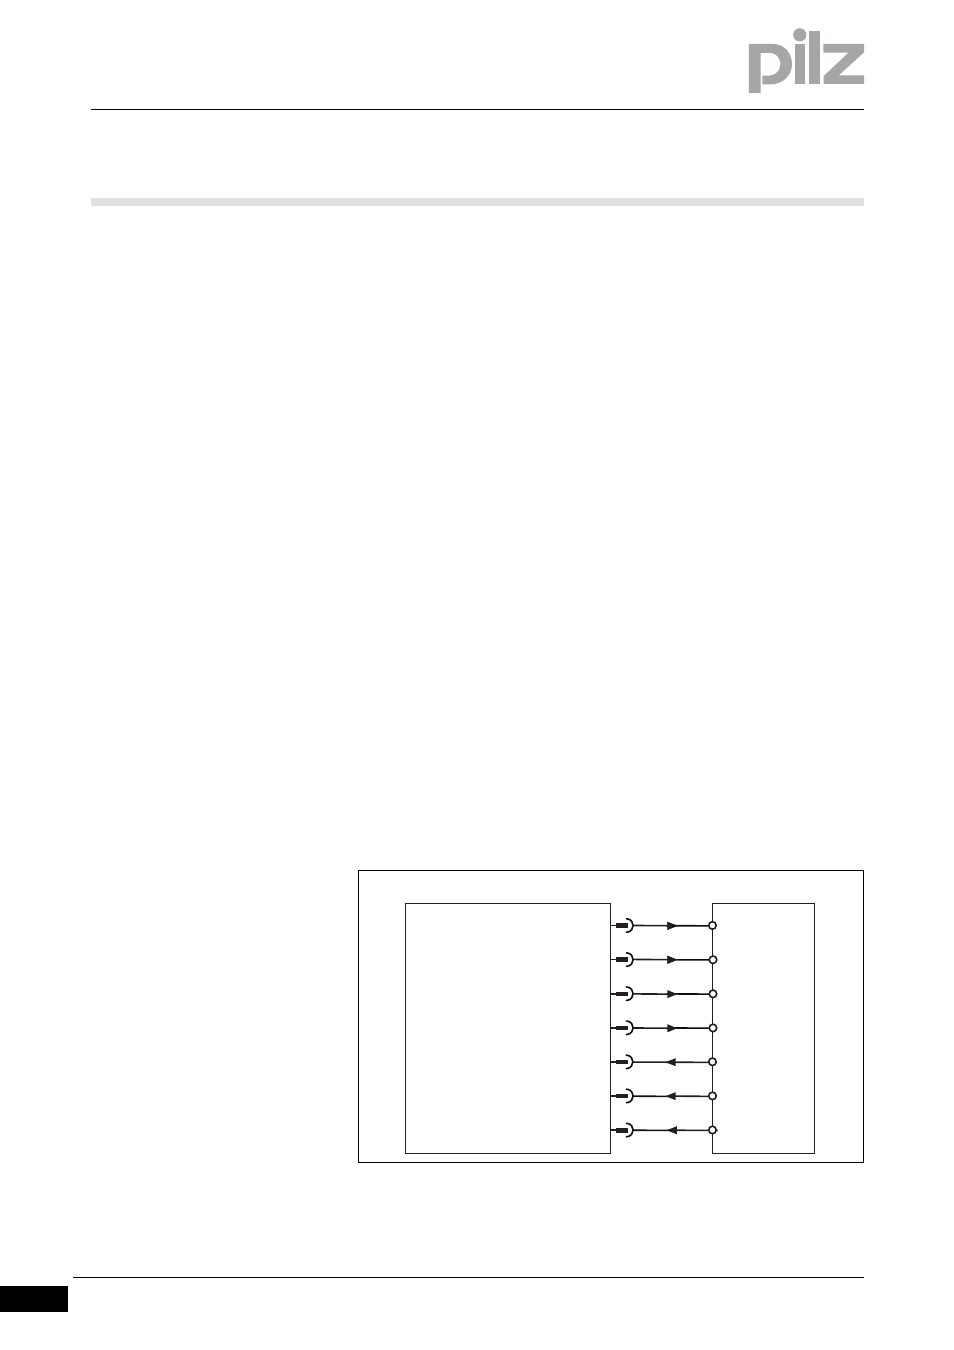
Funktion_Kommunikation_Basis
Fig. 4-11:
Digital inputs and outputs for communication
X1, 6
PLC Ready
X2, 6
X1, 1
X2, 1
X2, 2
PSENvip
Tool class PLC -> PSENvip Bit 1
Acknowledge PSENvip -> PLC
Tool class PSENvip -> PLC Bit 1
X1, 3
X1, 4
Activate
Tool class PSENvip -> PLC Bit 2
Tool class PLC -> PSENvip Bit 2
PLC
I1
I4
I3
I2
O3
O2
O1