Entering scheduler events – Bio-Rad Firmware & Software Updates User Manual
Page 38
CFX96 Touch, CFX96 Touch Deep Well, CFX Connect, and CFX384 Touch Systems Instruction Manual
25
Entering Scheduler Events
To schedule an event:
1. Double-click in the appropriate cell in the calendar or right-click and choose New Event.
2. Select the instrument and user from the drop-down list (Figure 18).
3. Adjust the start and end times. Once an event appears in the calendar view, it can be
moved to another time period by clicking and dragging the entry to a new position in the
calendar.
4. Assign a color to this event (optional).
5. To include an email or a pop-up reminder that will appear at a specified time prior to the
start of an event, check the Reminder checkbox and choose an advance notification
time period for the drop-down list.
WARNING! Scheduler must be running for reminders to be activated. Minimizing
the Scheduler window will enable pop-up and email reminders to occur at the
scheduled time. Selecting Close will quit the Scheduler.
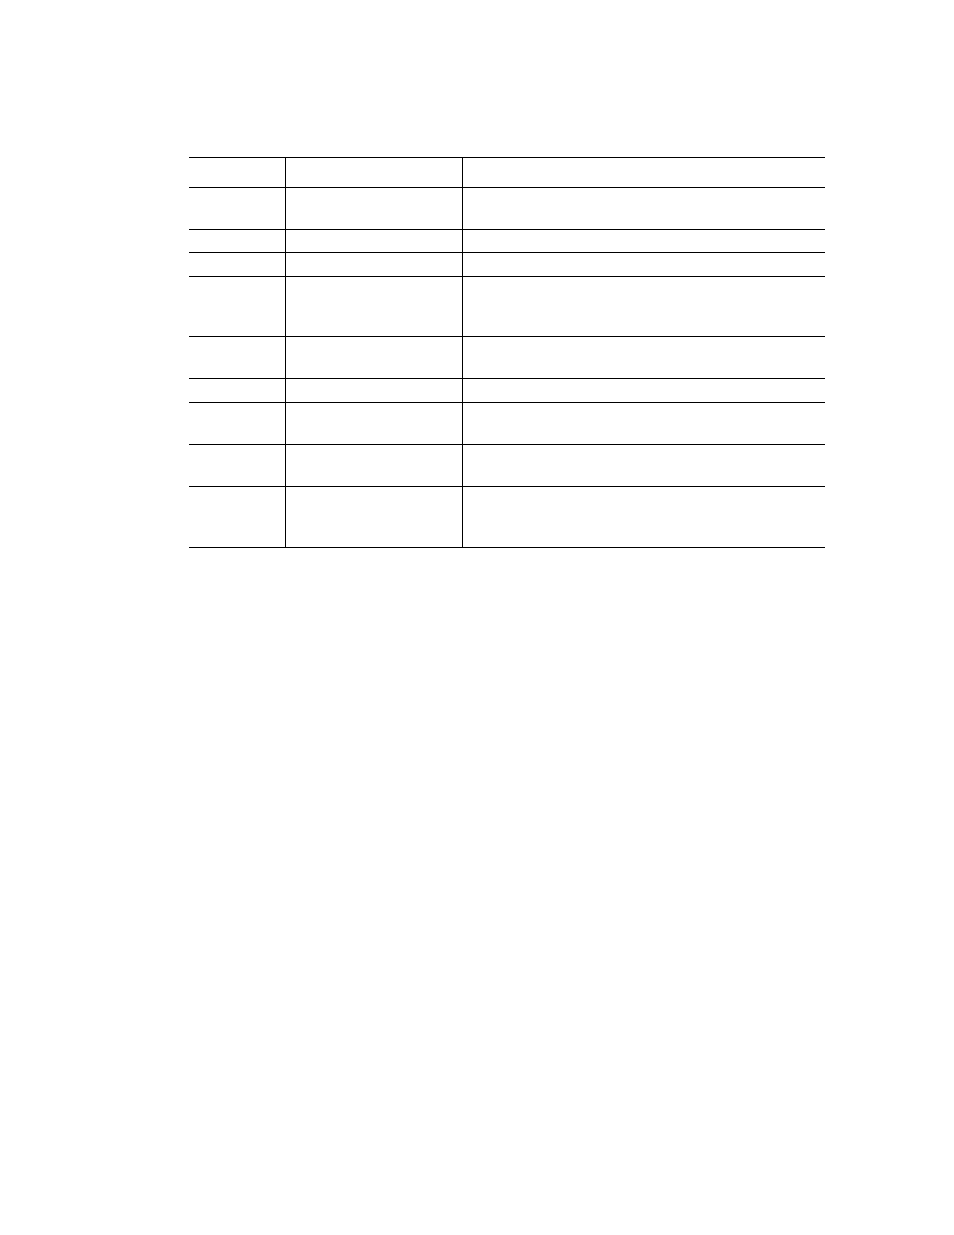
Table 10. Menu bar items in the Scheduler.
Menu Item
Command
Function
File
Print Preview
Open the print preview window to adjust print
settings
Print the calendar as it appears on the screen
Exit
Exit the Scheduler
View
Instrument Details
Open the instrument details window to view, edit,
add, or delete the name, model, or base or optical
head serial numbers
User Details
Open the User Details window to view, edit, add, or
delete Scheduler users
Log File
View the Scheduler activity log
Tools
Import from CFX
Manager
Imports instruments, users, or SMTP email settings
from CFX Manager software
Cleanup Events
Delete events from the calendar older than the
period of time specified in the options window
Options
Open a window to specify default calendar
settings, create a desktop icon, choose to run the
Scheduler at startup, or define cleanup parameters